Category Archives: Fermentation

An Important Update for The Ultimate Cheese Press

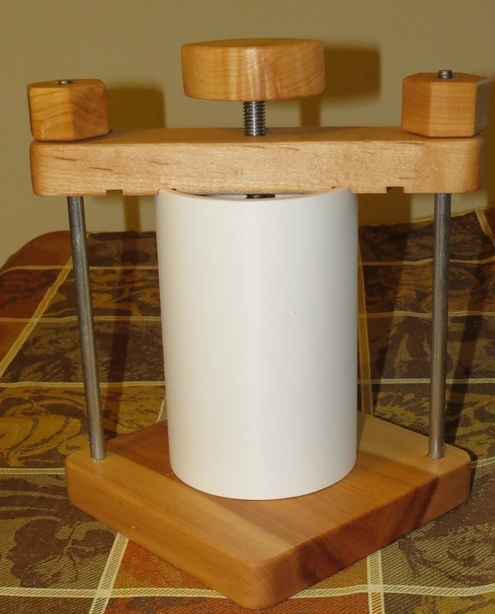
The Ultimate Cheese Press is our pride and joy. Designed by Jerri Bedell, founder of Homesteader’s Supply and is manufactured by another American company. We’re happy to tell you that we’ve made a change in how our presses are oiled.

We’ve been testing organic non-GMO cold pressed coconut oil and we are very happy with the results. Coconut oil is thicker, soaks into the wood well, and stands up to the acidic nature of whey in cheese making. Presses being shipped now have been treated with coconut oil but If you’d like to order a raw press (not oiled) please request it when you order.

The Ultimate Cheese Press

The Ultimate Cheese Press

Next time you need to treat our press you should follow these steps.

  1. Wash the wood with warm, soapy water. Wash all indentations and where bolts meet wood well.
  2. Air dry for a minimum of four hours, overnight if possible. Be sure the wood is completely dry.
  3. Melt 1/4 cup of organic non-GMO cold pressed coconut oil just until it melts.
  4. Wash your hands to avoid transferring anything to the coconut oil.
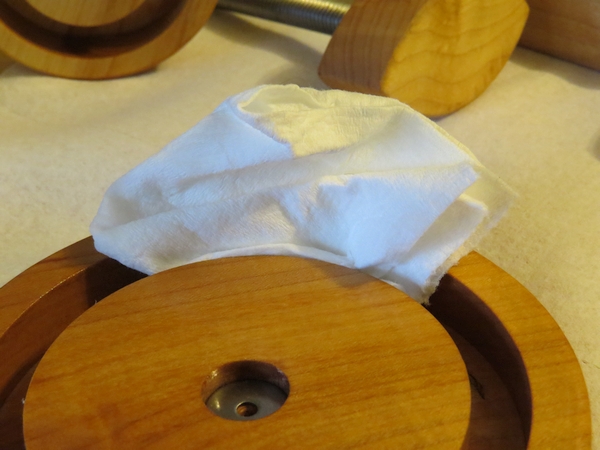
  5. Using a lint-free cloth, apply a heavy coat of coconut oil. Place oiled pieces on lint-free cloth or paper towel while the wood absorbs the oil and the oil solidifies. Fold your cloth into small sections that can be pressed into the grooves.
  6. Let the pieces sit for an hour or two before wiping clean with a lint-free cloth.
  7. Inspect all pieces closely. If you’ve missed a spot or the coating of oil is uneven, repeat steps three through five.
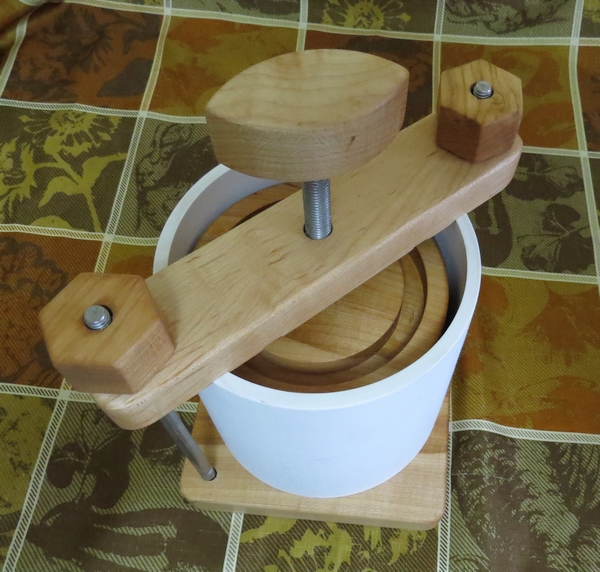
Oiling The Ultimate Cheese Press

Oiling The Ultimate Cheese Press

You should hand wash your press with warm (not hot), lightly soapy water after use. Never soak the wood. Be sure to let the pieces dry thoroughly before reassembling the press to store.

The Ultimate Cheese Press

The Ultimate Cheese Press

Sourdough bread

A quick and easy sourdough bread recipe

Sourdough bread isn’t supposed to be quick. The starter should ferment until its full flavor develops. The bread should rise slowly in a cool room to allow more flavor to develop. Those air pockets created by the yeast, the ones that hold globs of your butter or olive oil or jam, need time to grow. It’s all very lovely and tasty when you have time to wait, but that’s not how my day is going.

It was 2 pm before I realized we’re out of bread. Normally I mix up my starter, the water, some organic whole wheat flour and unbleached bread flour around 4 pm. I mix and knead by hand, feeling the dough as it changes, knowing exactly when to stop kneading. Then it sits in the bread pan I’ll bake it in, on the counter by the cool outer wall of the kitchen to rise overnight. First thing next morning, around 4:30, I pop the bread into a 400* oven, but that’s not how my day is going.
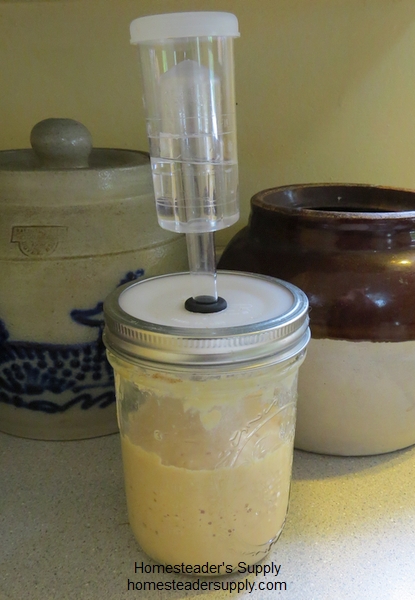
Pickle-Pro sourdough starter

Pickle-Pro sourdough starter

Today I’m making quick and simple sourdough bread so that I can have it with dinner. My starter is kept in a pint canning jar with a Pickle-Pro lid. It’s been the best starter I’ve used. The airlock has kept alcohol from building up on the surface of the starter if I don’t use it fairly quickly.

Sourdough Bread Recipe

Oven: 400*  Bake for 30-40 minutes

1 cup sourdough starter
1 cup warm water, around 100*
1 1/2 cups organic whole wheat flour
Approximately 3 1/2 cups bread or all-purpose flour
2 tsp yeast

I used the mixer today so I could let the mixer do the kneading and unload the dish washer. Use the kneading hook. Add sourdough starter, warm water and yeast to bowl. Turn mixer on and add the whole wheat flour in 1/2 cup increments. Add bread or all-purpose flour in one half cup increments. For the last cup of flour, allow the mixer to knead for a minute. Turn off the mixer and touch the dough. It should be moist but not sticky. The dough should pull away from the sides and be wrapped around the hook. If the dough is sticky add 1/4 cup of flour, knead and check. Experienced bread makers will “just add it” and know when they’ve reached the right look and texture.

Oil two bread pans with olive oil or butter if necessary. Today I need bread for sandwiches so I’m not looking for a loaf with a big rounded top. I like a wide loaf with a flat top so that a slice holds a nice amount of sandwich filling with one slice of bread. Remove the dough from the mixer and set aside to rise until it has doubled in size. Gently slice the dough in two and shape into two loaves. I don’t knead, just separate and shape. Allow to rise the second time. It’s ready for the oven when you gently press on the firm dough and it recovers slowly.

Make a slice down the center of the loaf (two slices if you’re making a round loaf) and spritz it with water. The slice and the water allow the dough to rise easily, forming nice pockets. If the crust starts to dry out, spritz it again.

It’s conveniently chilly and damp today so the wood stove is going this afternoon. I’m breaking my slow rise rule and put my bread on the clothes rack in the warm living room to rise quickly.
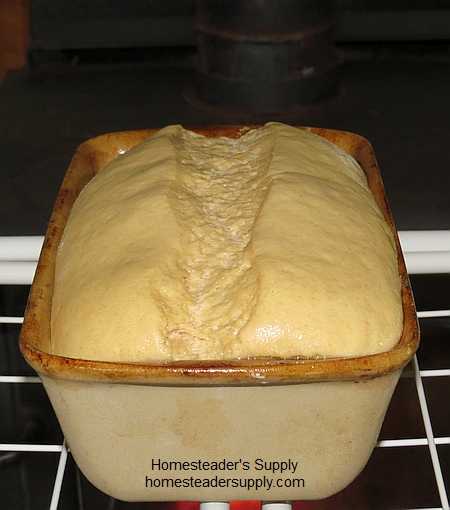
Sourdough rising

Sourdough rising. This is almost high enough for the size loaf I’m after.
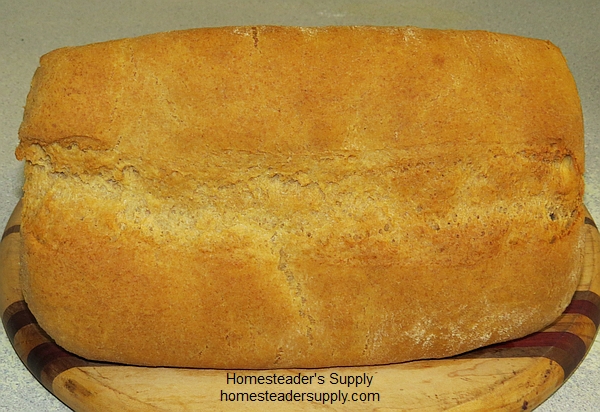
Sourdough bread bakedWhile the dough is rising I mixed up another batch of starter. I use the same jar or scrape the last tablespoon or two of starter from it and add it to a new jar. The only time I don’t have starter in the jar is on the original batch. Notice how much lighter in color this new batch is compared to the one above. As it ages and develops it becomes darker. This jar sits in a cool spot in the kitchen. I don’t tend to it daily. Tomorrow morning it will be at the top of jar. I’ll stir it down if necessary but otherwise it’s on its own until I use it in a day or two.
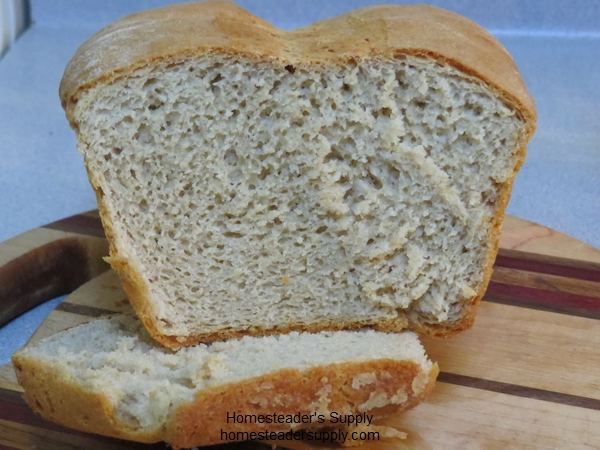
Sourdough bread

New Book on Fermenting Foods

Homesteader’s Supply has often given a “shout out” to Wardeh Harmon because we believe so strongly in what she does! The education she provides folks on the benefits of natural raw foods as well as the heath benefits of fermentation! And to continue our tradition… It’s our pleasure to carry and feature her newest book…

Fermenting Foods!
by Wardeh Harmon
2012  304 pages

Wardeh’s newest book about Fermenting Foods on the market today! Just published!

This book offers advice on the process of fermenting foods, providing information on how it works and the equipment required, and includes step-by-step instructions for making pickles, salsa, condiments, hummus, yogurt, and cheese.

This is the first series book to discuss the wonderful health benefits of live-culture foods and the techniques for preparing them.

Includes over 100 delicious recipes for all types of fermentation.

Check out her online class on fermenting and tell her jerri at Homesteaders Supply sent you!
http://gnowfglins.com/ecourse/classes/ferment

Biography:

Wardeh (‘Wardee’) Harmon lives in Southwest Oregon with her husband, Jeff, and their three children, Haniya, Naomi and Mikah. They raise a dairy cow, chickens and goats, and garden co-operatively with friends.

Besides homeschooling her children, making cheese, old-fashioned pickles and lots of other fermented foods, Wardeh teaches online classes in the fundamentals of traditional cooking, sourdough, cultured dairy, cheesemaking and lacto-fermentation at GNOWFGLINS eCourse (www.gnowfglins.com/ecourse). She blogs at GNOWFGLINS (www.gnowfglins.com) sharing recipes, videos and anecdotes of her family’s life.

GNOWFGLINS is an acronym to show how Wardeh and her family enjoy “God’s Natural, Organic, Whole Foods, Grown Locally, In Season.” 

More on the Pickle Pro

The exclusive Pickle-Pro Fermenting Lid that fits all wide mouth canning jars!

Now reap the benefits of preserving your food the natural way with our Pickle-Pro set up! Yes you can make Pickles and Sauerkraut, and that is just the start. Lacto-Ferment all your veggies and fruits into delicious foods which are better for your health. According to Sally Fallon of the Weston A Price Foundation, “The proliferation of lactobacilli in fermented vegetables enhances their digestibility and increases vitamin levels. These beneficial organisms produce numerous helpful enzymes as well as antibiotic and anti-carcinogenic substances. Their main by-product, lactic acid, not only keeps vegetables and fruits in a state of perfect preservation but also promotes the growth of healthy flora throughout the intestine.”

Our set up for Pickle-Pro, allows you to provide your own jars! They will fit any wide mouth quart or wide mouth half-gallon canning jars! We provide the lid with airlock and a rubber seal, you provide the glass jars and the ring to secure it to the jar. No muss no fuss… no broken jars in transit. And best of all, they will fit on all your wide-mouth canning jars! Now when your bounty is fermented, all you do is remove the Pickle-Pro set up, and seal your jar with a regular metal canning lid.

We’ve tried to make this as easy as possible. And to get you started we’ve included our recipe for Garlic Dill Pickles!

Remember, you can lacto-ferment with a salt brine, or whey, or with cheese cultures like our Abiasa Meso III.

And to learn more about lacto – fermentation, check out this great online class by Wardeh Harmen, learn from her by watching videos and receiving her instructions. We even provide the kit for her class, which includes our amazing Pickle-Pro Lids!

here is the link for Wardeh’s site… http://gnowfglins.com/ecourse/classes/ferment

Here is a tasty and easy fruit recipe you can eat by itself, use on cereal, or with yogurt:

Slice apples or pears and place in quart jar, top with Blackberries, blueberries or strawberries (even can be frozen fruit) Pour whey over the fruit, leaving 1 inch air space to the top. Seal jar with our Pickle-Pro Lid. Leave on counter for 3 days.

The New Pickle Pro Fermenting Lids

Homesteader’s Supply designed the “Pickle Pro” – a fermenting jar with an airlock to allow gases out without letting air in. These great containers are still available on the Homesteader’s Supply site.
We did have some customers who understood the need for a glass container to ferment in, but didn’t want to pay the shipping to get a heavy glass jar across the country.
The solution sort of snuck up on us…. create a fermenting seal out of a food grade wide mouth canning jar lid and drill out the hole for the grommet and add the airlock. This new Pickle Pro lid fits any wide mouth canning jar and is ideal for those who don’t necessarily need the gallon jar size. Wardeh, the fermenting wizard with GNOWFGLINS (http://gnowfglins.com/) tested the new air lock system and gave it a thumbs up which made us very happy!!!

Our first run of drilling the lids made us realize that the jig needs to be squared up a bit, some of the grommets are a bit off center. This doesn’t change the quality of the product… just gives it a unique twist!!! We did notice that the plastic canning lids that we use for the new fermenting jars have a flaw from the pouring process… we’re working with the manufacturer on a solution but the seal is true even with the small chink in the plastic… best we can figure out, they are from the molding of the lids out of hot plastic.

If you have ordered one and have tried it, please let us know how you like it!!!! For those with the original Pickle Pro… let us know how you’re enjoying that product too!!

Thanks and wishing all of you a Happy New Year!!!!