Category Archives: Homesteading

Summer Money Saving Tips

Summer Money Saving Tips

I’ve been thinking about my plans for the homestead a lot lately. It’s been more than a year since we moved to Tennessee to homestead and operate Homesteader’s Supply. With such a long list of things to do, money has to be part of the plan. What can we do on the homestead without spending a ton of money this summer? Plenty! We shared Money Saving Tips for Homesteaders last winter, and a second part, More Money Saving Tips for Homesteaders. And now, more ideas! Summer money saving tips.

Summer Money Saving Tips

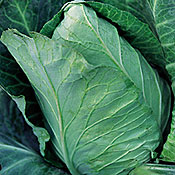
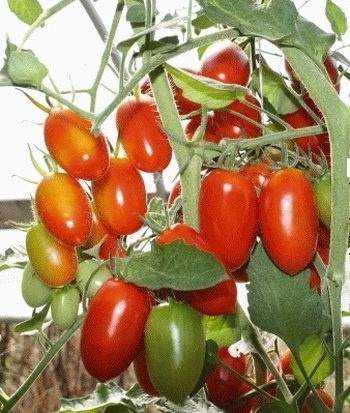
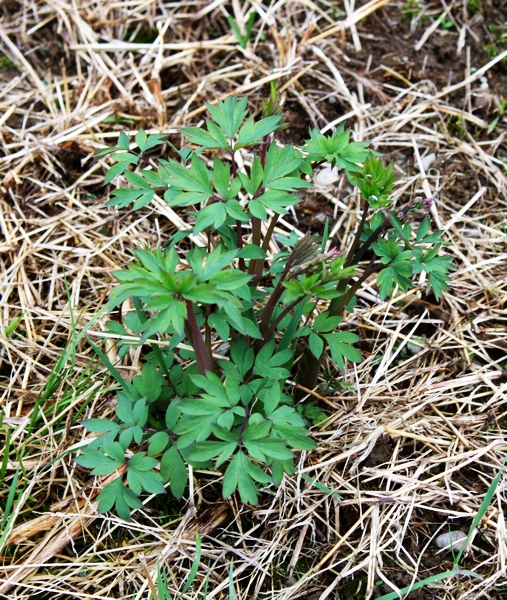
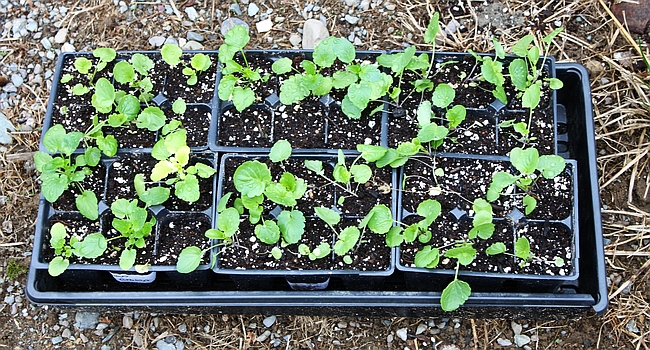
  1. Eat what you have and avoid the grocery store. Seasonal eating is your chance to gorge on what’s ripe now. I’m a little tired of rhubarb but now that the strawberries are starting to ripen and show up at farmers market, I can add a little variety. The garden is doing well. We’ll probably all be tired of eating the same things often before the next fruit or vegetable is ripe, but we can change it up. Try new recipes. Put up what you can for winter.
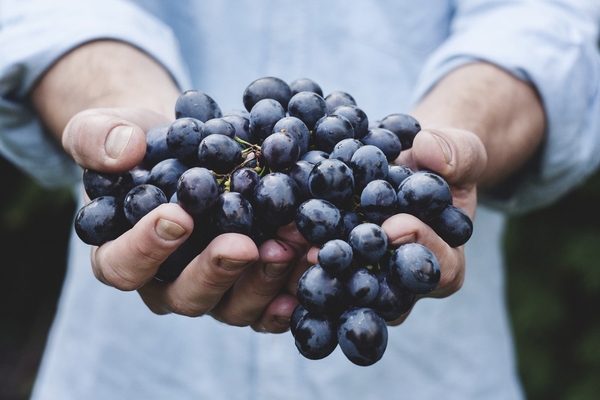
  2. Buy seconds from local farmers. You might save a few more dollars if you can pick the fruit or vegetable, or at least pick it up at the farm. Summer money saving tips.
  3. Build inexpensively, but build it well. When you put your building skills to use you should build sturdy and attractive things. In the long run it will last and you’ll be happy with your work.
  4. Co-own. If you need a piece of expensive equipment too often to rent but not often enough to own yourself, consider co-owning. I tried to rent a rototiller three times before I actually got one. I don’t need a rototiller often but when I do, it’s time sensitive. My friend and next door neighbor chipped in and together we bought a tiller. I thought about doing this with a snow blower now that I live in an area with some snow but that’s a little too time dependent.
  5. Wild harvesting is always going to be one of my most favorite money savers. I can pick gallons of berries each summer on a wildlife refuge for the price of a gallon of gas to get there and back. They’re $4 a pint in the grocery store. Summer money saving tips.
    summer money saving
  6. My current favorite money saving tip for homesteaders covers entertaining. We are having a blast. A group of friends take turns hosting potluck. The host supplies the drinks. I didn’t want to buy plastic silverware and tablecloths and paper plats each time it was my turn to host. We sometimes have 30 people at a meal. That’s a lot of settings to buy and throw away. Here’s what I’ve done: Summer money saving tips.
    • Buy inexpensive silverware and tablecloths. Check yard sales!
    • Buy inexpensive plates, serving bowls and glasses. They don’t have to match.
    • Until you’ve built up your inexpensive but nice tableware, BYOS. Bring Your Own Setting.
    • BYOS, Part II. Bring Your Own Seat.
  7. Progressive meals are a lot of fun. Start with appetizers and move from homestead to homestead through the courses. The food doesn’t have to be fancy, just good.
  8. Dessert night. After a long day of chores it’s really nice to get together with friends over dessert. Who needs dinner when you’ve got homemade dessert? Tarts with fresh fruit, cheesecake with fresh cream cheese, cakes, pies, ice cream…

Enjoy the summer! Summer money saving tips.

Grocery Shopping is Expensive!

Grocery shopping is expensive!

After leaving the grocery store yesterday morning, I sat in the car, a little disturbed and depressed. The expense of grocery shopping these days is astronomical. I came home determined to grow more of my own food. I’ll add to my container gardening and I’m thinking about what I can grow indoors in winter. Ugh! Grocery shopping is expensive!

grocery shopping is expensive

Jersey cabbage

It’s May and there’s fresh food available but not enough to put fresh vegetables on the table daily so I’m still shopping. It’s time to find the local farmers market in my new state.

  • Cabbage: $1.29 a pound. I bought it because I’ve been craving coleslaw but it kind of hurt a little. grocery shopping is expensive
  • Carrots:  They are dry and many of them were cracked, and they’re .99 cents a pound. I moved on to the organic section and found nice carrots for $1.49 a pound. I’m sure this is less expensive per pound. They don’t have to be peeled because they are fresher, and because they aren’t overgrown and cracked. They’ll be great in the coleslaw.
  • Broccoli: Soft and starting to flower. $1.99 a pound. The stems’ ends were dried out.
  • Peas: $4 a pound. It takes about a pound of freshly picked peas to get one cup of peas after shelling.  Who can afford to pay $4 a cup for peas? Oh my gosh, grocery shopping is expensive.
  • Spinach. I looked at baby spinach with the thought of adding it to my salads and quiche (the hens are laying full force so I’m eating a lot of quiche). It was packaged in a plastic container. $9.09 per pound. I can buy a lot of spinach seeds for $9.00.

    cherry tomato, grocery shopping is expensive

    Juliet tomato

  • Tomatoes: They’re not ripe here yet, and they weren’t in the grocery store either. They were so immature they were hard and what I consider inedible.  Shipped in from Mexico and $1.79 a pound. grocery shopping is expensive
  • Yellow summer squash.  It’s a wonder I didn’t mutter out loud.  $1.79 a pound.

Fresh from the garden this week, I have radishes, Swiss chard, baby beets and beet greens, lettuce, arugula, boc choi, the last of the tatsoi, and the green garlic. And eggs! Lots of eggs for protein. Fresh food is worth the effort, especially after my reminder that grocery shopping is expensive.

Sprucing up the Yard

Sprucing up the yard

I’m still at it! I’m still sprucing up the yard here and there as I get a little time. This weekend I spent time on the perennial gardens. With the garden rototilled and settling, I turned my attention to the perennial gardens. By the time I finished one of them became an expanded perennial garden with room for annual vegetables and flowers.

There’s so much work in setting up a homestead and making it our own that adding beauty can be lost in the shuffle. As good as it felt to have the garden prepared and ready to plant, working in the flower gardens was rewarding. It’s a small start to all that needs to be done to my new plots (remember that I’ve been here just over a year) but looking out the window this morning and seeing flowers that weren’t there 24 hours ago made me smile. Sprucing up the yard has had a fast return in smiles.

sprucing up the homestead, johnny jump ups

Johnny Jump-Ups

I moved Johnny Jump Ups, a self-seeding annual, to the expanded garden, right by the back porch. It was overcast yesterday when I uprooted the clump and divided them. Soon after I put down the shovel for the day, the sky opened up and poured on the newly transplanted flowers. It’s overcast and drizzling today and for the next two days, perfect weather for transplants to settle in.  Before the end of the season I’ll leave a few flowers instead of dead-heading and let them go to seed. Over the years the colors will change as the number of generations grow.

This peony survived transplanting and winter and established its roots well. It will take a few years to grow before it flowers. I divided one plant into three. When they fill in and blossom together they’re be beautiful. When I’m sprucing up the yard next year I’ll probably need to add support for the peonies. Or at least I hope they grow that much in a year.

sprucing up the homestead

Peony

This bleeding heart has been here for a very long time. It might have been one of the original plants in the perennial garden. It was overgrown, its root a massive, woody, hollow mess. There’s only one thing to do when it’s that bad – break it up with a spade, dig holes, amend the soil and split it up. I might have been a little too harsh. This and one tiny other shoot have come back. This is the original plant. So be it. It didn’t bloom last year and it might not this year but next  year, it will be beautiful again. I’ll weed this bed when the rain stops, and I’ll be looking for other plants that might still pop up.

sprucing up the homestead, bleeding heart

Bleeding heart

It was nice to find the chives growing. I use a lot of them in cooking, dips and on baked potatoes. I divided the clump, spread them out and will pass one section on to a friend when she visits later this week. I bought an oregano plant at a garden show but I’m not sure it’s going to survive. It’s out there and now I want to see what happens.

sprucing up the homestead

Pansies, waiting to be planted

I ran out of oomph by the end of the afternoon. These pansies are waiting for me. They’ll be just fine right there for a few days as long as I remember to take them out of the tray.

What’s growing in your perennial gardens? Are you adding annuals to fill space or because you like them?

Foods You Don’t Have to Refrigerate

Foods You Don’t Have to Refrigerate

It’s getting warm, sometimes downright hot. Gardens are starting to produce at least spinach and other cool weather greens that need to be stored in the refrigerator. We have pitchers of iced tea and lemonade taking up lots of room. According to the Food & Drug Administration, refrigerators should be kept at 40°. Not all foods must be kept that cold and for some, it’s detrimental. Here’s a list of foods you don’t have to refrigerate. It might help make room for the foods that do need to be that cold.

Bread is one of those foods you don’t have to refrigerate anymore. It was common back in the days of making ten or 12 loaves at a time. As it turns out, bread won’t mold as quickly in the refrigerator but it does go stale faster.

foods you don't have to refrigerate

Tomatoes, peppers and melons should be left on the counter, out of the sun. Refrigeration causes a breakdown in sugars and acids and changes the texture. Sweeter melons are grown with less water (did you know that?) and kept on the counter.

Herbs store well in fresh water on the counter. Some of them, such a mint, will develop roots if left too long, and the taste will water down. Cut only what you’ll use within a few days for best flavor or dehydrate extra for use later.

Apples and Grapes like to be cool but not cold. Polish them up, put them in a pretty bowl and use them as an edible display. We eat a lot of each when they’re easy to see and reach all the time. My exception to cold grapes in freezing them. I like to freeze them in the summer to use in my lemonade.

foods you don't have to refrigerate

Honey is a natural anti-bacterial (when used topically on wounds). It won’t spoil, and it will take longer to crystallize when kept in a dark cupboard. Molasses is another sweetener that doesn’t have to be refrigerated. There are mixed thoughts on Maple Syrup. I didn’t refrigerate an open quart of real maple syrup (not pancake syrup) and it molded. If you need room you can take the maple syrup out but put it back as soon as there’s room.

And the list of foods you don’t have to refrigerate grows longer! Vinegar based, salty and fermented foods don’t need refrigeration. I like cold pickles but they’re the first thing to come out of the fridge when I need more space.

Eggs are the controversial item on the list of foods you don’t have to refrigerate. Did you know that in many countries eggs are never refrigerated? It’s true. In Europe, farmers vaccinate their laying hens for salmonella bacteria. They don’t wash eggs the way we do here in the United States. we concentrate on washing the shells to keep salmonella out of the egg. Washing removes the bloom that covers the egg as a means of keeping salmonella out. The US has 1.2 million cases of salmonella a year. England and Wales recorded less than 600 casaes in 2009.

Do you wash your un-vaccinated chickens’ eggs? What do you leave out of the fridge? Inquiring minds want to know!

Composting yard waste will feed your garden’s soil

Composting Yard Waste

I don’t know how there got to be so many leaves on the lawn this spring. I raked in the fall, added the leaves to the garden and rototilled them into the soil to give them the winter to break down. I’m sure the trees were bare when I crossed this task off the to do list. I must have become distracted by bird and deer hunting seasons and stopped paying attention to the lawn. Now I’m composting yard waste I thought I’d taken care of six months ago.

composting yard waste

I swear I raked leaves last fall!

Composting yard waste in the spring is easy, especially if you have manure to add to the leaves and dead grass you’ve raked up. Racking the yard and cleaning the hen house on the same day will leave you with stronger muscles and a great compost pile! Choose a spot in a shaded area. You want the pile to get hot so it breaks down and kills weed seeds and other undesirables but not so hot that it kills everything.

You’ll need to decide a head of time how you’ll be composting yard waste. I don’t have a single favorite method. The plastic plastic bin or circle made of chicken wire is convenient, especially when I have a small amount of composting ingredients.When it’s time to turn the compost you pick up the bin (it’s bottomless), set it down beside the pile, and move the composting materials into the bin.

A three bin system is most useful when you have a lot to compost. You fill the first and second bin. When it’s time to turn the compost you move bin two into bin three, and bin one into the now empty bin two. When it’s time to turn again, bin two goes back into one and three into two.

When you need to start a new compost pile you move the pile that needs to be turned into an end bin and build the new pile in the center bin. Don’t add to the pile that’s composting. When that happens you’ll have uncomposted material in your otherwise finished pile.

garden wagon

Crate Garden Wagon

Gather up the twigs and anything else you can’t run over with the lawn mower. Set aside the twigs. Remove dog waste as that’s not suitable for a compost pile. Run over the leaves to chop them up. Whole, wet leaves mat together and can create a mess in a compost bin.

Tip: If you start mowing on the outside of the area and mow your way in, always blowing the leaves and grass to the center, you will save yourself a considerable amount of time raking.

After filling your garden cart or wheelbarrow, place your rake on top of the pile to help keep the debris in place.

How to Build a Compost Pile

You’ll start composting yard waste now as you build your pile. Place the twigs on the bottom of the pile to allow air to flow in and water to drain out. If you have cornstalks and sunflower stalks you can use them in the base.

Shovel a five to six inch layer of chopped leaves on top of the twigs and stalks.
Add a two to three inch layer of manure, kitchen scraps or grass.
Sprinkle a shovelful of garden soil on top of the manure.
Add water until the ingredients are damp like a wrung out sponge but not dripping wet.
Continue until the bin is full or the pile is a minimum of three feet by three feet. The ingredients will condense and shrink overnight. You may add more layers the next day.

Tip: Healthy garden soil is full of the microbes that help the compost pile start “cooking.”

You need to watch the pile to be sure it reaches 135° to 160°. A compost thermometer is a big help. You poke it into the pile and check the temperature without reaching in. When the pile cools down you’ll need to turn or disturb the pile, about once a week. You can completely turn the pile by moving it as described above, or you might need to just add air and a little water. You can “fluff” the pile with a garden fork.

Joining in on Homestead Blog Hop #29!


How to Transplant Seedlings

How to Transplant Seedlings

Transplanting seedlings is a matter of seedlings, supplies and patience. Knowing when to transplant is your first step. This tiny carrot seedling has plenty of room and can grow where it is five or six more days if you’re pushed for time.

Carrot seedling, how to transplant seedlings

Carrot seedling

This seedling has it’s first true leaves. You can see the heart shaped cotyledons at the bottom of the plant. The other two are true leaves. It’s time to transplant, especially if the seedlings are crowded. Spacing tiny seeds out to give seedlings adequate space for root and leaf growth is tricky.

Snow Crown cauliflower seedling, how to transplant seedlings

Snow Crown cauliflower seedling

Supplies for Transplanting Seedlings

Most seedlings aren’t particularly fussy. Vine crops have tender stems that snap easily if they are too long during transplanting, and they don’t like to have their roots disturbed. Transplant them from the starting tray into 6″ containers or the garden as soon as they have their first true leaves. They are our exception.

I move seedlings from a 1020 tray (10″ wide by 20″ long) into six packs most of the time. You can use yogurts cups and other containers you’ve kept out of the recycling bin if you’d like.

how to transplant seedlings

Pansy seedlings in a six pack

You need potting medium. ProMix or something similar, the same material you started the seeds in, will work just fine. I recommend adding worm castings or compost to the mix to give the seedlings enough nutrition to last them a month. Dampen the medium and allow it to set long enough to absorb the water it needs and drain the excess.

You might need fertilizer. If the leaves start to yellow the plants are lacking nitrogen. If they’re slow to grow they need an all-round fertilizer. I prefer to give them a weak solution of compost or worm casting tea all the time rather than a bigger dose of fertilizer occasionally. Plants, like us, need to be fed on a regular basis. They’ll slow down if they aren’t being fed.

Gently separate seedlings from each other and the seed starting medium. Leave as much medium as possible on the roots to help minimize transplant shock. Make a divot in the medium that’s larger than the roots and pop the seedling in. If you are transplanting tomatoes you can bury the stem to the first leaves. New roots will form along the stem. Growth will slow for a week or so while the roots get established but in the end it’s worth that extra week’s wait. Peppers, brassicas (broccoli, cauliflower, cabbage) and other plants that don’t form roots on the stem planting just above the roots is enough. Leave more room in the medium for roots to grow.

Gently fill medium in around the roots and when done, water all seedlings enough to settle medium and soil into their new home. Avoid direct sunlight and wind for a week to allow the plants to recover from being moved. Transplant shock can stress plants to death. If you’ve transplanted seedlings into the garden you can give them shade with floating row cover or by planting them larger plants later in the growing season. Happy gardening!

Joining Homestead Blog Hop #29!