Category Archives: How-To

How to Plant Garlic

How to Plant Garlic

In Planning Ahead to Plant Garlic we wrote about preparing the soil before it was time to plant garlic. The time has come. Here’s how to plant garlic! It’s a little consuming but it’s not at all difficult. You’ll need part of a day when it hasn’t been raining. You want the soil to be moist but not wet. Garlic needs time to settle into the soil and establish roots but not so much time that it can sprout before the soil freezes.

You’ll need:

  • Garlic
  • Dibble or dowel
  • Straw
  • Compost or fertilizer

[subscribe2]

Sort through your garlic bulbs ahead of time. Separate the bulbs into cloves, discarding any that are spoiled or too small. Starting with large, healthy bulbs will get your future garlic harvest off to a good start.

how to plant garlic

Discard cloves that are too small or diseased

Amend the soil. Garlic is a heavy feeder. Add a two to three inch layer of compost to the soil and work it in. Or, add three pounds of 10-10-10 fertilizer to a 100 square foot area to the soil and work it in.

Mark two inches on the dibble or dowel to eliminate the guessimating. If you’re like me you’ll carefully poke the dibble in the recommended one to two inches at first, then you’ll realize how long it’s taking and just start poking. “Close enough” ends up too deep. As long as my dibble is marked I’m good to go.

Poke one to two inch deep holes in the amended soil, three to five inches apart. Rows should be 12″ to 18″ apart.

The pointed end of the clove is the top. The flat end is the root end. Drop one clove in each hole. I’ve found it faster to poke all of the holes I can reach at once, plant the cloves, then cover the hole than it is to do each one step by step by step. Do whatever works best for you, the garlic doesn’t care as long as it lands right side up.

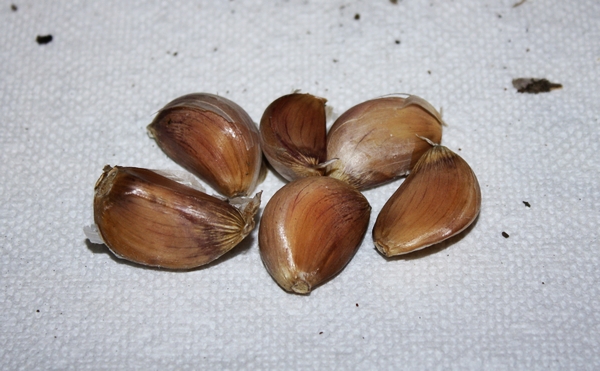
How to plant garlic cloves

Garlic cloves

Cover the holes and water the soil deeply. This is the first and last time you’re going to water the soil this year so be generous with the water.

Spread a six inch layer of straw over the rows. The straw helps to insulate the soil and prevent heaving caused by frost. I mulch the space in between rows as heavily as I do the actual row. Garlic doesn’t like competition from weeds. If there’s going to be high wind or it’s not going to rain within a day or two I water the straw to weight it down and hold it in place. A slow spray will allow the water to soak in without running off.

If you can’t find straw you can use hay. Hay might add a few seeds to the soil but it will prevent more seeds from germinating so it’s worth the trade off. I tried mulching with leaves one year. It seemed fine in the fall but the cloves had a hard time breaking through the matted leaves in the spring. I had to pull them back to free the bulbs.

And now you wait. You shouldn’t have to do anything with your garlic until spring.


How to Make Popcorn on the Stove

How to Make Popcorn on the Stove

Earlier sunsets lead to earlier evenings which lead to movie and game nights.

Do you flavor your popcorn in a certain way? We love a little homemade butter with grated Parmesan cheese and a sprinkle of Italian seasoning. It’s our current favorite but it changes from time to time.

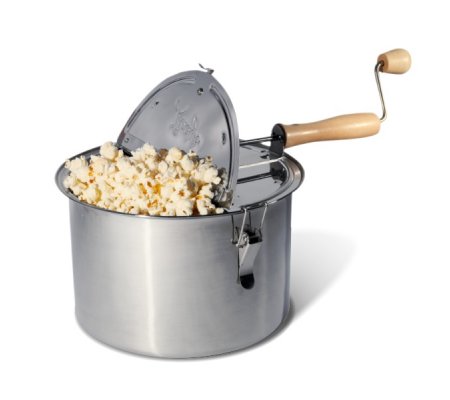
Our stainless steel stove top popper is built to last. The handles stay cool. The lid vents to let steam out to keep your popcorn tender and light.

how to make popcorn on the stove, popcorn popper, old fashioned popcorn

Old fashioned popcorn is the best!

Popping corn on the stove takes only a minute or two more than tossing a bag into the microwave. Stove top popcorn is healthy and tastes yummy, and it’s adaptable to the seasons. I’m thinking of trying one of the Pumpkin Pie spice recipes in last week’s newsletter.

Pour two tablespoons of oil (coconut or olive) into the popcorn popper.

Add 1/2 cup popcorn kernels to the oil.

Place the popper on a burner and turn the stove on to medium to medium-high heat. Stoves vary so much that there’s no absolute setting. From the time you turn the heat on until the last kernels pop should span about three minutes.  Start turning the handle as soon as you turn on the heat and don’t stop until the popping is finished. When more than six or seven seconds passes between pops your corn is done.

Powdered Ranch salad dressing is a great topping. A little goes a long way so one packet will last for at least two cups of unpopped popcorn. Look through your packets of seasoning. There might be a few you can use on popcorn. Taco or Fajita seasoning are great. Try a soup mix like French Onion, but sift out the solid onions first.

Cinnamon toast popcorn is an old time favorite. Mix cinnamon and sugar in a 50/50 blend and sprinkle over hot popcorn.

Back when we ate chips, Salt ‘n Vinegar was a favorite, and luckily it’s easy to make Salt ‘n Vinegar popcorn. Spray malt vinegar on popcorn and sprinkle with salt.

Chocolate popcorn, anyone? Melt semi-sweet or dark chocolate in a double boiler. Pour over popcorn and sprinkle with salt before the chocolate cools and sets.

Once you know how to make popcorn on the stove the possibilities are endless. What kind of popcorn do you like?


Time Management Tips for the Homestead

I love reader questions. Did you know that? I love to open a reader’s email and see what they have to say. I’m going to answer a question here.

“You talk about having a lot to do this time of year but you haven’t told us everything you do. What do you do and how do you fit it all in?” ~Rhonda
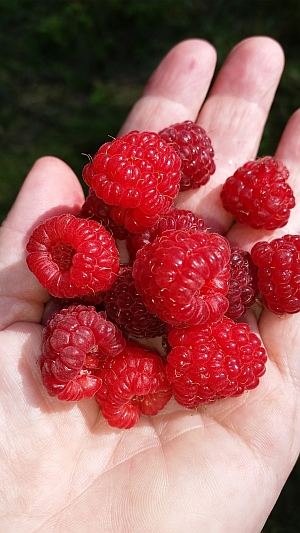
Raspberries freeze well

Raspberries freeze well

This time of year feels like it’s busier than others but in reality, I’m probably feeling more rushed. Homesteading can be a full time job and if you’re already working a job, it can be stressful.

The first killing frost is hanging over our heads any time after the first week of September. It might be early or it might not happen until October. The first frost could come early and then we’ll be frost free for weeks. It’s too late for the tomatoes, squash, cucumbers and other warm season crops once they’ve been frost killed no matter how good the weather is after so there’s the rush to force the plants to produce.

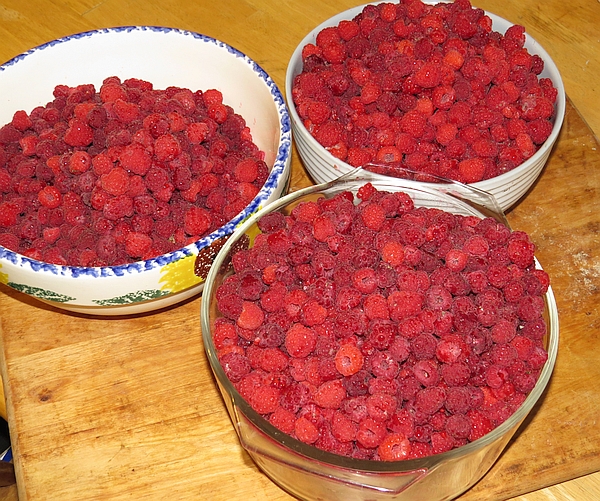
The late raspberries are ripening and the wild blackberries are still going gangbusters. Making jam and jelly is simple but it’s time consuming. I have more time in the winter than right now they’re being frozen in a single layer on cookie sheets. I don’t think these berries make the best jam after they’ve been frozen but freezing them makes it easier to make jelly. They skins burst when they’re frozen so they let go of the juice easily as they thaw.

  • Tip: Freezing strawberries saves time during the summer. You’ll make thicker jam with less pectic and sugar and have juice for jelly when the berries thaw.
Deluxe Stainless Steel Food Mill

Deluxe Stainless Steel Food Mill

Apples don’t have to be sauced, jellied, pied or otherwise put up immediately. You have at least a few weeks, and sometimes months, to get them processed. I picked a bushel of apples one day last week. They were roasted another day and then stored in the fridge. On day three I put them through the food mill (if you don’t have a food mill, you need one). I warmed the apples turned applesauce on the stove, added sugar and spices, and hot water bathed the batched. It took a little time on each of three days but I didn’t have enough time in one day to do it all. Do what you can when you can and it will come together. A little time here and there resulted in 18 pints of sauce.
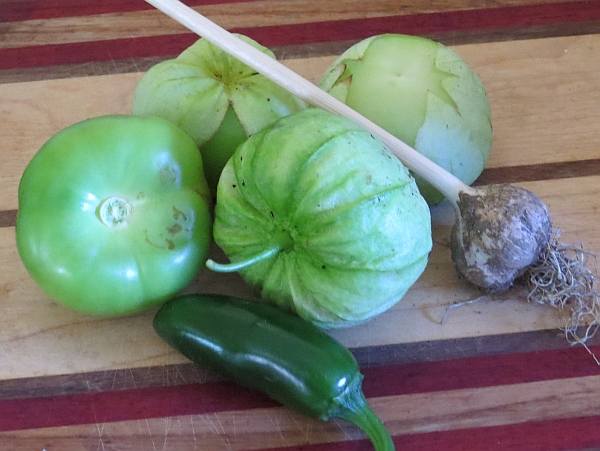
Salsa Verde Ingredients

Salsa Verde Ingredients: tomatillo, Jalepeno pepper, garlic. Missing – onion and cilantro, to be pulled and picked in a few days.

  • Tip: If your tomatoes are not ripening fast enough you can push a spade into the ground around the roots to stress the plants. Cut 12 inches from the base of the plant, severing the roots. A plant’s mission in life is to reproduce. You’ll speed up ripening this way.

The garden is still producing well. Tomatoes, eggplant, tomatillos, squash, pumpkins, cucumbers, kale, cabbage – just about everything is still growing. It all has to be weeded, watered when we don’t have enough rain, picked, preserved or stored – you know how it goes with the garden. This morning I picked close to a half bushel of tomatillos for salsa verde. It’s also hunting season. I can’t put hunting in the freezer so move over berries and vegetables, the tomatillos are coming in. Tomatoes can also be frozen. I like having the warmth from the oven early in the morning on a chilly day as the tomatoes or tomatillos roast. An hour or two with the oven on replaces the small, hot, quick burning fire I usually build on a late fall morning.

  • Tip: When your pumpkins and winter squash start to get soft spots, clean them up and roast them first thing in the morning, then freeze the flesh. This is usually a mid-winter project when I start checking on vegetables stored in the root cellar.

Firewood is weighing heavily on my mind these days. It was delivered late so I’m rushing to get it split and stacked to dry. Best made plans and all, I couldn’t depend on someone when it came to firewood so I was stuck with making the best of a bad situation. It happens. I’m working on eight cords of beach, ash, maple, yellow birch and white birch. The hydraulic splitter makes the work a lot easier but it’s still not an easy job on a hot, late summer day.

  • Tip: Secure next year’s firewood supply now and ask that it be delivered in spring. We burn up to six cords a year. I buy eight cords a year which means we a year “off” now and then without the expense and work, and won’t run out of wood.

Pigs, ducks and chickens are growing out back. They’re turning grass, insects, weeds, food scraps and a few commercial pellets into meat that will feed my family. Portable fences and chicken tractors need to be moved daily. Two people moving fencing takes me a third of the time it takes when I have to do it alone. Ask for help.

When did the paint start peeling off the hen house? I swear it was fine yesterday. Or I was too busy to notice. I’m not sure it’s going to get painted before the snow flies. If there are a few extra dollars I might hire someone to do it for me. It would take someone who likes to paint less than a day to do it. It takes me more than a day to fumble through scraping and painting. We can’t always do it all. Remember when you first started to daydream of homesteading? It was so idyllic. You’d spend days outdoors in the beautiful weather doing your chores? The mosquitoes weren’t part of my daydream. Neither was heat rash. Rainy days would be spent inside, cooking and ready. Painting the hen house was not in my day dream.

  • Tip: Neighborhood kids are often willing to do some work if you pay fairly, and you might be surprised at how well they work. I pay by the job rather than the hour. I don’t want to pay for the time they spend taking selfies and texting.

Plan to use the oven early in the morning or later in the day to warm up the house. It can do its work while you’re doing something else.

  • Tip: The final muck out of stalls and pens doesn’t have to happen when the animals leave for slaughter. Give your attention to the work that must be done at time and get to the stalls, pens and the hen house before the ground freezes and you’ll be all set.

Do you have a time management tip to share? Please leave them in comments!

Planning Ahead to Plant Garlic

It’s that time of year – garlic. It’s time to check on the garlic you planted last year and to choose and order your garlic varieties (unless you’re growing your own seed stock, that is!) and plan ahead for the day you plant garlic.

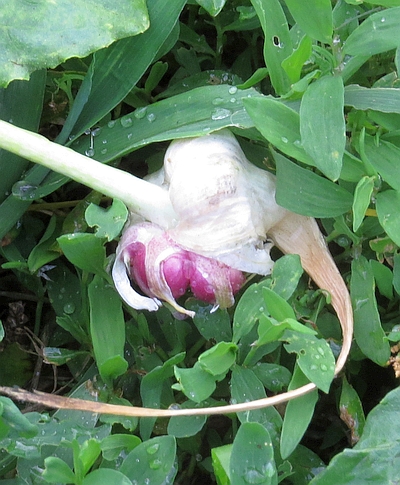
Garlic Bulbils

Garlic Bulbils

I pushed a garden fork into the damp soil this morning, loosened a head of garlic and gave it a tug. It’s small. I missed this plant when I cut off the scapes and energy went into producing lots of little bulbils in the flower rather than a larger head. We’ve had plenty of rain so the soil has never dried out. There was plenty of compost in the soil when I planted the individual cloves 10 months ago, and I mulched with more than enough hay to control weeds. It’s small but probably very tasty, and there’s still a little more time for the rest of the plants, which still have nice green leaves, to grow.

Look around the garden. What area will be open in late fall that will also be convenient next year? You won’t be able to drive a tractor through the place you choose for this fall’s garlic planting. Is there room to go around? Will the spot be inconvenient when you’re maneuvering the rototiller between rows next year? Does the soil drain well? If there are puddles in that spot each spring it’s not the place for your garlic.

Fresh garlic

Just dug…

Garlic likes soft soil that has been enriched with lots of compost. You’ll need to turn over the top 8 to 12 inches of soil. If the spot you choose has a weed problem now’s the time to get it under control. Garlic doesn’t like competition. If the weed load is light you’ll have an easy time planting and can skim ahead past solarization. If that’s the case, a lot of gardeners are envious!

Solarization will kill tender annuals and some perennials, and kill a large portion of the seed bank. The seed bank is the ungerminated seeds in the soil. Seeds can survive for years before germinating. The Hairy Galinsoga you thought you got rid of five years ago might germinate next year because it’s been sitting dormant the seed bank.

Prepare the soil for solarization by harvesting whatever you have growing, and pull all of the weeds you can possibly get out of the ground. Smooth the surface, leaving no room for gaps between the soil and the plastic you’ll use.

Soak the soil deeply, at least 12 inches. Moist soil will retain heat better than dry soil. You don’t want to have to remove the plastic for the next four to six weeks so be generous with the water.

Cover the area with a single sheet of clear plastic unless you live in an area that doesn’t get very hot. In that case, it’s probably best to use black plastic that will prevent germination in seeds that require light to germinate. Weeds that germinate under clear plastic will “cook” and die. Choose 1.5 to 2 mils (thickness) for larger areas. It will stand up to wind and light foot traffic from wayward pets and wildlife better than 1 mil. Painters plastic will last three to five weeks. Keep an eye on the plastic for signs of breaking down and remove it before it starts to crumble. If your seed bank is extreme you might opt for UV treated plastic (greenhouse plastic) that won’t break down so that you can leave the soil covered from now until planting time.


A Taste of Raspberry Jam

Raspberry Jam

How to Make Raspberry Jam in 30 MinutesMid-July, raspberry time. The canes are loaded, it’s been a good year for raspberries. Picking gallons at a time barely makes a noticeable dent in amount of berries to be picked. It’s time to make raspberry jam.
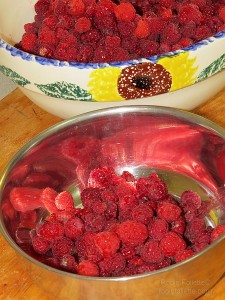
Raspberries to mash


You’ll need:

  • Two quarts of fresh raspberries
  • 1/3 cup, rounded, bulk pectin
  • 5 to 6 cups of sugar

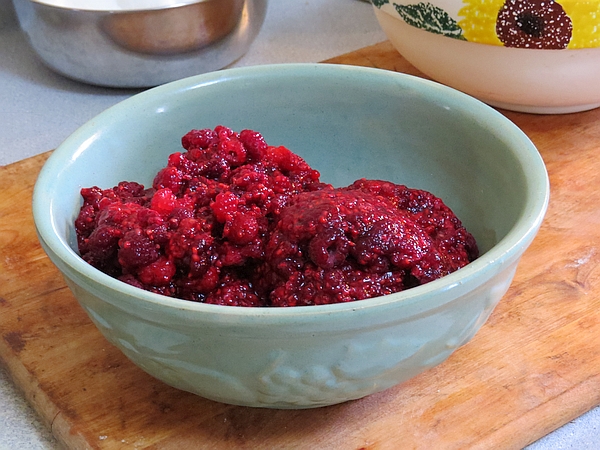
Lightly mash raspberries, one cup at a time. You’ll have five cups of mashed berries when you finish.

Stir in pectin.

Move mixture to an eight quart pan and heat to a simmer over medium heat. When simmering, stir in sugar. Bring to a boil that can’t be stirred down and continue to boil for 60 seconds, stirring constantly.

Ladle into hot, sterile jars. Wipe the rim clean with a damp cloth. Place sterile lids and rings, leaving a 1/8″ air space, and hot water bath as recommended.

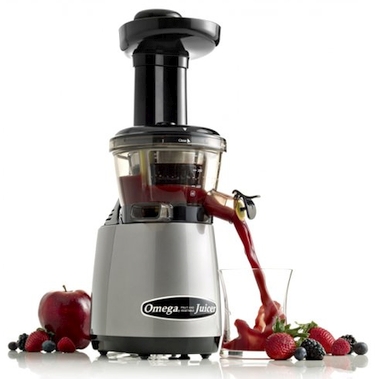
If you’d like to make jelly you can use one of our juicers to speed the process.

Omega VERT Juicer

Omega VERT Juicer

If you’d like to do this by hand, freeze the berries, let them thaw, and strain the seeds out. Frozen berries are much easier to juice than fresh.

There are so many things to do this time of year that being able to freeze the berries and make jelly later is a great convenience.

After thawing the berries you can heat them to around 100*. Don’t cook, just heat. Remove the juice you can pour out easily, then hang the remaining berries in cheese cloth to drip into a pan. When the dripping slows to an unproductive rate, give the cheese cloth a gentle squeeze to get the last of the juice.

Lightly mashed raspberries

Lightly mashed raspberries

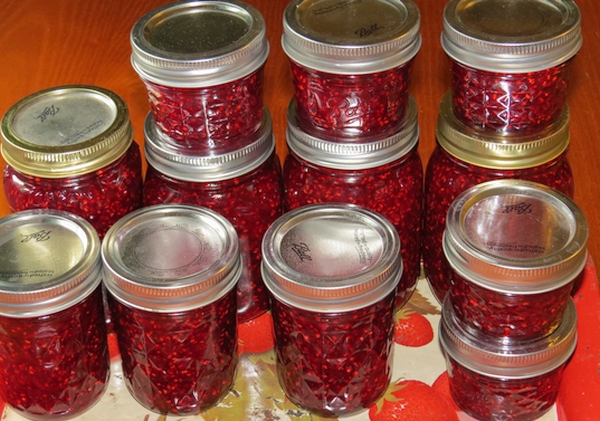
Raspberry Jam. Imagine a warm biscuit and jam this winter.

Raspberry Jam. Imagine a warm biscuit and jam this winter.

Raspberry Jelly Recipe

This recipe is different than the jam recipe in a major way. This recipe doesn’t use pectin. You might need to make it a few times to get it just right. If it’s too thin you can use it as pancake syrup, on ice cream or in smoothies. It won’t be what you were aiming for but it won’t go to waste.

4 cups raspberry juice
1 1/2 pounds sugar

Mix together. Heat to a gentle boil. Skim off any foam that settles at the top. Continue to boil for 20 to 30 minutes. When your spoon is lightly coated the jelly is ready to be jarred. Ladle into hot, sterile jars, leaving a 1/8″ head space. Wipe the rim clean, place lids and rings on, tightening the rings to “finger tight.” You want it tight enough to keep water out but loose enough to let air escape during the hot water bath.

raspberry bowls

Sheller and Pitter and Shredder – Oh My!

These three items are featured in this week’s newsletter. Sheller and Pitter and Shredder – Oh my! Have we got what you need for mass food production!

Mr. Pea Sheller

Mr. Pea Sheller will shell your peas and beans. It’s fast, safe to use and built to last.

Cherry Stoner, Jr

Cherry Stoner, Jr makes quick work of stoning cherries by nearly effortlessly removing the stones from up to five cherries at a time. There’s no need to be careful to load the cherries just right, the Cherry Stoner, Jr can handle it.

Deluxe Cabbage Shredder

The Deluxe Cabbage Shredder is great for church suppers, sports clubs, restaurants and diners and other folks who make large batches of coleslaw, kimchi or sauerkraut. Cooperatives and groups of friends might get together to buy the Deluxe Cabbage Shredder to share.

Coleslaw Recipe

The sauce for coleslaw is key to making the best slaw possible. This recipe is easy to remember when you’re in the middle of cooking for a big dinner.

1 part vinegar
2 parts sugar
4 parts mayonnaise

Every cup of mayo gets a half cup of sugar and a quarter-cup of vinegar. That’s it. Mix it up, pour it over shredded cabbage and carrots and you’re done.

One cup of mayo will coat one to two pounds of cabbage depending on how creamy you like  your slaw.