Category Archives: How-To

The Homestead To Do List

The Homestead To Do List

It’s overwhelming sometimes, isn’t? Seems like the Homestead To Do list grows as fast as the weeds, is as hard to whittle down as it is to muck stalls in spring, and that it has a mind of its own. Leave it sitting on the table unsupervised and someone’s apt to add to it while you’re not looking.

These tips might help you keep the list from taking over every waking moment.

Separate your lists. One list for the homestead work, one for household work, one for kids. But keep control of how many lists you have. Combine what goes together naturally.

Homestead tasks include the garden, putting food up, firewood, livestock, poultry and similar tasks. Household tasks include laundry, dishes, floors, dusting, painting and decorating.

Homesteading To Do List

Control your lists, don’t let your lists control you.

A daily list is a big help to me. I end my day but writing tomorrow’s To Do list on a 3″ x 5″ spiral bound notebook that fits in my back pocket. I have tiny pens that fit in my pocket, too. A fresh list, in the order I should work, keeps me focused. I don’t have to clutter my mind trying to remember what else I need to do, and that helps me concentrate on the task at hand. Anything I didn’t accomplish today goes to tomorrow’s list if it still really needs to be done.

Here’s one for your to do list. Subscribe to Homesteader’s Supply newsletter.

The pen is a big time saver. Write down your additions. Again, if you’re not working to remember everything you’re better able to concentrate.

Be Seasonal. If you’re not going to get to certain tasks until winter don’t clutter your list with them now. I makes your list look and feel longer than it is. Make a note on a master list and forget about it for now.

Accept that your lists will probably never be empty. That’s a hard one. It’s a relief to cross items off the list. It must be a great feeling to not have a To Do list. I’m not familiar with that feeling. Lists evolve. They grow, shrink, change, get crumpled up and thrown away.

Set Time Limits. Set time limits. Be realistic, but aim to get the job done in a certain amount of time. It takes me one hour to weed the beans if I hustle. Keep moving and work efficiently.

Weather. Pay attention to the weather. I can weed the beans today before it gets too hot but I can’t put them on tomorrow’s list because it’s going to rain hard all day.

Do a good job. Doing a good job today means some items won’t be back on your list too soon. It’s worth the extra time and effort now even when it feels like a big burden during an especially busy time of year.

Be Realistic. I had beautiful perennial gardens on my list year after year after year. Weed. Plant. Weed. Prune. Weed. I’ve come to the conclusion that there isn’t time to raise pigs and poultry, have a half-acre garden, put up all this food, cut, split and stack the firewood, and have beautiful perennial gardens.

Control your to do list, don’t let your to do list control you.

Best Basic Cheese Kit – Let’s Make Cheese!

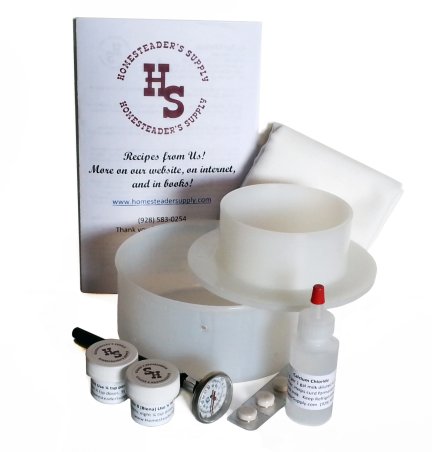
I’ve dabbled in a little cheese making in the past – just enough to know I want to make more, and I want it to be delicious. I love really good cheese. Jerri Bedell, our beloved owner of Homesteader’s Supply, sent the Best Basic Cheese Kit to me to try out. You see…I have an idea. I think we should make cheese together. All of us! Well not all of us. Of course not everyone wants to make cheese. But how about some of us?

Here’s my plan. On Tuesday, May 13, I’m going to make cheese using the Best Basic Cheese Kit. There’s time for you to order the kit, get familiar with it, and be ready to make cheese that day. We’ll compare notes as we go and talk about the cheese we made. If you write about this in your blog we’ll share your link on Facebook, Twitter and in a blog about our cheese making day.

The cheese kit is only $44.88, and shipping is free in the lower 48 states.

Best Basic Cheese Kit

So about that cheese kit! This is the same supplies and equipment used by professionals to make cheese.  It contains some of the same quality products in our larger kits, just gives you the basic products you need to try your hand at making all kinds of cheese.  And what better than to buy your kit from a store that takes pride in helping our customers!

Best Basic Cheese Kit

Best Basic Cheese Kit

Our kit does not contain any citric acid or vinegar, and there is no need for a microwave.  Let’s face it, real cheese takes time to make…some faster than others. But if you want the best tasting, all natural cheese, then this is the kit for you.

With this kit you will be able to make many types of cheese, as it includes both basic mesophilic and thermophilic cultures, enough to make up to 24 lbs of cheese from each type.   And, these cultures are the only  type where you can make a mother culture for continued use, so they can last you a very long time.  We include that recipe. The Reblochon Mold is the best one to use as a form for soft cheeses and mozzarella, and as a press for harder cheeses like Colby and Cheddar, making one pound of cheese from one gallon of milk!  The rennet is vegetarian, and usually only needs 1/4 or 1/2 half tablet per gallon of milk. The calcium chloride is for making cheese with pasteurized milk, necessary to help for the curds.  And the bonus is you can even make butter and sour cream with this kit!

Everything that is included in this kit and more information about the kit is available on our website. Please let us know that you’ve ordered one of our cheese kits (doesn’t have to be this one in particular!) and will be making cheese with us. We’d like to blog about the project, include your photos and comments, and if you have one, link to your blog. You may comment here, leave a message on Facebook or send Robin an email.

How to leave fast food behind and eat inexpensively at home

It’s sad that it is cheaper to feed your family at McDonalds than to provide a balanced meal for your family..

For example – if all they can afford is crap, and they don’t have the resources to grow their own they could be at a real disadvantage.

These are two of the comments made on Homesteader’s Supply Facebook page. Balanced meals don’t have to be expensive, or complicated. They can be much healthier than fast food. We can leave fast food behind and eat inexpensively.

It takes a bit of time to prepare and cook a good meal. The time can be spent teaching children to cook, a skill that’s being lost in a large portion of our youngsters. Food for thought: In the big picture of life, is it more important to have children in three after school and extra curricular programs that keep us too busy to cook and eat well than it is to teach our kids to cook? Let’s get off the road a little and into the kitchen more, where we can share some quality family time.

9

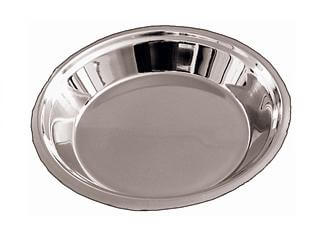
9″ stainless steel pie pan.

Here is a recipe for quiche to help us get started. Quiche is great for breakfast, lunch or dinner. For a grab-and-go breakfast use muffin tins instead of the pie plate, no crust needed. I browsed the online flyer a Hannaford, a grocery store chain, and the paper flyer from Food Mart to get prices.

Broccoli & Cheese Quiche

One dozen eggs
1/2 pound chopped broccoli
1/2 pound grated cheese
One pie crust
1 tsp salt
1 tsp pepper
1 tsp Italian seasoning

Scramble the eggs and add seasonings. Use seasonings you like. A quarter-teaspoon of crushed red pepper adds zing without heat. Garlic powder is also good. If the broccoli is frozen you should thaw, drain and pat it dry. Mix everything together and pour into the crust-lined pie plate.

Serving sizes are out of proportion these days. One serving of meat is three to four ounces. That’s the size of a deck of play cards (not Uno or other large game cards). Keep the number of servings you need for the entire day in mind. You have three meals and possibly a snack to get all that you need to be healthy and fit.

Variations: spinach, onion, mushrooms, artichoke, dandelion greens. What’s available in the garden?

Bake at 350* for 45 minutes.

To cut down on costs:

  • use brick cheese that you grate yourself
  • chopped broccoli is less expensive than pieces when using frozen
  • use broccoli stems, not just the tops

Eight servings. $7.20 total.
Eggs – $3.00
1 pie crust – $1.15
Cheese – $2.20
Chopped broccoli – .60 cents
Seasoning – .25 cents

Serving cost: .90 cents.

Eating healthy, homemade meals probably means dietary changes if you’re used to swinging through the drive through on a regular basis. Change can be difficult and fun. Try to avoid overwhelming everyone. You might cause a revolt. Keep it fun.

Setting up for chickens

It’s spring and time to get busy on the flock of chickens. Is it time to start your first flock of layers? Or maybe some of your older hens need to be retired and replaced. Homesteader’s Supply has the equipment you need to get going or add to your equipment.

chick daysThe Small-Scale Poultry Flock


A little time spent reading before bringing your chicks or chickens home can save you some heartache and back break. We have books you’ll find to be helpful whether you’re just beginning or have been raising poultry for years. You’ll find all of them listed here.

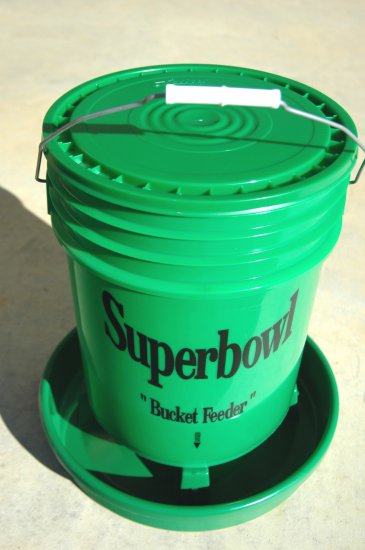
Superbowl bucket feeder for poultry

Holds 50 lbs of food

The Superbowl bucket feeder holds up to 50 pounds of food, decreasing trips to the coop with more food. It’s easy to fill and can be hung up or placed on a base to discourage hens from scratching their food onto the floor.

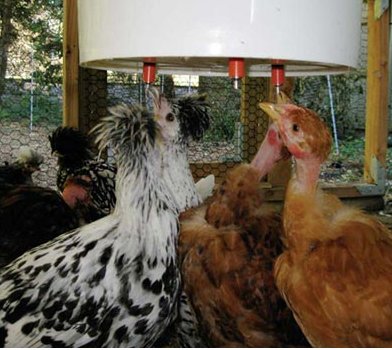
Poultry can make a mess of their water quickly by stepping in it and throwing dirt in when they dust bathe and scratch. Suspend a bucket fitted with Poultry Nipples. There’s no pan needed because it doesn’t drip. It’s also excellent for ducklings that are prone to getting soaking wet (the way ducks do…) and cold.

Poultry Nipples

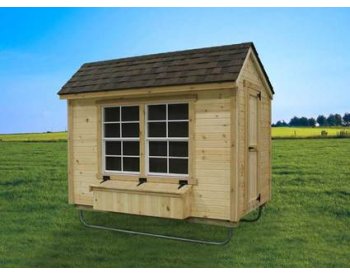
EZ-fit Chicken Coop 5ft X 8ft

EZ-fit Chicken Coop 5ft X 8ft

The EZ-fit Chicken coop will provide a safe, secure place for your poultry. It’s available in three sizes. Shipping is free to the lower 48 states!

The optional skids make moving your hen house to fresh grass easier. The skids don’t get stuck in ruts as easily as a tire will. They’re also a good way to keep the coop off off the ground. Hens bring mud into the coop on their feet. A ramp helps remove some of the mud, helping to keep not just the coop but the eggs cleaner.

The nest boxes are located on the outside of the coop for easy pick up and nest box cleaning. Other features include:

  • Chicken Door & Ramp
  • Inside Roost
  • Predator-resistant Wire Mesh
  • Man Door
  • Window(s)
  • Standard window color is white
  • 25-Year 3-Tab Shingles
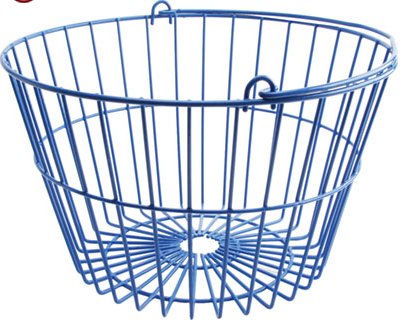
Egg basket

Egg basket

Our egg basket is coated with plastic to help keep it clean, and make the clean up it will eventually need easier.

Dimensions: 14″ top diameter x 9″H x 10″ bottom diameter.

You can see our entire line of poultry supplies on our website.

Getting Started with Container Gardening

Our food supply becomes a little less stable and more expensive each day because of drought and flooding, transportation costs and world issues. Everyone can grow at least a little bit of their own food. It’s simple to do, doesn’t cost a lot of money, takes little time, and can take up little space. Let’s get started.

Containers can be small clay pots, large wooden planters, plastic saved from your kitchen, and everything in between. Short term, we like to start with recycled containers. Any plastic container you can poke drainage holes in should work.

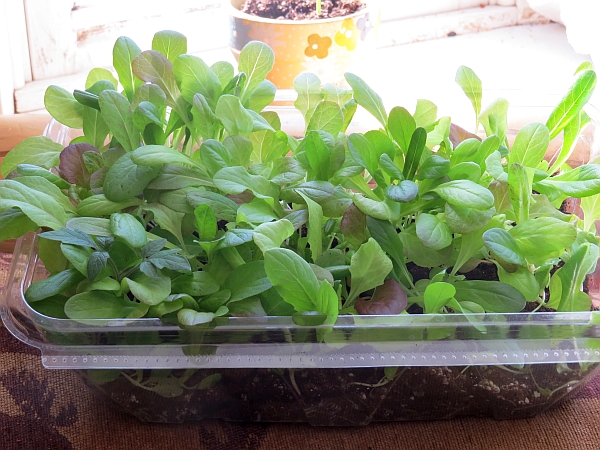
Container Gardening, salad container

Salad container used for leaf lettuce.

This is a container from mixed greens purchased in the grocery store. A few inches of seed starting medium mixed with a cup of worm castings is all it takes to support this cut-and-come-again salad mix. Notice the tomato seedling in the left corner? It will be transplanted into its own pot.

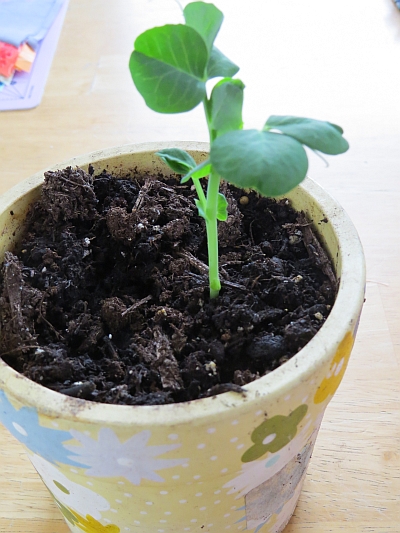
Container Gardening, Coral Shell Pea

Coral Shell Pea

This is a Coral shell pea. It’s a small plant that with vines only two feet long, perfect for a six inch clay pot. It will stand up straight until it’s seven or eight inches tall then lean over and hang over the edge. Choose a short vine variety for small containers.

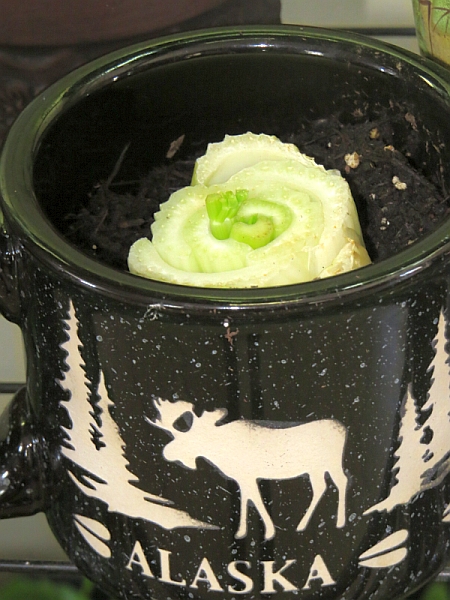
Do you have extra coffee mugs cluttering your cupboard? As long as you avoid over watering or can drill a hole through the bottom they make great containers. This mug holds store bought celery. It will develop roots and continue to grow.

Container Gardening, Coffee Mug

This coffee mug holds celery.

Transplant seedlings into containers with the same guidelines as if you were planting them into the garden. Each plant must have enough room for its roots to spread. The container should be heavy enough with soil and plants to keep it from tipping over if you move it outside.

Look in your seed catalogs for a note or other indication marking varieties suitable for containers. It’s become such a popular way to grow vegetables now that many companies point these out to us. These are some of our favorites:

  • Cucumber – Salad Bush, Space Master. Two plants per one gallon container. Look for words like Bush and Space in their name.
  • Bush Beans – Tendercrop, Derby. Three plants per one gallon container.
  • Tomatoes – Determinate varieties stop growing when they reach their maximum height. A five gallon container will hold one tomato plant. Super Bush is an excellent choice. It maxes out at three feet tall, is very frost hardy, and has three inch tomatoes. The stem is dense and keeps the plant upright with little or no staking. Tomatoes love the additional warmth containers offer.
  • Peppers – Probably the least picky plants we’ve grown in containers. Provide a minimum of a two gallon container. Pepper plants have large roots when they have enough roots and might be more than four feet tall in good soil. Jalepeno and Ace bell varieties do very well.
  • Swiss chard – Peppermint and Bright Lights are tasty and attractive. Two plants fit well in a one gallon container. You can choose a container that is wider than it is deep. Avoid over heating these cool weather plants.
  • Tatsoi and Boc Choi do well in containers. Choose a “baby” variety of Boc Choi such as Purple or Shuko. You can combine tatsoi and boc choi together in one container to add a variety of color and make the container attractive. Avoid over heating.
  • Cabbage – Little Jade or other Napa varieties do well in container gardens. Be sure to place them toward the back or in a partly shady area so their roots don’t over heat.
  • Zucchini – who knew! Astia zucchini has performed well in an 18″ container every year for us. Hand pollinating is recommended for good production.
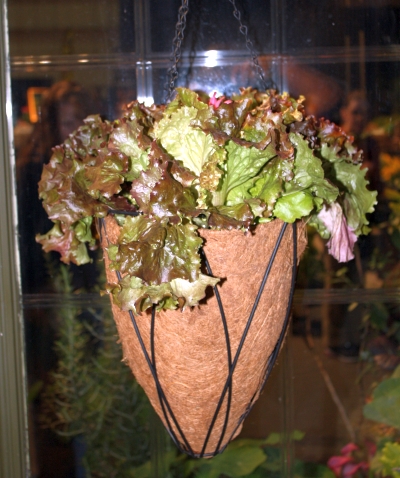
  • Leaf Lettuce does well in containers. For variety, choose different colors and leaf textures. Leaf lettuce can be cut and left to grow again for another harvest. Salad Bowl, Red Sails, and Black Seeded Simpson do well with container gardening.
Leaf lettuce in a hanging basket

Leaf lettuce in a hanging basket

Container gardening outdoors requires some attention. Soil can dry out quickly in the heat and wind, or become flooded in heavy rain. Check them now and then to be sure roots haven’t grown out of or soil hasn’t blocked drainage holes.

Use a soilless mix or part soil mix for your containers. Avoid using 100% garden soil as it will compact over time, blocking good drainage and make it difficult for roots to spread. Your garden center will be able to show you what they offer and explain which brand might be best for your particular containers. It will contain vermiculite or perlite, and have a fertilizer such as composted cow manure in its mix. If you live in a hot and/or windy area you’ll want a mix with soil because it retains moisture better than soilless mixes.

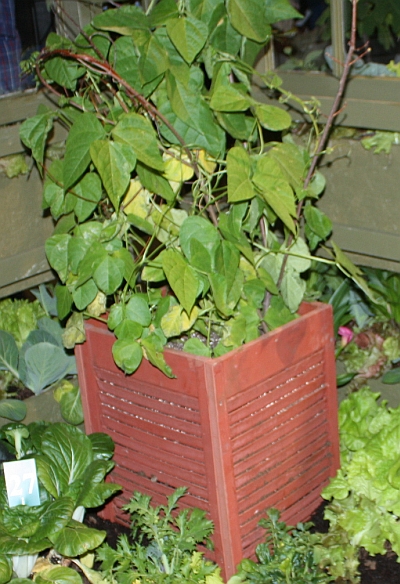
Pole beans in a container garden

Pole beans need a trellis to attach themselves to.

Carrots are a great vegetable for kids. Seeds placed around the outer edge of the container will be able to be seen before they reach maturity and are pulled. Choose a container at least 12 inches deep, or grow a miniature variety.

You can avoid poor soil and space issues and still grow a lot of food by grouping containers together. Keep like plants together, such as tomatoes or peppers, to aid in pollination. Place containers wherever you have room. They don’t have all have to be together. Is there room for pots at the base of your mailbox? How about on your steps?

Do you have questions? Suggestions? Something to add? Comments are open!


Simple little seed is chock full of beneficial nutrition!

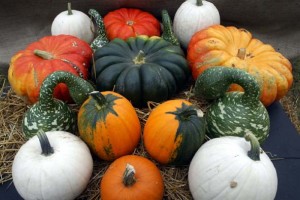
Pumpkins_variety

The season is upon us now where Pumpkins are a plenty!  I couldn’t get a total count, seems there might be over 50 varieties of pumpkins that can be grown in your own garden from      heirloom seeds.  Within that variety are some amazing differences:

  • The most commonly known carving pumpkin, the Jack-O-Lantern, was not bred for eating.
  • The Smaller sweeter pumpkins are for eating.
  • Colors of pumpkins are just as diverse, such as the blue Jarrahdale from New Zealand and Queensland    Blues from Australia.
  • Pumpkins are considered a fruit because it contains seeds.

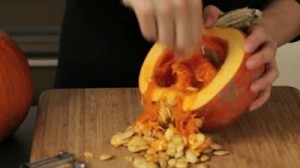
scooping-out-seeds-of-pumpkin

  •  Pumpkin can be used for soups, stews, bread, pickles, pies, puddings, ice cream, and even beer or ale!
  • You can even preserve pumpkin by canning (most advice is only as cubed, not mashed.)
  • Cattle, goats, pigs, chickens and turkeys all love pumpkins.

Here are some interesting facts about pumpkin seeds:

  • Most pumpkin seeds have hulls, unlike the Kakai Pumpkin seeds are completely hull-less.
  • Mexican mole sauce is made with pumpkin seeds.

Health Benefits of Pumpkin Seeds:

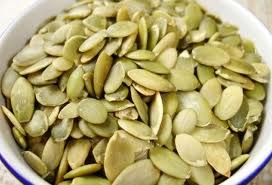
pumpkin_seeds_raw

  • Contain lots of minerals such as zinc, iron, copper, magnesium, phosphorus, and manganese… for helping to optimize bone health and preventing osteoporosis.
  • Good source of B vitamins, Vitamin E, Vitamin K
  • They have been shown to reduce LDL cholesterol, improve prostate health, reduce inflammation related to arthritis, improve sleep and lower depression.
  • The only alkaline forming seed.
  • Contain high quality protein, and the content of protein actually increases with the age of the fruit.


Preparation and Use of Pumpkin Seeds:

  • Best to shell the seeds, then soak in water for 6 hours.  Soaking make enzymes and other nutrients more digestible.
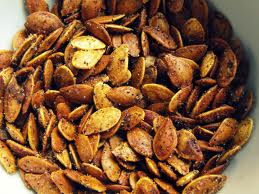
  • Bake them in the oven at 160 to 170°F for 15 to 20 minutes.  You can even sprinkle different seasonings on them for a variety of flavors.
  • Many suggest dehydrating below 110 degrees F, will prevent of loss of nutritive value from over-heating.
  • Sprinkle them on top of salads, cereals, and yogurt.
  • Add them to soups, stews, and meatloaf.
  • Enjoy them raw as a snack!pumpkin_seeds_toasted