Category Archives: Recipes

Bread stuffing

Bread Stuffing Recipe…or is it Dressing?

Bread Stuffing Recipe

This recipe may be downloaded, sent to the printer and picked up on your way to the kitchen.

It happens every year, about two weeks before Thanksgiving. The obsession resurfaces, creeping in, taking over my subconscious, making my stomach growl. Thanksgiving dinner. Stuffing. I use a friend’s bread stuffing recipe that makes my mouth water! I like to keep it simple and tasty. Our stuffing has never been fancy. Nana made a potato based stuffing. Or was it dressing? Stuffing? Dressing? What do you call it?

I make a bread based stuffing when it’s my turn to host Thanksgiving dinner and when I’m stuffing a roasting chicken. I sometimes make stuffing to go with chicken pieces. Stuffing doesn’t have to be stuffed, after all. Maybe that’s when it becomes dressing! Maybe stuffing is dressing when it’s a side dish.

Bread stuffing recipe

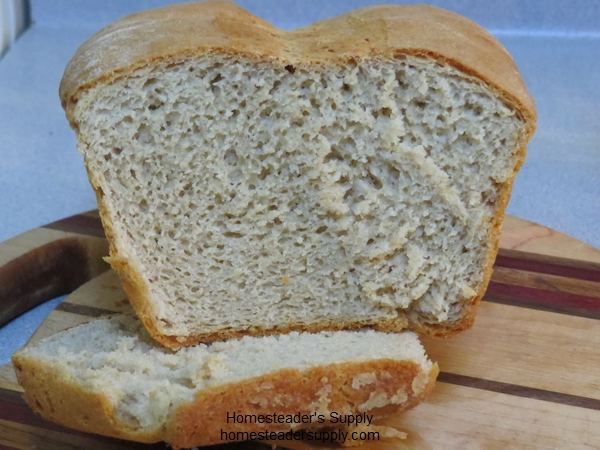
Sourdough bread will add flavor to your stuffing.

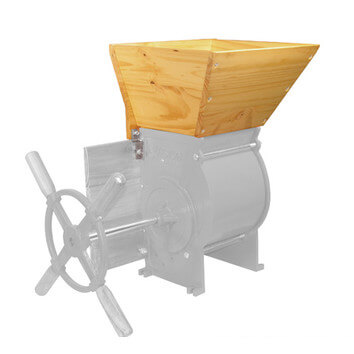
Saving stale bread is a time saver. It doesn’t matter what kind of bread I’ve made, it works. Remember the sour dough bread we made using the Pickle Pro for the starter? The flavor of sour dough adds a lot to stuffing.

If you don’t have stale bread you can make bread specifically for stuffing. I use whatever bread recipe I’m making at the time and add Italian or poultry seasoning, garlic powder, onion powder and pepper to half the batch of bread. Bake it as usual. You can add more seasonings when you make the stuffing if necessary.

Bread Stuffing Recipe

Bread stuffing recipe

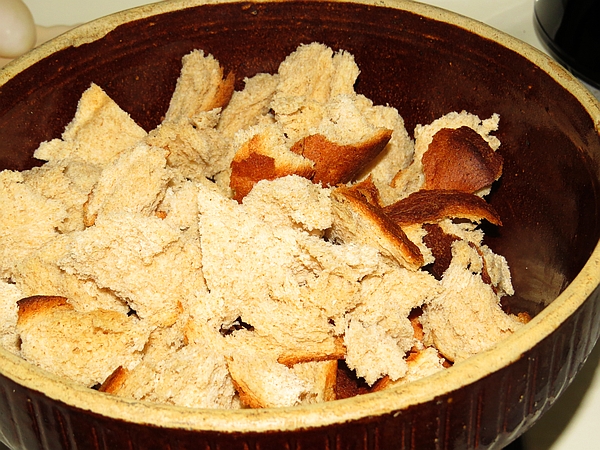
Tear the bread into large pieces. It will condense when you add chicken broth.

This recipe is based on one pound of bread. Multiply as needed. It’s best if made a day ahead of time. Store in the refrigerator overnight. Stuff the turkey (or chicken) right before roasting, or bake in a buttered casserole or Dutch oven. This is great cooked ahead of time and reheated. I put it in the oven to warm when the turkey has finished cooking and is resting before carving.

Tear one pound of bread into large pieces. It will condense when you add stock.
4 medium celery stalks, chopped
1 medium sweet onion, chopped
2 large apples, peeled, cored and chopped
1 tsp ground or 2 tsp fresh sage (I use a lot more as I love sage)
Salt and pepper to taste
1 to 1 1/2 cups turkey or chicken stock

Combine all ingredients, adding stock slowly until you get the consistency you want.


{thismoment} Old Recipe

{this moment} – A Friday ritual. A single photo – no words – capturing a moment from the week. A simple, special, extraordinary moment. A moment I want to pause, savor and remember.
If you’re inspired to do the same, leave a link to your ‘moment’ in the comments for all to find and see. Created by SouleMama

You can download the recipe to print and take to your kitchen here.

Old recipe, nut bars, recipes

Seven Step Nut Bars


How to Make Popcorn on the Stove

How to Make Popcorn on the Stove

Earlier sunsets lead to earlier evenings which lead to movie and game nights.

Do you flavor your popcorn in a certain way? We love a little homemade butter with grated Parmesan cheese and a sprinkle of Italian seasoning. It’s our current favorite but it changes from time to time.

Our stainless steel stove top popper is built to last. The handles stay cool. The lid vents to let steam out to keep your popcorn tender and light.

how to make popcorn on the stove, popcorn popper, old fashioned popcorn

Old fashioned popcorn is the best!

Popping corn on the stove takes only a minute or two more than tossing a bag into the microwave. Stove top popcorn is healthy and tastes yummy, and it’s adaptable to the seasons. I’m thinking of trying one of the Pumpkin Pie spice recipes in last week’s newsletter.

Pour two tablespoons of oil (coconut or olive) into the popcorn popper.

Add 1/2 cup popcorn kernels to the oil.

Place the popper on a burner and turn the stove on to medium to medium-high heat. Stoves vary so much that there’s no absolute setting. From the time you turn the heat on until the last kernels pop should span about three minutes.  Start turning the handle as soon as you turn on the heat and don’t stop until the popping is finished. When more than six or seven seconds passes between pops your corn is done.

Powdered Ranch salad dressing is a great topping. A little goes a long way so one packet will last for at least two cups of unpopped popcorn. Look through your packets of seasoning. There might be a few you can use on popcorn. Taco or Fajita seasoning are great. Try a soup mix like French Onion, but sift out the solid onions first.

Cinnamon toast popcorn is an old time favorite. Mix cinnamon and sugar in a 50/50 blend and sprinkle over hot popcorn.

Back when we ate chips, Salt ‘n Vinegar was a favorite, and luckily it’s easy to make Salt ‘n Vinegar popcorn. Spray malt vinegar on popcorn and sprinkle with salt.

Chocolate popcorn, anyone? Melt semi-sweet or dark chocolate in a double boiler. Pour over popcorn and sprinkle with salt before the chocolate cools and sets.

Once you know how to make popcorn on the stove the possibilities are endless. What kind of popcorn do you like?


apple cider jelly recipe

Making Apple Cider Jelly

Apple Cider Jelly

Growing up, apple jelly on a toasted English muffin was one of my favorite breakfasts. When I discovered a recipe for apple cider jelly on the internet a few years ago I knew it was going to be my new favorite. I bought a gallon of fresh pressed cider and got to work. It took me several tries to get apple cider jelly right, and we ate a lot of ice cream with apple cider topping (code for jelly that didn’t set up). Apple jelly from the crab apples on my ancient tree was much easier. I couldn’t figure it out.

A neighbor came to pick apples and we talked about my apple cider jelly problem compared to the simple, dependable apple jelly. “Do you simmer peels in the pot,” she asked? I didn’t. I learned that day that there’s a lot of pectin in apple peels. I peel two apples, simmer the peeling in the cider, and remove the peels before pouring the jelly into jars. Problem solved.

apple cider jelly, recipe, hot water bath

Waiting for the jelly to come to a boil

Apple Cider Jelly Recipe

4 cups apple cider of good quality
3 cups sugar
2 oz pectin
Peelings from two medium apples
(Optional) 1-2 teaspoons apple pie spice or a combination of cinnamon, nutmeg, cardamom

Add the peels to the cider at the start.

Mix spices into sugar if you’re going to make spiced apple cider jelly.

Methods of making jelly and jam vary between brands of pectin. Follow the directions provided in your pectin. Remove peels before pouring the jelly into jars.

apple cider jelly, recipe, hot water bath

Hot water bath

Preserving with Pomona's PectinOld school canning told us to fill the jars, cover the jelly with paraffin wax and allow to cool before adding a cover. Another formerly accepted method didn’t use paraffin. We tightened the jar lid and turned the jars upside down until they sealed. We know now that these aren’t the best methods. You’ll find great information including how to hot water bath your jelly in Preserving With Pomona’s Pectin by Allison Carroll Duffy.

apple cider jelly recipe

Apple cider jelly

A homemade biscuit or English muffin with a pat of homemade butter and jelly or jam is one of my favorite breakfasts in winter.

Butternut Squash Soup Recipe

Butternut Squash Soup Recipe

Butternut squash

Butternut squash, so fresh it’s still in the field

The first and second killing frosts came last week, first on Thursday and then on Friday mornings. Some of the winter squash and pumpkins weren’t quite ready to be picked but nothing goes to waste on the homestead. The pigs and poultry are happy to eat the unripened squash. The plants, nearly black a few days later, will feed the micro herd in the soil.

One of my favorite ways to use butternut squash is in soup. It’s creamy and rich, has a hint of nutmeg, and can even be a little spicy. If there’s a winter squash you like more than butternut you can use it instead. A variety that isn’t stringy works best.

Saute two cloves of garlic and one medium onion in EVOO
Peel and seed two pounds of butternut squash, and cut into two inch pieces
Peel and core one medium apple, sliced

Simmer the butternut squash and apple in four cups of chicken stock until squash is cooked. Add onions and garlic, and puree in a blender or with an immersion blender.

Sauteed diced onion and garlic until golden.  Add cider and simmer five minutes. Sautee apple in butter until tender. Add chicken stock and squash, cover and cook until squash is tender. Add apple to the pot.  Puree either in a blender or with an immersion blender until smooth. Stir in 1/2 cup of cream and nutmeg to taste.  Serve warm.

This stores in the fridge for up to a week.

For variations, you can add apple or pumpkin pie spice in place of nutmeg. To add a bit of spiciness, slice a four inch piece of Chirico or Linguica into 1/4″ pieces and pan fry to remove some of the fat and improve flavor, and add to the soup before pureeing.

butternut squash soup

A cup of butternut squash soup

Winter squash is simple to grow. You’ll need space enough in the garden for the vines to spread, and that amount of space depends on the variety of squash you grow. You can start seeds indoors three weeks before the average last frost date for your area and transplant the seedlings, or start the seeds in the garden. Plants should be from three to six feet apart. The longer the vines grow the further apart the plants should be placed. The soil should be rich with compost and as weed free as possible. The vines will grow together by mid summer and help control the weeds.

Watch for pests such as squash vine borer, cucumber beetles and flea beetles, and treat as necessary.

Butternut Squash

Butternut Squash

Harvest mature squash before first frost or cover the plants with a heavy sheet or blanket the night before expected frost. Wait until the sun has warmed the cover before removing.

Cut the squash from the vine and store out of direct sun and rain for 10 days. Most varieties of winter squash will store in a cold cellar, cool closet or even under the bed for several months. Check the stored squash every two weeks while in storage for signs of soft spots or spoiling, and use squash starting to go by first. If necessary, winter squash can be frozen.


Fruit Presses & Apple Cider Season

Fruit Presses & Apple Cider Season

It’s apple cider season! Not the apple cider that’s been stored somewhere for who knows how long before put out on the store shelf. It’s the season of picking, crushing and pressing fruits to make cider. We offer a variety of fruit presses!

Apple & Fruit Crusher - Fruit Presses

Apple & Fruit Crusher

Let’s start with the Apple & Fruit Crusher for hard fruits. Before you press your apples or pears you should break them up. If you have just a few you’ll be fine cutting them into quarters or halves depending on size, before you put them into the press. More than that and you’ll spend a long time cutting.

The Crusher mounts easily on a table top. I’ve seen it mounted between two saw horses. Whatever works for you is great. It’s that simple.

I love the old-timey look of the Crusher with its bright red color and old fashioned handle.

Fruit Presses - Hopper for Fruit Crusher

Apple & Fruit Crusher Hopper

The Apple & Fruit Crusher is easier to load when you add the wooden Hopper. It’s sturdy, easy to put together, and holds a peck of apples at a time. Pouring the apples into the Hopper will save you time and a lot of bending to pick up fallen fruit.

We offer Fruit & Wine Presses from a reputable company called TSM. They’ve combined the old time feel of hand cranking and beautiful presses with modern technology. The baskets are made of oak grown in the USA! Each press comes with a filter bag except for the Deluxe Stainless Steel Press which doesn’t need one.

Fruit Presses

The Harvest Deluxe Fruit & Wine Press is my favorite. It holds 4.7 gallons of fruits. It’s sturdy, mounts to a wooden base for added stability, and has padded hand grips. You’ll be able to press your hard fruits as well as grapes and other soft fruits. The juice drains from its spout into your container.

We also have the Harvest Apple Fruit & Wine Press that holds 4.7 gallons of fruit, and its larger model that holds 8 gallons of fruit. If you prefer a ratchet model you’ll find it here.

You can drink your juice fresh or turn some of it into cider. We love to cook with cider. One of our dishes is pulled pork that has been slow cooked in apple cider.

Apple Cider Pulled Pork Recipe

4 pound pork butt
2 cups apple cider
1/4 cup cider vinegar
1/4 cup brown sugar
1 tablespoon apple pie spice

Add everything together in the slow cooker, set it on low, and let it cook for at least eight hours. It will pull apart with a fork as you take it out of the slow cooker.