Category Archives: Fermentation

Beginner’s Guide to Making Yogurt

If you’ve ever tried looking up the instructions for making yogurt on the Internet, you probably became overwhelmed rather quickly by all the different recipes and techniques. It seems like everyone has their own way of doing it. For a beginner, it can be too confusing to sort out what works best–and to anticipate where things might go wrong!

Fortunately, the Homesteader’s Supply staff has come up with a tried-and-true method for making the creamiest, most delicious yogurt ever! Once you try making yogurt our way using any of our yogurt cultures, you’ll never want to eat store-bought yogurt again.

Bavarian_yogurt

A Word about Our Yogurt Cultures

We carry a variety of yogurt cultures, including Bulgarian, Italian, and ABY-2C. The main differences between them are in the flavor and the viscosity. Some are more sweet, and some are more tart. Some are thinner, and some are thicker. If you like a very thick yogurt with a mild, sweet flavor, try our Italian culture.

An Overview of the Process

The process of making yogurt comprises five simple steps:

  1. Heating the milk
  2. Cooling the milk
  3. Measuring and adding your chosen yogurt culture
  4. Incubating the yogurt
  5. Refrigerating the yogurt until it’s sufficiently cooled to eat

Here’s What You’ll Need

You will need the following:

Step 1:  Heat Your Milk

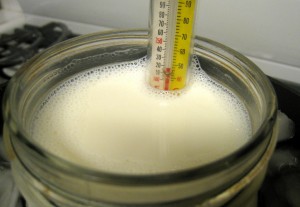
  1. Pour the milk into the stainless steel pot. If using a thermometer that attaches to a pot, making sure the tip of the thermometer isn’t touching the pot. (If using a digital thermometer, follow the manufacturer’s instructions.)
  2. Gently heat the milk on medium until it reaches 180 degrees Fahrenheit.  Then turn off the heat and remove the pot from the burner.

Be careful not to overshoot 180 degrees. It’s better to go slowly rather than to try to turn up the heat too much and then not be able to get the temperature to stop climbing too fast.

Step 2: Cool the Milk

Allow the milk to cool to 115 degrees Fahrenheit. You can do this by allowing the pot to sit on the stovetop (if cool) or counter. Alternatively, immerse the pot in a cold water bath to speed up the cooling process. If you choose to do this, however, be sure monitor the temperature very carefully so the the milk doesn’t cool below 115 degrees!

yogurt_110

Yogurt culture is similar to yeast in that the milk needs to be within a certain temperature for the culture to work properly. If the milk is too hot, it will kill the yogurt culture. On the other hand, if the milk falls below 100-115 degrees, the culture won’t get activated.


Step 3: Measure and Add the Dried Yogurt Culture

The amount of dried yogurt culture you need depends on the amount of milk and the type of culture you’re using. For example, in this recipe we are using two liters/quarts of milk, so we can use one envelope of our dried Bulgarian yogurt culture. If you are using a different type of yogurt culture, be sure to read the package directions to determine how much to you need.

Once you’ve measured out the appropriate amount of dried yogurt culture, add it to the cooled milk as described below.

It’s important to mix the yogurt culture in very thoroughly; otherwise, your yogurt might separate. The most reliable method is to start by sprinkling the dried yogurt culture on top of the warmed milk and letting it sit there for a minute or so until it dissolves. When the dried culture has dissolved completely, mix it into the milk. Make sure the culture is distributed evenly throughout. If you start mixing before the dried culture has completely dissolved, it can clump; and then you won’t be able to mix it in thoroughly.

Step 4: Incubate the Yogurt

It’s important to keep your yogurt as close as possible to the ideal temperature of 105 degrees for at least 10 to 12 (or up to 24) hours so the beneficial, health-promoting bacteria in the culture can multiply. This process is called incubating the yogurt. The longer you incubate the yogurt, the fewer carbohydrates it will have because the bacteria feed on the sugars naturally present in the milk. And, a longer incubation period results in thicker yogurt!

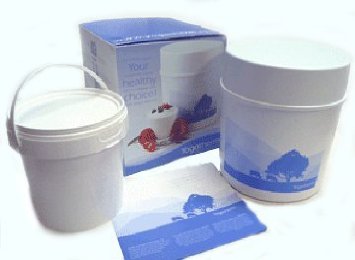
This step is easy if you have a Yogotherm or VitaClay yogurt maker. All you have to do is transfer the yogurt into the provided container and follow the manufacturer’s directions.

yogotherm

Things can get a little trickier if you don’t have a yogurt maker, but it’s still relatively easy to set-up your own incubator environment using readily available supplies. Be sure to transfer your yogurt into an appropriate container first! Large Mason jars are a good choice,

We recommend insulating the container of yogurt with towels and placing it in a cooler to keep the heat from escaping. You’ll want to fill any extra air space in the cooler with additional towels (or clean rags) to maximize the insulation. Then, set the cooler in a very warm place.

Ideally, you want to keep the temperature of the yogurt as close to 105 degrees as possible during the incubation period. Under normal conditions, the temperature will drop very slowly over time. It probably won’t fall below 80 degrees, though, and that’s okay.

Step 5: Refrigerate the Yogurt

When the incubation period is over, your yogurt is ready to be refrigerated. If you’re using Mason jars, be careful the temperature doesn’t drop too quickly or the jars might crack.

Allow your yogurt to cool in the refrigerator for at least six hours. During this period, the yogurt will thicken. If the yogurt has separated, you can stir the liquid back in.

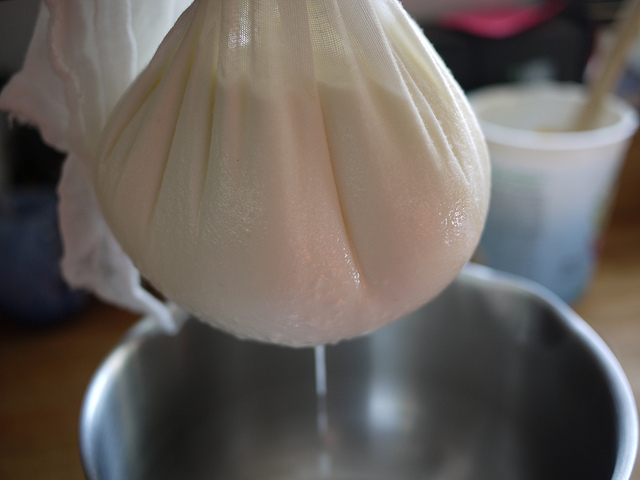
For thicker yogurt, you can drain off some of the whey. The easiest way to do this is by using cheese cloth to strain it. You can put the yogurt in cheese cloth and hang it over your kitchen faucet, or suspend it over a bowl and let it drain until the yogurt becomes very thick. If you let most of the whey drain out, you’ll end up with delicious yogurt cheese! Simply scrape the yogurt off the cheese cloth, whip it until it becomes very smooth, and then add herbs, spices, honey, or whatever flavorings you like. Place it in the refrigerator to cool, and in a few hours you’ll have scrumptious yogurt cheese! It’s delightful on crackers, with chips, on sandwiches, etc.

yogurt cheese

Incidentally, some folks like to thicken yogurt by adding a few tablespoons of powdered milk before heating the milk; however, some experts claim that powdered milk has damaged proteins and recommend avoiding it.

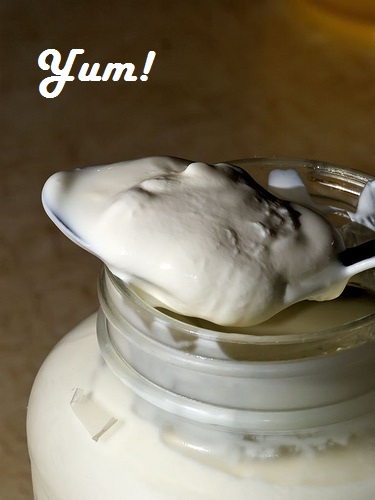
When your yogurt is nice and cool and has reached the desired consistency, it’s ready to eat. You can enjoy it with fruit or whatever flavorings or sweeteners you like.

yogurt_spoon


What the Heck Is a SCOBY?

Once you try your first bottle of store-bought kombucha, you’ll probably become a fan for life. No, wait…scratch that. If you’re anything like me, you’ll get hooked and become a die-hard kombucha addict! At $4 (or more) for a 16-ounce bottle, your habit is going to become more expensive than a latte fixation. And then, before long, you’re going to find yourself Googling “how to make your own kombucha at home,” just like I did.
booch

For the uninitiated, kombucha is a fermented beverage made from sugar, tea, and a living kombucha culture. Unflavored kombucha is both slightly acidic and slightly sweet. The longer you brew it, the less sweet it becomes because the kombucha culture continues to feed on the sugar in the tea and uses it up.

When brewing is complete, you can add ingredients like ginger, herbs, dried fruits, dried flowers, or extracts to flavor the drink to suit your personal preference. Fizzy and refreshing, kombucha makes a terrific substitute for commercial carbonated sodas.

Kombucha Is a Health Tonic*

Kombucha detoxifies the liver and dramatically boots immune function. Like all fermented foods, it’s alkalizing and makes the body more resistant to degenerative diseases and cancers.

Kombucha drinkers report a wide variety of health benefits, including improved digestion, weight loss, improved energy, and reduced stress. Many claim that itcures constipation, skin problems, and hangovers. Some people even notice that kombucha restores hair color and strengthens the hair.

The wide variety of complaints relieved by Kombucha is almost not comprehensible. But it is explainable on the basis that Kombucha does not target a specific body organ but, rather, influences the entire organism positively by effecting a stabilization of the metabolic situation and the detoxifying effect of its glucuronic acid. In many, this leads to a heightened endogenic defense capacity against those toxic influences and environmental stresses which inundate us from many sides. The result is the invigoration of a damaged cellular metabolism, and the restoration and firming up of one’s well-being. 

~ Gunther W. Frank, leading authority on kombucha tea and author of Kombucha: Healthy Beverage and Natural Remedy from the Far East

It All Starts with a SCOBY

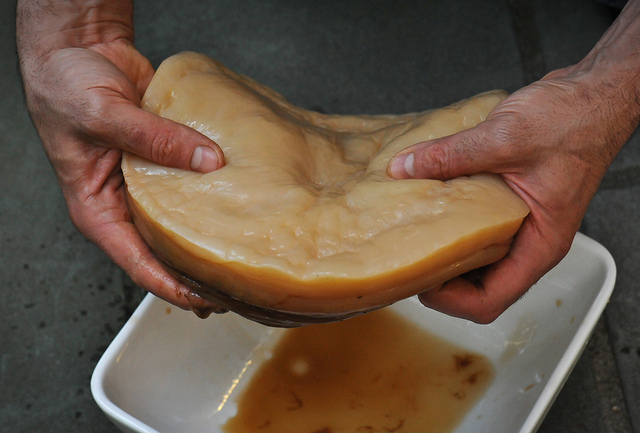
One of the first things you’ll discover is that the kombucha brewing process begins with a weird, slimy thing called a SCOBY. Remarkably, the SCOBY — which looks like a flat rubbery mushroom — is what gives kombucha its famous, health-promoting benefits.SCOBY stands for Symbiotic Culture of Bacteria and Yeast, and it’s the secret ingredient that turns sugar-sweetened tea into kombucha.

All over the internet, you see kombucha brewers obsessing about their SCOBY. Is it healthy? Does it float? Does it sink? Does it stink? Does it have black spots? The list of things people worry about is practically endless. But, truthfully, there’s no need to worry if you start out with a top-notch SCOBY and follow the directions carefully.

shroom
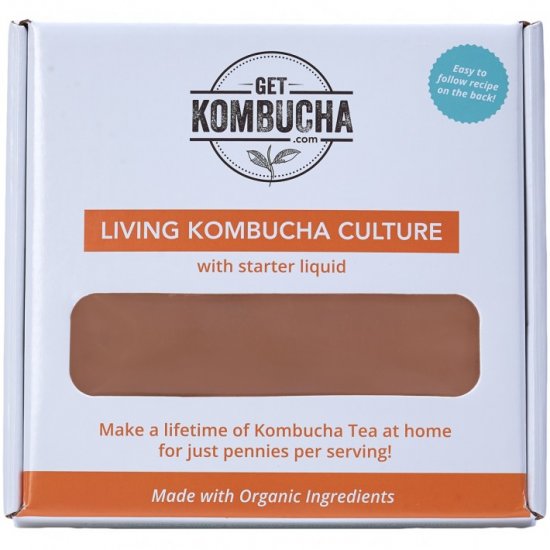
Our kombucha making supplies are of the highest quality, and we think our SCOBY is the best on the market. We get our freshly grown, organic SCOBYs from Kombucha Dave, and when you buy your kombucha products from us, you get a discount, plus all the instructions, videos, and support you need to brew your own kombucha for life.

SCOBY
About the Brewing Process

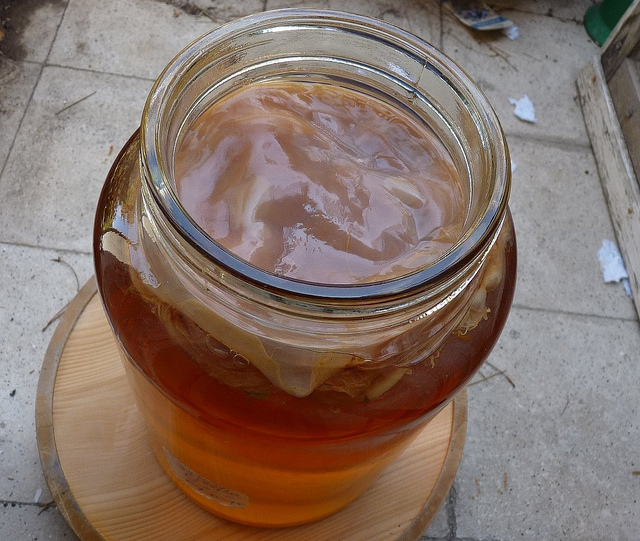
Simply stated, to make kombucha, you add your SCOBY to a gallon jar containing sweetened tea that has been allowed to cool. It starts out looking like this:
jar

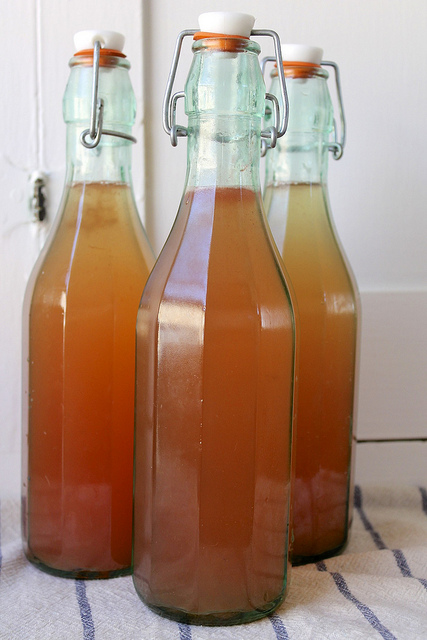
Then cover it, and let it sit in a clean, warm place like on your kitchen counter. In a few days, it’ll be ready to drink. Best of all, you’ll have an unlimited supply of kombucha for just pennies a bottle.

Bottoms up! bottles

By the way…

Our good friend Kombucha Dave has a fascinating article on his blog where he talks about why a SCOBY is sometimes mistakenly called a mushroom. He has kindly given us his permission to republish it here. Enjoy!


Is Kombucha Really a Mushroom?

One of the most frequently asked about Kombucha is, “Is kombucha really a mushroom?” It’s because most people call it Kombucha mushroom. Some people call it Kombucha SCOBY. But kombucha mushroom is the most common. So, is it really a mushroom?

kombucha mushroom

No it is not, maybe at most it could be called fungie, or a type of fungi. I’m a type of fun guy, but again you can call it a Kombucha mushroom, we refer to it sometimes on our site as mushroom tea, mainly because that’s how other people refer to it. So if you’re at a party and someone says, “oh this kombucha mushroom tea is awesome”. Don’t take the bottle and spill it on them and say it’s not really a mushroom, but let’s talk about how it got it’s name then.

How did Kombucha turn into mushroom? Well the theory is, the story goes like this, in Japan, they were brewing something with seaweed and ‘Kombu’ actually means seaweed in Japan and ‘cha’ means tea. So it was originally called seaweed tea, and they were using seaweed, it wasn’t Kombucha, but a culture came about. Something to keep in mind, there’s lots of things to ferment that will form a culture, but not necessarily makes it Kombucha, make sense?

A mother vinegar forms a culture, you have sour dough starters, wine uses cultures and things like that, so eventually what happened kombucha mushroomis that at the same time, people were also doing Kombucha tea. They saw the culture, so I’m looking at the seaweed culture we called Kombucha and I’m looking at this Kombucha culture and I’m just going to label it Kombucha, so there you go. In addition to that, to make things even more confusing, if you ever look at a Kombucha SCOBY or a Kombucha culture, I kind of think it does look like a cap of let’s say a portobello mushroom, so again hopefully that answers your question, is Kombucha a mushroom.

Also, I’d like to think that it is called kombucha mushroom because it looks like a mushroom and the texture is similar to a mushroom’s texture.


* Per FDA regulations, we can’t tell you about the health benefits of kombucha without also disclosing the following:

Legal Disclaimer  Information about the health benefits of kombucha is for educational purposes only. These statements have not been evaluated by the FDA. This information is not medical advice, nor is it intended to replace the advice or attention of a qualified health-care professional.

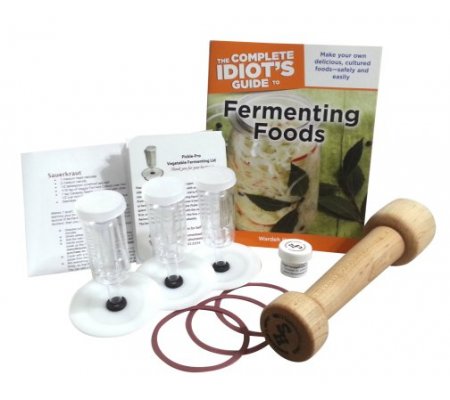
We’re giving away a Fermenting Kit!

Celebrate the Harvest

It’s Homesteader’s Supply week! We are giving away the Fermenting Kit AND a $35 gift certificate!

fermenting kitHomesteader’s Supply and Countryside & Small Stock Journal invite you to preserve the harvest and reap the many gifts the earth provides this time of year. Click on the photo or link above to enter.

Enter weekly to win a prize package from one of our sustainable living sponsors. Your weekly entry will also be included in the grand prize drawing (value of $5,000) in September!

cys-harvest-FB-variants-1


Sprouting Wheat Berries

Sprouting Wheat Berries

Thanks to Ida Walker from The Enabling Cook for guest blogging with us this week! Ida is sprouting wheat berries and leads us through the process, step by step.

For many of us who bake our own breads, the next logical step is to grind our wheat into flour. And once we start grinding our own, it’s on to sprouting. Many of us sprout pea shoots, mung beans, radish greens and the like, but we may not have thought about sprouting wheat berries for our flour. Though I have to confess my motivation for trying many things do not revolve around health benefits. But if I can get some benefits, why not? Nutrients, like vitamin C, are added when wheat berries are sprouted. Some people who have difficulty with wheat find products made with sprouted grains more tolerable. According to some experts, whole wheat or partial whole wheat bread is fluffier when made with sprouted grains than all regular, whole wheat flour.

whole wheat berries, sprouting wheat berries

Turkey Hard Red Winter wheat berries in their overnight soak

sprouting wheat berries

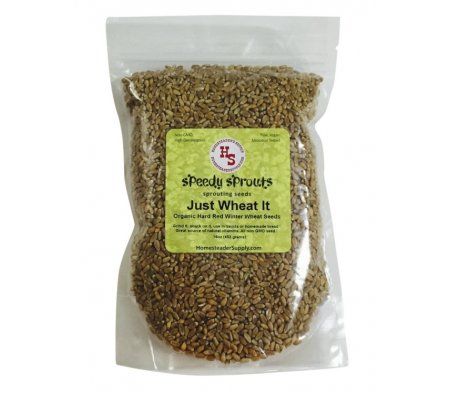
You’ll want hard red or white wheat for bread.

sprouter, sprouting wheat berries

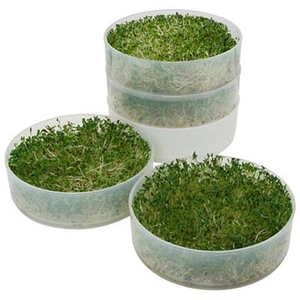
Our four tray sprouter is economical and handy.

Rinse the berries well, and put them in your sprouting container of choice. No metal, please. You can buy special equipment called sprouters. Since I’m a canner, I always have wide-mouth jars on hand. So I bought a sprouting lid that fits most such jars. You don’t need a special lid, though. You can always cover the opening with a clean piece of nylon stocking or cheesecloth. Add the jar ring, and you’re set. If you don’t have canning jars, you can put the seeds in a colander set in a bowl. Be sure to cover it with a clean towel or cheesecloth. sprouting wheat berries

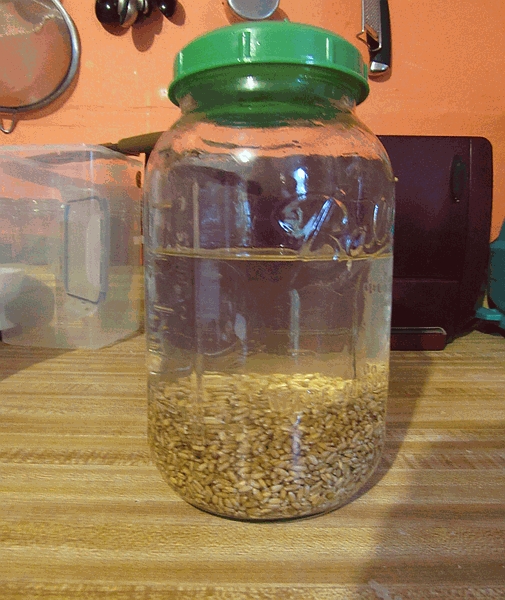
Once you have your container, add the wheat berries. Make sure to leave space for expansion. I filled the quart jar about 1/3 of the way. Then cover with filtered or spring water. The next day, drain your berries and fill the jar with clean water, to the shoulders of the jar (if using). Because the water will be draining, you don’t need to use filtered water. Unless your tap water is suspect, it’ll do just fine. sprouting wheat berries

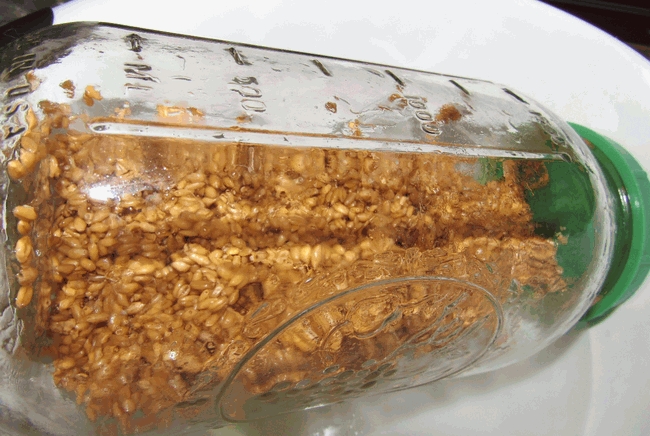
Drain the berries and rinse. If you’re using a colander, cover the berries and set over the bowl. If you’re using a jar, pour enough water into the jar to cover the berries by about 2 inches. Put on a lid and slosh (technical term) back and forth a couple of times. Set up the jar so it’s at an angle, which will let the water drain. I usually set mine in the sink, but since it was otherwise occupied, I put it in a large bowl. You’ll need to shake the jar a bit so more of the berries are exposed. Make sure they don’t block lid. Drain and refill 3 or 4 times each day; if you’re using a colander, you may need to do so more often. Your goal is to prevent the berries from drying out and to expose as much surface area as possible. sprouting wheat berries

sprouting, wheat berries

Sprouting complete

So when are they ready? They’re ready when the tails are still short, about 1/8 of an inch. If you’re using them for salads, etc., they can be longer. But if you’re planning on using the seeds for flour, keep them short. You’ll get more flour if you do not let the tails grow longer. How long does it take? It depends. This time it only took a couple days. In the winter, it takes longer, but then I have a really cold kitchen. sprouting wheat berries

If you’re going to use these sprouted berries for flour, the next step is drying. This can be done in a 150-degree oven or in a dehydrator. I used the latter at 95 degrees. It took about 2 hours at that temp, and I had the trays full of berries. sprouting wheat berries

sprouting, wheat berries, sprout flour

Sprouting wheat berries, then making flour!

Once the berries are dry, there are 2 options. You can put them in an airtight container and freeze them for later grinding. Or, if you’re like me and figure you’ve waited long enough, grind away! Use your grinding implement of choice. If you’re using an electric mill or blender, the berries will get heated in the process. Many, including me, put the berries in the freezer for a while before grinding.

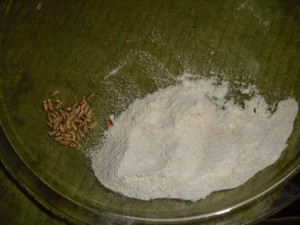
How much flour will you get from your berries? The amount of flour your berries will provide depends on how finely you grind them. From 606 grams of berries, I got 600 grams of flour. Not a bad return! Store any newly milled flour in a bag or airtight container in the freezer. I use a vacuum sealer. sprouting wheat berries

This process was fun. Seriously. The hardest part was waiting for the seeds to sprout. It’s worth the wait, however, as I have organic sprouted flour for my bread.

Thank you again, Ida! Please be sure to visit Ida at The Enabling Cook. You’ll love her website, recipes and tips.

In the Kitchen with Prepper Pro

In the Kitchen with Prepper Pro

Prepper Pro w/ Logo

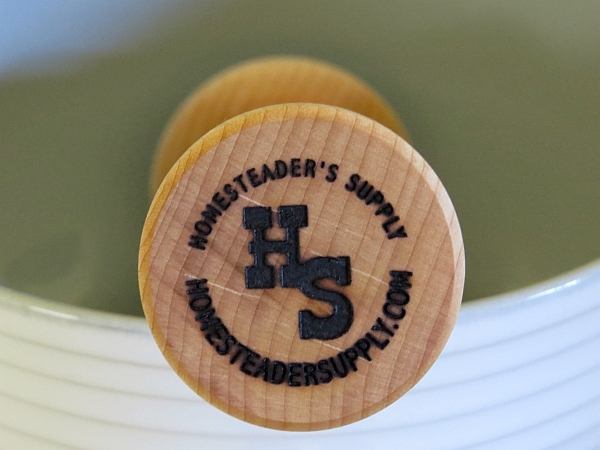
The Homesteader’s Supply logo is branded on each Prepper Pro

This morning I woke up with enthusiasm and dread. It’s a food day. Mushrooms needed to be cleaned and dehydrated. Beans were waiting to be picked, blanched and frozen. The blueberries were taken out of the freezer last night to thaw and needed to be made into jam today. I knew I’d be working with the Prepper Pro today. I waited until it arrived in the mail to make jam. When it was time to put it to use in the blueberries, I hesitated.

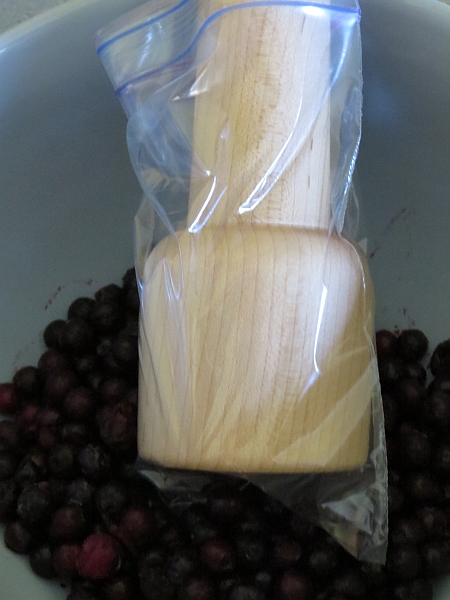
The  Appalachian Maple wood is treated with raw, organic coconut oil but I wasn’t sure the blueberries wouldn’t stain it. It’s such a beautiful piece that I didn’t want to take chances with it. I thought about wrapping it in Saran wrap but wasn’t sure it would stand up to two quarts of blueberries without slipping. I opted instead for a zippered sandwich bag. It worked perfectly to protect the wood.

A zippered sandwich bag protected the Prepper Pro from being stained.

A zippered sandwich bag protected the Prepper Pro from being stained.

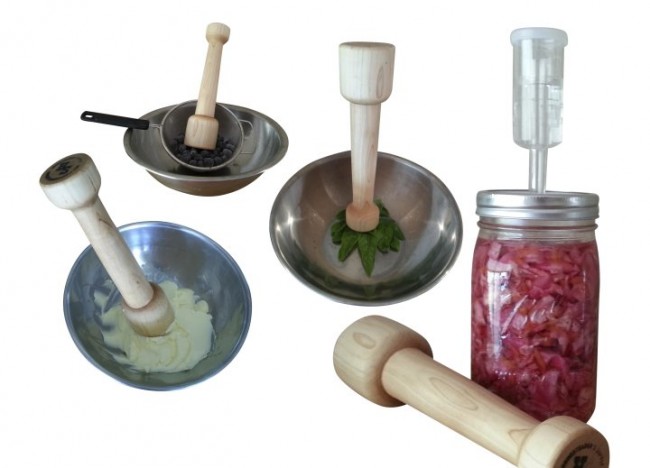
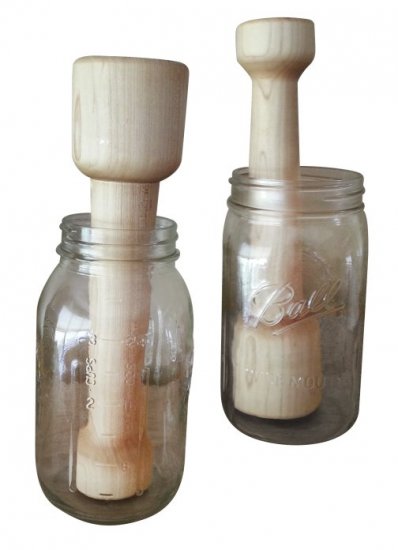
I won’t use the bag when I grind dehydrated Chanterelle mushrooms into powder or when grinding herbs. I’ll be pulverizing wild mint later this week. The large end (pictured above) of the Prepper Pro fits into a wide mouth canning jar. The smaller end fits into a small mouth jar. As I used it I thought of more ways I’ll use this new tool of mine.

Prepper Pro Sm_03

The Prepper Pro is another of our new products that was designed by Jerri, owner of Homesteader’s Supply, and is being made locally from locally sourced Appalachian maple trees. It’s well balanced, smooth as can be, and fits comfortably in my hands.

You can purchase the Fermenting Kit that comes with:


The Prepper Pro fits into small and large mouth canning jars.

The Prepper Pro fits into small and large mouth canning jars.

Prepper Pro

I’ll be mashing strawberries, raspberries and blackberries I’ve frozen to use later. There are always herbs to grind, both fresh and dehydrated. And I think I’ll give a grind or two to my loose, dried tea blends to wake them up a bit before putting them into the tea ball. I’ll be using this for more than packing my jars when I make sauerkraut. I washed the Prepper Pro when I finished using it, applied more organic coconut oil, and put in easy reach on the shelf. This is going to be used often.

And I’ll be adding the Prepper Pro to a few Christmas baskets this year. I have friends who’ll put it to good use!

Sheller and Pitter and Shredder – Oh My!

These three items are featured in this week’s newsletter. Sheller and Pitter and Shredder – Oh my! Have we got what you need for mass food production!

Mr. Pea Sheller

Mr. Pea Sheller will shell your peas and beans. It’s fast, safe to use and built to last.

Cherry Stoner, Jr

Cherry Stoner, Jr makes quick work of stoning cherries by nearly effortlessly removing the stones from up to five cherries at a time. There’s no need to be careful to load the cherries just right, the Cherry Stoner, Jr can handle it.

Deluxe Cabbage Shredder

The Deluxe Cabbage Shredder is great for church suppers, sports clubs, restaurants and diners and other folks who make large batches of coleslaw, kimchi or sauerkraut. Cooperatives and groups of friends might get together to buy the Deluxe Cabbage Shredder to share.

Coleslaw Recipe

The sauce for coleslaw is key to making the best slaw possible. This recipe is easy to remember when you’re in the middle of cooking for a big dinner.

1 part vinegar
2 parts sugar
4 parts mayonnaise

Every cup of mayo gets a half cup of sugar and a quarter-cup of vinegar. That’s it. Mix it up, pour it over shredded cabbage and carrots and you’re done.

One cup of mayo will coat one to two pounds of cabbage depending on how creamy you like  your slaw.