Tag Archives: homesteading

Preserve the Harvest! Let’s Celebrate

Celebrate the Harvest

cys-harvest-twitter

Homesteader’s Supply and Countryside & Small Stock Journal invite you to preserve the harvest and reap the many gifts the earth provides this time of year. Click on the photo or link above to enter.

This week’s prizes are a one-year subscription to Countryside & Small Stock Journal, a FD-61 food dehydrator, and a box of Pomona pectin.

Enter weekly to win a prize package from one of our sustainable living sponsors. Your weekly entry will also be included in the grand prize drawing (value of $5,000) in September!


Getting Started in Beekeeping, Part II

This week’s blog was written by Dave Lenweaver. It’s the second part to last week’s blog, Why Now is the Perfect Time to Start Beekeeping.

How expensive is beekeeping?

You can get your start in beekeeping with equipment for about $200-$250, the bees will be another $120-$150 depending on your area and if you buy nucs or packages.

New beekeepers should start out as early in the spring as one can obtain bees. This gives the bees a chance to build up and be ready for nectar and pollen season, at least in the norther parts of the country. Southern parts of the country have longer nectar and pollen seasons and you may be able to start later.

If the colonies are weak going into winter you stand a good chance of losing them to cold or starvation. Hive loss can be as great as 60% of an apiary without the challenge of a weak colony so be prepared with good strong bees.

In addition, you will want to have at least two additional supers per colony ready to add when the nectar is flowing or the bees want to swarm. Beekeeping is no fun when you are scrambling to find equipment to add to a packed colony.

None of these costs include an extractor, which can cost as little as $150 or as much as $1,000 and up.

Is beekeeping time consuming?

Yes and no. For the most part you will install your bees and walk away with occasional checks on the colony for pests and overall health of the colony. you should check your bees every week to two weeks, which as you become more experienced will take as little as 10 minutes per hive to as long as 30 minutes if you are nosy. As you progress you’ll soon realize that the less you poke about the better off the bees are.

When your bees have made enough honey for you to harvest your time investment will increase. Count on at least an afternoon if you have only one colony, longer if you have more.

You’ll also find you are thinking about the bees way more than you would have imagined.

Wrap up

With beekeeping it’s a guarantee you will learn patience. When you are checking the hives you need to move deliberately, slowly, and with purpose. The bees can sense when you are pushing it. You’ll also learn more about the natural world around you such as when trees blossom and their names and characteristics as well. Through beekeeping your interest in other insects will be heightened as you see other bugs in the garden or apiary.

You’ll come to better appreciate the seasons as well. You’ll long for the cherries to blossom and know that the apples, dandelions, and locust trees are coming into bloom soon.

As you can see there are many variables to beekeeping. It can be an exciting hobby while being frustrating at the same time. You’ll jump for joy when you see the queen or evidence she is laying eggs and experience sadness when the colony you nursed through summer dies in the winter. This is the natural world and it isn’t always what we want.

Beekeeping is not difficult, nor is it easy. Especially when things start to go wrong. However, it can be a great teaching experience for children and adults helping to bring families closer together.

Recommendations

Read, read, read, and read. When you are tired of reading watch Youtube beekeeper videos. One needs to be as fully informed as possible going into this hobby. We waited six years before starting our apiary so we would be positive we knew what to expect.

Start with two colonies. Nucs from a local supplier would be my preference. They are accustomed to your local climate and have a better chance of surviving cold or inclement weather. Package bees from Florida or California would have a more difficult time making it through a harsh winter. Two colonies gives you something to compare against as well. If one is strong and one is weak find out why.

Have extra equipment on hand. When the nectar starts flowing or the bees look eager to swarm is no time to go online and order new supers and frames. Have them ready.

Learn to use your judgement and intuition with the bees. You can learn from others’ good ideas and from things that seem real dumb as well. Let someone else do the dumb thing while your bees stay safe and you learn from it. Be aware.

Enjoy the bees. Relax. Grab your tea or coffee, take a chair out to the apiary and watch the bees as they go about their daily activity. Your presence is of no concern to them as you sit to watch them come and go. The big lesson from observation is the bees are fine without our intervention. We are there to assist them when needed and learn of the natural world around them when not. Be silent and enjoy their humming, sniff the air to smell the blossoms and the odor of the hive. Look at the ground to see what new insect you find.

Nature is an amazing teacher and beekeeping can be a portal to a better understanding of the world around us. Enjoy.

Why now is the perfect time to start beekeeping

This week’s blog is a guest blog written by Dave Lenweaver from Clean Slate Farm. Grab a cold drink before you visit Dave and Joanne’s website. There’s so much interesting information there you’ll want to stay a while.

Why now is the perfect time to start beekeeping

beekeeping, honey beeOkay, that’s a little misleading but very good advice. With all the news about honey bees dying and Colony Collapse Disorder (CCD) it seems everyone wants to start beekeeping. But before you jump in here’s some advice from a second year beekeeper.

Take your time and learn as much as you can before getting bees. Being surrounded by thousands of apparently angry, buzzing bees while checking the hive is not the time you want to learn the basics.

beekeeping, honey beeStart with reading everything you can get your hands on about beekeeping. Some good books to begin with are:

Beekeeping for Dummies, The Backyard Beekeeper by Kim Flottum, The Practical Beekeeper by Michael Bush, and my favorite, Natural Beekeeping by Ross Conrad.

Beekeeping is a hobby of constant learning, and the most important thing you will learn is patience. Which is why you should start reading at least a year in advance of beginning your journey into beekeeping. Any of the above books will give you ample advice and you’ll will find much of it consistent.

There are also many excellent Facebook and Google+ groups dedicated to beekeeping. The moderators of these groups, and many of the participants, are knowledgeable and willing to offer advice on starting up your apiary. Don’t be afraid to ask questions and expect many different opinions. As is so often said in beekeeping circles, ask ten beekeepers a question and you’ll get twenty opinions.

Youtube is an excellent resource as well. You will see many interesting, insightful, and strange practices. Watching Youtube videos is one of the best ways to see what beekeeping is all about and how it is done. Do a search for any aspect of beekeeping and you’ll be informed on how to perform that task. You’ll also find many amusing videos of what not to do.

What you’ll learn from all this reading

All of this information may seem confusing but it’s helping you determine what kind of beekeeper you want to be and will be. In this period of time you’ll learn what makes sense to you and more importantly, what doesn’t.

However, there are some basics no one can dispute. You need at least one beehive and some bees to put in it. A hive is the equipment which houses the bees, a colony is the bees that inhabit the hive. A hive consists of the following:

  •  bottom board
  •  brood chamber
  •  honey super
  •  inner cover
  •  telescoping outer cover

In addition you’ll need:

  • a bee jacket or suit
  • bee gloves, which you may stop using at some time
  • hive tool
  • smoker

Let’s discuss the hive parts in more detail, but not too much. That’s why you’re going to be reading a lot!

The bottom board comes in two configurations; solid and screened. Most hobbyist beekeepers use screened bottom boards for two reasons. The first is for pest management of the varroa destructor mite. A screened board allows you to see any mites which have fallen off the bees and land on a panel below the board. If you see a lot of mites on the panel it may indicate treatment is necessary. This type of board also allows for ventilation of the hive.

The brood chamber and the honey super are the same thing. A wooden box, or body, full of wax foundation where the bees live and make more bees. What it’s called depends on what is happening inside. If the queen is inside laying eggs, it’s the brood chamber; if the bees are building comb and filling it with nectar its the honey super.

These boxes come in three different depths; deep (9 9/16” tall), medium (6 5/8”), and shallow (5 3/4” tall). Some beekeepers use all deep bodies, some all medium bodies, and some use a combination of all sizes. Northern beekeepers may use all deeps to assist in overwintering the colonies. Some beekeepers use all mediums due to weight. A medium body full of honey weighs less and is easier on the back. Then again some beekeepers use deeps for brood and mediums or shallows for honey.

As if to confuse the issue further, bodies can accommodate 10 frames or 8 frames. The choice is up to the beekeeper. Again, this is primarily a weight consideration. A 10 frame deep can weigh 90 pounds when full while a 10 frame medium will weigh in at about 60 pounds.

An inner cover is placed on top of the last super. It may seem like an extraneous piece of equipment but it does serve a purpose. Bees like to seal off cracks and crevices with propolis, a sticky, gummy substance. They do this to seal out light and drafts. Without an inner cover the bees would seal the telescoping outer cover. Propolis is indeed sticky and If the outer cover were to be sealed to the hive it would be difficult at best to remove it without disturbing the bees.

Should I get a nuc or a package of bees?

This is also a subject that causes a lot of debate in beekeeping circles. A nuc, short for nucleus hive and pronounced nuke, is a box of bees with 5 frames of comb, a mated queen, brood in chambers, with workers and foragers all ready to go.

A package of bees contains about 10,000 bees in a screened in box with no frames of comb ready for the bees to begin collection of pollen and nectar.

With nuc your bees are off to a head start and won’t be wasting time getting up to speed by having to build comb. A package of bees has to start from scratch and it will take from two to three weeks for them to build comb for the queen to lay eggs and for workers to begin foraging.

Nucs are generally local bees of one breed or another while package bees can be ordered in different breeds. In the northern part of the country a nuc may be your better choice because of the head start they have on the nectar flow.

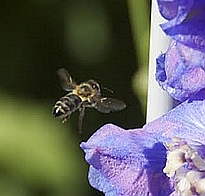
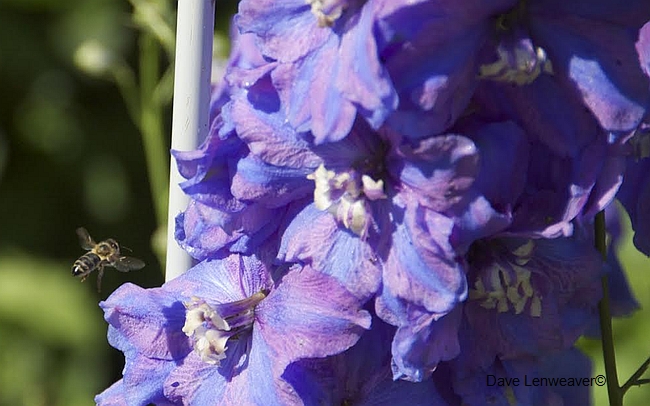
Russian, Carniolan, Italian, oh my!

You’ll soon learn that all bees are not created equal. There are Russian, Italian, Carniolan (car-nee-oh-lahn) and other breeds each with their own temperament and production characteristics. The choice is up to you as the beekeeper, mostly. Sometimes your choice is dictated by what is available. As you read you’ll learn more about each breed to help you make your decision.

Summer Money Saving Tips

Summer Money Saving Tips

I’ve been thinking about my plans for the homestead a lot lately. It’s been more than a year since we moved to Tennessee to homestead and operate Homesteader’s Supply. With such a long list of things to do, money has to be part of the plan. What can we do on the homestead without spending a ton of money this summer? Plenty! We shared Money Saving Tips for Homesteaders last winter, and a second part, More Money Saving Tips for Homesteaders. And now, more ideas! Summer money saving tips.

Summer Money Saving Tips

  1. Eat what you have and avoid the grocery store. Seasonal eating is your chance to gorge on what’s ripe now. I’m a little tired of rhubarb but now that the strawberries are starting to ripen and show up at farmers market, I can add a little variety. The garden is doing well. We’ll probably all be tired of eating the same things often before the next fruit or vegetable is ripe, but we can change it up. Try new recipes. Put up what you can for winter.
  2. Buy seconds from local farmers. You might save a few more dollars if you can pick the fruit or vegetable, or at least pick it up at the farm. Summer money saving tips.
  3. Build inexpensively, but build it well. When you put your building skills to use you should build sturdy and attractive things. In the long run it will last and you’ll be happy with your work.
  4. Co-own. If you need a piece of expensive equipment too often to rent but not often enough to own yourself, consider co-owning. I tried to rent a rototiller three times before I actually got one. I don’t need a rototiller often but when I do, it’s time sensitive. My friend and next door neighbor chipped in and together we bought a tiller. I thought about doing this with a snow blower now that I live in an area with some snow but that’s a little too time dependent.
  5. Wild harvesting is always going to be one of my most favorite money savers. I can pick gallons of berries each summer on a wildlife refuge for the price of a gallon of gas to get there and back. They’re $4 a pint in the grocery store. Summer money saving tips.
    summer money saving
  6. My current favorite money saving tip for homesteaders covers entertaining. We are having a blast. A group of friends take turns hosting potluck. The host supplies the drinks. I didn’t want to buy plastic silverware and tablecloths and paper plats each time it was my turn to host. We sometimes have 30 people at a meal. That’s a lot of settings to buy and throw away. Here’s what I’ve done: Summer money saving tips.
    • Buy inexpensive silverware and tablecloths. Check yard sales!
    • Buy inexpensive plates, serving bowls and glasses. They don’t have to match.
    • Until you’ve built up your inexpensive but nice tableware, BYOS. Bring Your Own Setting.
    • BYOS, Part II. Bring Your Own Seat.
  7. Progressive meals are a lot of fun. Start with appetizers and move from homestead to homestead through the courses. The food doesn’t have to be fancy, just good.
  8. Dessert night. After a long day of chores it’s really nice to get together with friends over dessert. Who needs dinner when you’ve got homemade dessert? Tarts with fresh fruit, cheesecake with fresh cream cheese, cakes, pies, ice cream…

Enjoy the summer! Summer money saving tips.

Foods You Don’t Have to Refrigerate

Foods You Don’t Have to Refrigerate

It’s getting warm, sometimes downright hot. Gardens are starting to produce at least spinach and other cool weather greens that need to be stored in the refrigerator. We have pitchers of iced tea and lemonade taking up lots of room. According to the Food & Drug Administration, refrigerators should be kept at 40°. Not all foods must be kept that cold and for some, it’s detrimental. Here’s a list of foods you don’t have to refrigerate. It might help make room for the foods that do need to be that cold.

Bread is one of those foods you don’t have to refrigerate anymore. It was common back in the days of making ten or 12 loaves at a time. As it turns out, bread won’t mold as quickly in the refrigerator but it does go stale faster.

foods you don't have to refrigerate

Tomatoes, peppers and melons should be left on the counter, out of the sun. Refrigeration causes a breakdown in sugars and acids and changes the texture. Sweeter melons are grown with less water (did you know that?) and kept on the counter.

Herbs store well in fresh water on the counter. Some of them, such a mint, will develop roots if left too long, and the taste will water down. Cut only what you’ll use within a few days for best flavor or dehydrate extra for use later.

Apples and Grapes like to be cool but not cold. Polish them up, put them in a pretty bowl and use them as an edible display. We eat a lot of each when they’re easy to see and reach all the time. My exception to cold grapes in freezing them. I like to freeze them in the summer to use in my lemonade.

foods you don't have to refrigerate

Honey is a natural anti-bacterial (when used topically on wounds). It won’t spoil, and it will take longer to crystallize when kept in a dark cupboard. Molasses is another sweetener that doesn’t have to be refrigerated. There are mixed thoughts on Maple Syrup. I didn’t refrigerate an open quart of real maple syrup (not pancake syrup) and it molded. If you need room you can take the maple syrup out but put it back as soon as there’s room.

And the list of foods you don’t have to refrigerate grows longer! Vinegar based, salty and fermented foods don’t need refrigeration. I like cold pickles but they’re the first thing to come out of the fridge when I need more space.

Eggs are the controversial item on the list of foods you don’t have to refrigerate. Did you know that in many countries eggs are never refrigerated? It’s true. In Europe, farmers vaccinate their laying hens for salmonella bacteria. They don’t wash eggs the way we do here in the United States. we concentrate on washing the shells to keep salmonella out of the egg. Washing removes the bloom that covers the egg as a means of keeping salmonella out. The US has 1.2 million cases of salmonella a year. England and Wales recorded less than 600 casaes in 2009.

Do you wash your un-vaccinated chickens’ eggs? What do you leave out of the fridge? Inquiring minds want to know!

How to Transplant Seedlings

How to Transplant Seedlings

Transplanting seedlings is a matter of seedlings, supplies and patience. Knowing when to transplant is your first step. This tiny carrot seedling has plenty of room and can grow where it is five or six more days if you’re pushed for time.

Carrot seedling, how to transplant seedlings

Carrot seedling

This seedling has it’s first true leaves. You can see the heart shaped cotyledons at the bottom of the plant. The other two are true leaves. It’s time to transplant, especially if the seedlings are crowded. Spacing tiny seeds out to give seedlings adequate space for root and leaf growth is tricky.

Snow Crown cauliflower seedling, how to transplant seedlings

Snow Crown cauliflower seedling

Supplies for Transplanting Seedlings

Most seedlings aren’t particularly fussy. Vine crops have tender stems that snap easily if they are too long during transplanting, and they don’t like to have their roots disturbed. Transplant them from the starting tray into 6″ containers or the garden as soon as they have their first true leaves. They are our exception.

I move seedlings from a 1020 tray (10″ wide by 20″ long) into six packs most of the time. You can use yogurts cups and other containers you’ve kept out of the recycling bin if you’d like.

how to transplant seedlings

Pansy seedlings in a six pack

You need potting medium. ProMix or something similar, the same material you started the seeds in, will work just fine. I recommend adding worm castings or compost to the mix to give the seedlings enough nutrition to last them a month. Dampen the medium and allow it to set long enough to absorb the water it needs and drain the excess.

You might need fertilizer. If the leaves start to yellow the plants are lacking nitrogen. If they’re slow to grow they need an all-round fertilizer. I prefer to give them a weak solution of compost or worm casting tea all the time rather than a bigger dose of fertilizer occasionally. Plants, like us, need to be fed on a regular basis. They’ll slow down if they aren’t being fed.

Gently separate seedlings from each other and the seed starting medium. Leave as much medium as possible on the roots to help minimize transplant shock. Make a divot in the medium that’s larger than the roots and pop the seedling in. If you are transplanting tomatoes you can bury the stem to the first leaves. New roots will form along the stem. Growth will slow for a week or so while the roots get established but in the end it’s worth that extra week’s wait. Peppers, brassicas (broccoli, cauliflower, cabbage) and other plants that don’t form roots on the stem planting just above the roots is enough. Leave more room in the medium for roots to grow.

Gently fill medium in around the roots and when done, water all seedlings enough to settle medium and soil into their new home. Avoid direct sunlight and wind for a week to allow the plants to recover from being moved. Transplant shock can stress plants to death. If you’ve transplanted seedlings into the garden you can give them shade with floating row cover or by planting them larger plants later in the growing season. Happy gardening!

Joining Homestead Blog Hop #29!