
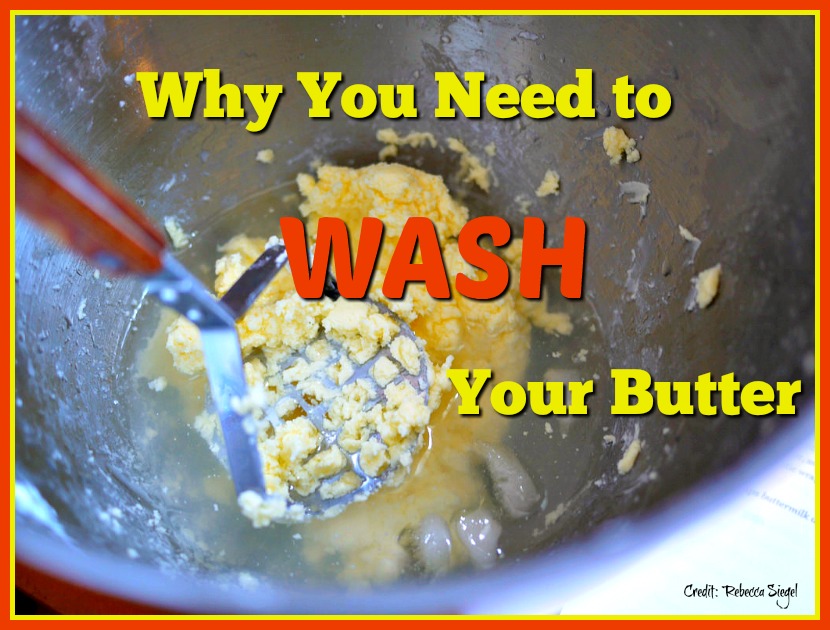
 Have you ever been told that it makes no difference whether or not you wash your homemade butter? Do you think it really matters all that much one way or the other? Wouldn’t it be easier and faster to skip the washing step and just work the buttermilk out of the butter?
Here are the answers to the above questions:
- They lied.
- Yes, it actually matters a lot.
- Um, that would be a NO.
Are you surprised by any of these answers? If not, then you’re an expert butter maker. Congratulations!
Let’s take a look at the science of butter-making to see why washing the butter is a critical step in the process. An effective way to determine whether a procedure is important is to find what happens when it doesn’t get done. That’s a good place to begin our discussion.
What Happens If You Don’t Wash Your Butter
In his pamphlet entitled “Scientific butter making,” originally published in 1884, Mr. W.H. Lynch said the following:
“The reason why the dairyman washes butter is to remove all foreign matter and retain all the butter with its aroma unaffected. When the buttermilk is drawn off and the butter left in the churn, the latter is still surrounded with many impurities, of which particles of buttermilk are most numerous, also particles of casein or cheesy matter. This latter matter is more liable to spoil or become tainted than the butter itself.”
Wow! It sure sounds like a lot of bad things can happen if you don’t wash your butter. Let’s take a look each problem individually.
Unwashed Butter Contains Casein
Mr. Lynch is saying that even if you drain off the buttermilk, other impurities will be left behind–namely, casein. Casein is the main protein found in milk. It has a cheesy texture that sticks to the butter. After draining off the buttermilk, you could continue to work the butter until all the buttermilk was worked off, but your butter would still have casein in it. The only way to get the casein out of the butter is by washing.
Casein Causes Butter to Putrify
According to Mr. Lynch, butter becomes rancid when it comes in contact with oxygen in the atmosphere, but casein becomes putrid. And putrification occurs much faster than oxidation. So, if you don’t get the casein out, your butter will become putrid long before it has a chance to go rancid.
Unwashed Butter Has a Broken Grain
Washing butter before you work it preserves the grain of the butter. But if you choose to work the buttermilk out without washing the butter first, the grain of the butter is very likely to break. When its grain is broken, butter has a salvy appearance. When cut with a knife, instead of having a bright and shining appearance, it will appear (in Mr. Lynch’s words) “dull as lard.”
Washing butter to remove all the buttermilk and the casein preserves the grain of the butter. The grain is a such key factor in the composition of butter that it’s impossible to have a fine-quality butter without it. Therefore, we must take extra care not to injure the grain in any way.
Unwashed Butter Has a Peculiar Flavor
Unwashed butter always has a little buttermilk clinging it, which gives it a peculiar flavor–even when fresh, even before the casein has begun to putrify. Washing removes all this foreign matter and leaves the butter tasting fresh and pure.
Some folks contend that washing butter washes out its aroma and natural yellow color. However, that’s not true. The flavor of butter is in the fat, which does not combine with water and therefore cannot be washed away. Water removes the impurities from the butter by the mechanical action of agitation. Washing butter the correct way doesn’t cause it to dissolve.
Now, if the butter were to be kept in water for a long time, it’s color and aroma would be removed. However, with simple washing, the butter is not soaked. Washing butter doesn’t remove anything that would be desirable to retain.
How to Wash Your Butter
Mr. Lynch advises leaving the butter in its granulated state. In other words, don’t try to gather it up into a ball before washing.

Buttermilk must be washed out until the water is clear.
Begin by pouring off the buttermilk. Then add a quantity of pure, ice-cold water. Agitate the butter with the water until it gets cloudy. Pour off the water, then add fresh, ice-cold water again and agitate a second time. When the water is cloudy, pour it off. Add ice-cold water again and agitate a third time. Continue washing the butter in this manner until the water no longer looks milky. Finally, pour off all the water. Now your butter is ready to be worked.
How to Work the Butter
It takes a lot of effort to work the buttermilk out of butter that hasn’t been washed. By comparison, working the surplus water out of butter that has been washed is much easier. And because you don’t need to work butter nearly as much when it has been washed first, there’s little chance of overworking it. Overworking is what breaks the grain and ruins the texture, and gives it a salvy appearance.
To separate the butterfat from any remaining water, press the butter with the back of a wooden spoon (see photo below). Alternatively, you can use a metal spoon or a fork. Our wooden Prepper Pro is yet another excellent option. Each end of the tool is a different size, so it gives you more control when pressing. Plus, it’s more comfortable in your hand than using a spoon.
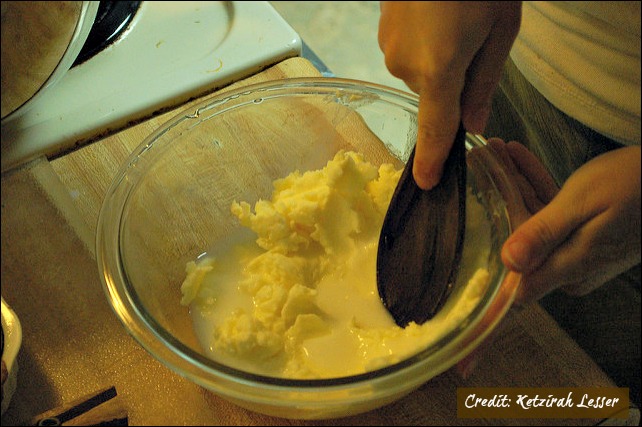
Squeezing the buttermilk out of the butter.
As the water separates from the butter, pour it off. If the butter happens to get a bit too warm while you’re working it, add a little ice-cold water to bring it back to the desired hardness. This will help preserve its buttery color.
Continue pressing until all the water has been removed. When you’re done, you will have a fine quality butter with a perfect grain and no foreign matter.
Now your butter is ready to be used or stored. Because the casein has been removed, there’s no concern that the butter might become putrid. When made using this method, butter never requires salt to help preserve it.
How to Store Your Finished Butter
Normally, you can keep butter out for several days without it going rancid. It’s impossible to say how long the butter will stay fresh at room temperature because it all depends on the environment. Exposure to heat and light will make butter go bad faster. Wrapping butter helps it stay fresh longer.
Another effective way to help butter stay fresh longer at room temperature is to keep it in a butter crock or a ceramic butter bell like our white porcelain butter keeper (see below). Adding about an inch of cool water to the base of the butter bell forms a seal that keeps out air. Because a butter bell keeps butter cooler and protects it from air and light, your butter can stay fresh for up to 30 days. Nevertheless, we recommend you keep out only as much butter as you’ll need for the next few days. Refrigerate the rest in an airtight container to ensure optimum freshness.
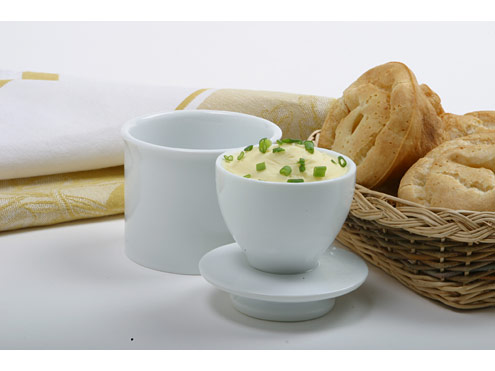
Adding a little water seals out air, keeping butter soft, sweet and spreadable for up to 30 days.
You might want to form your butter into blocks before you store it. Our Sweet Mary’s wooden butter mold (see photo below) lets you press up to a pound of butter at a time. You control the size of the blocks by how far you pull back the press. Pull it all the way back to mold a pound, or just halfway for a half-pound block. With our Sweet Mary’s butter mold, you can press room temperature butter over and over without having to soak the mold or freeze the butter!
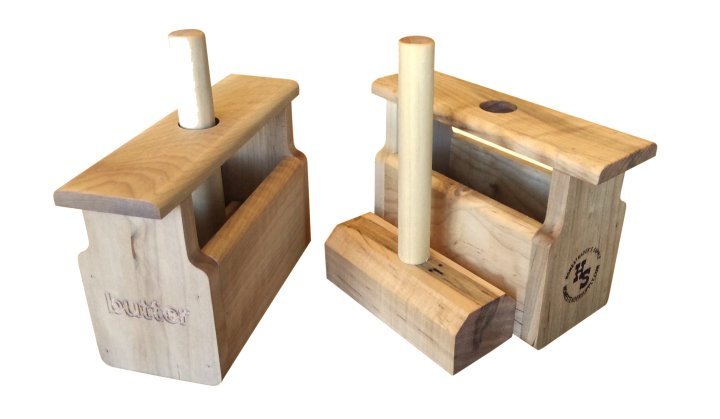
Press and mold up to a pound of butter in our Sweet Mary’s butter mold.
How Long Will Butter Keep in the Refrigerator?
For optimal freshness and flavor, and to keep it from picking up odors, the California Milk Advisory Board recommends keeping butter wrapped and stored in the coldest part of your refrigerator. The butter experts at Land O’Lakes advise against storing butter in the butter box on the inside of your refrigerator door because that spot is warmer than other areas of the refrigerator.
Typically, refrigerated butter will keep for up to four months. You can freeze it for up to a year without affecting the flavor or texture.
What If Your Butter Tastes “Off”?
Some variation in the flavor of butter is normal and depends on the cow’s diet. The butter from a cow that ate alfalfa before she was milked will taste different from butter from a cow that ate weeds. If two cows eat the exact same diet but are kept in different barns, their butter will taste different because the smell of the barn affects the flavor, as does the length of time since the cow last ate.
Despite these minor variations, fresh butter should taste sweet. If the butter is bitter or has a peculiar flavor that’s unpleasant, something is probably wrong. Streptococcus bacteria in the butter produces a malty or sour taste. Things like medications and pesticides can make butter taste like chemicals. If the butter has a harsh, sour-bitter taste (like soap or blue cheese), it is most likely rancid. When butter is rancid, it turns a brownish color. If the butter tastes metallic or like cardboard, it has oxidized.
The flavor of butter can be affected by many other factors, like the age of the cream, improper handling or storage of the cream, overheating the cream during pasteurization, dirty utensils or equipment, growth of microorganisms or enzymes in the cream. If a cow eats a lot of weeds, the butter will often taste like weeds. If your butter tastes bad, don’t take any chances. Just throw it out.
Have you ever made homemade butter? Have you ever compared the taste of butter that was washed to that of butter that had the buttermilk worked out of it without washing? Please share your experiences with homemade butter in the comments section at the very bottom of this page.
(c) 2016 Homesteader’s Supply