Monthly Archives: April 2015

Composting yard waste will feed your garden’s soil

Composting Yard Waste

I don’t know how there got to be so many leaves on the lawn this spring. I raked in the fall, added the leaves to the garden and rototilled them into the soil to give them the winter to break down. I’m sure the trees were bare when I crossed this task off the to do list. I must have become distracted by bird and deer hunting seasons and stopped paying attention to the lawn. Now I’m composting yard waste I thought I’d taken care of six months ago.

composting yard waste

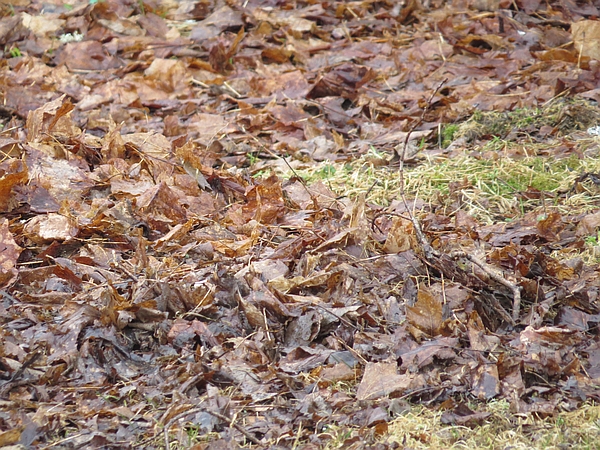
I swear I raked leaves last fall!

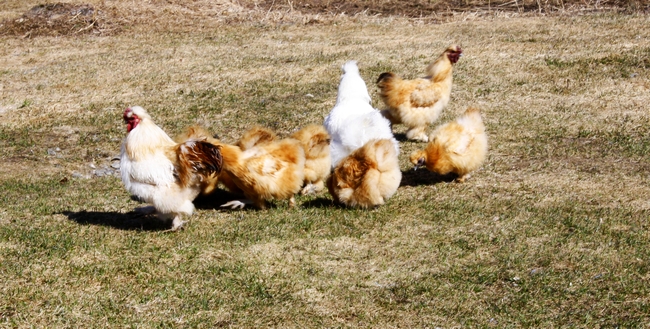
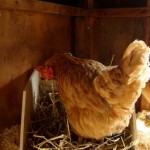
Composting yard waste in the spring is easy, especially if you have manure to add to the leaves and dead grass you’ve raked up. Racking the yard and cleaning the hen house on the same day will leave you with stronger muscles and a great compost pile! Choose a spot in a shaded area. You want the pile to get hot so it breaks down and kills weed seeds and other undesirables but not so hot that it kills everything.

You’ll need to decide a head of time how you’ll be composting yard waste. I don’t have a single favorite method. The plastic plastic bin or circle made of chicken wire is convenient, especially when I have a small amount of composting ingredients.When it’s time to turn the compost you pick up the bin (it’s bottomless), set it down beside the pile, and move the composting materials into the bin.

A three bin system is most useful when you have a lot to compost. You fill the first and second bin. When it’s time to turn the compost you move bin two into bin three, and bin one into the now empty bin two. When it’s time to turn again, bin two goes back into one and three into two.

When you need to start a new compost pile you move the pile that needs to be turned into an end bin and build the new pile in the center bin. Don’t add to the pile that’s composting. When that happens you’ll have uncomposted material in your otherwise finished pile.
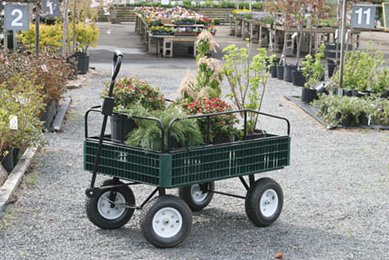
garden wagon

Crate Garden Wagon

Gather up the twigs and anything else you can’t run over with the lawn mower. Set aside the twigs. Remove dog waste as that’s not suitable for a compost pile. Run over the leaves to chop them up. Whole, wet leaves mat together and can create a mess in a compost bin.

Tip: If you start mowing on the outside of the area and mow your way in, always blowing the leaves and grass to the center, you will save yourself a considerable amount of time raking.

After filling your garden cart or wheelbarrow, place your rake on top of the pile to help keep the debris in place.

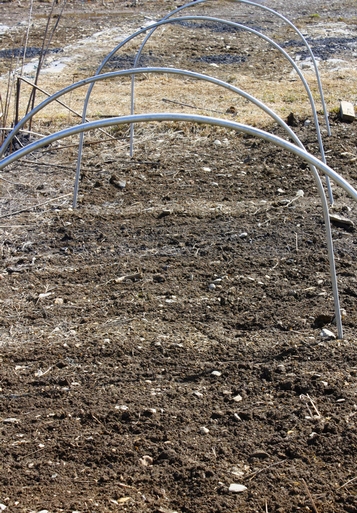
How to Build a Compost Pile

You’ll start composting yard waste now as you build your pile. Place the twigs on the bottom of the pile to allow air to flow in and water to drain out. If you have cornstalks and sunflower stalks you can use them in the base.

Shovel a five to six inch layer of chopped leaves on top of the twigs and stalks.
Add a two to three inch layer of manure, kitchen scraps or grass.
Sprinkle a shovelful of garden soil on top of the manure.
Add water until the ingredients are damp like a wrung out sponge but not dripping wet.
Continue until the bin is full or the pile is a minimum of three feet by three feet. The ingredients will condense and shrink overnight. You may add more layers the next day.

Tip: Healthy garden soil is full of the microbes that help the compost pile start “cooking.”

You need to watch the pile to be sure it reaches 135° to 160°. A compost thermometer is a big help. You poke it into the pile and check the temperature without reaching in. When the pile cools down you’ll need to turn or disturb the pile, about once a week. You can completely turn the pile by moving it as described above, or you might need to just add air and a little water. You can “fluff” the pile with a garden fork.

Joining in on Homestead Blog Hop #29!


Gardening 2015 – Let the season begin!

Gardening 2015 – Let the season begin!

Once the warmer weather got started it didn’t take long for the snow to melt and expose the garden. Gardening has begun!

The top three inches of soil were thawed Saturday afternoon. I had some free time and a lot of seeds so I got to work. It’s much too soon to rototill so I retrieved the pointed hoe from the garden shed and made rows, disturbing very little soil. I amended the soil last fall at the end of the gardening season with leaves I raked off the lawn and aged manure from a local organic farm.

Gardening Tip:

If you do your soil testing the fall rather than spring you’ll be ready to plant when spring arrives. There are fewer soil tests ordered in the fall so the results come back faster than spring, when there’s a stack of samples in front of yours. You’ll be able to start gardening sooner than later.

My stash of pea seeds are aging. I mixed seeds saved from the 2012 growing season with 2013 and 2014. Pea seeds will germinate for two to three years if they’re stored properly. If you do a lot of gardening you can buy enough seeds to last two gardening seasons and save some cash.

Gardening Tip:

Store seeds in closed jars in a cool, dark place. 50° is optimum. A one-inch layer of rice at the bottom of the jar will act as a desiccant.

The trenches are about an inch deep; no need to be precise, they’re just peas. I seeded heavily to make up for what might be poor germination of the older seeds, to have some seedlings to fill in bare spots, and to have others for pea shoots. I’ll thin the seedlings if necessary.

Gardening Tip:

Plants need adequate room to produce to their full potential. You’ll use less seed and pick more food if you space your seeds out according to the planting instructions.

gardening season, garden, pea seeds

Poke pea seeds in after the soil settles.

I dropped all of the seeds into four rows then covered them with the hoe. By Sunday afternoon the soil was settling and a few peas were showing. By this morning (it’s Monday) more peas were out, some of them sitting on top of the settled soil. The chickens and ducks are free ranging until there’s something in the garden they can bother. I poked the peas back into the soil with my fingers, pushed soil over others, and gave the chickens some corn far away from the garden. I don’t like to keep them penned longer than necessary. They do a great job of pest control.

gardening, bantam silkies, silkie bantams, bantam chickens

A White Silkie stands out amongst the Buff Silkies. They spend the entire day roaming for insects.

Beets do well in cold soil. The soil should be 50° in the top few inches. I plant a month or so before the average last frost date. I planted a small block between metal ribs. If it were to get too cold or we had a foot of snow coming (gasp! but it happens) I could cover the ribs with greenhouse poly to keep the seedlings protected. The rows are three and a half feet long and approximately six inches apart. Beet “seeds” are a cluster of two to five seeds. Space your seeds out so each seedling has enough room.

gardeningOne of the blocks between the ribs is filled with spinach. Spinach will germinate when the soil is 38°. It will take longer at 38° than 50° and warmer but if you’ve got free time, get planting. I’ll plant another crop of spinach in early September for baby leaves in early October and mature leaves for a few weeks before I close the last of the garden in late November.

With one short row left, I returned to the house for a package of Tango lettuce seeds. I’m heavy fingered with these tiny seeds so I’ll use some of the young leaves in salad and do a little transplanting.

Are you gardening yet? What do you have planted?

Joining Homestead Blog Hop #29!

How to Transplant Seedlings

How to Transplant Seedlings

Transplanting seedlings is a matter of seedlings, supplies and patience. Knowing when to transplant is your first step. This tiny carrot seedling has plenty of room and can grow where it is five or six more days if you’re pushed for time.

Carrot seedling, how to transplant seedlings

Carrot seedling

This seedling has it’s first true leaves. You can see the heart shaped cotyledons at the bottom of the plant. The other two are true leaves. It’s time to transplant, especially if the seedlings are crowded. Spacing tiny seeds out to give seedlings adequate space for root and leaf growth is tricky.

Snow Crown cauliflower seedling, how to transplant seedlings

Snow Crown cauliflower seedling

Supplies for Transplanting Seedlings

Most seedlings aren’t particularly fussy. Vine crops have tender stems that snap easily if they are too long during transplanting, and they don’t like to have their roots disturbed. Transplant them from the starting tray into 6″ containers or the garden as soon as they have their first true leaves. They are our exception.

I move seedlings from a 1020 tray (10″ wide by 20″ long) into six packs most of the time. You can use yogurts cups and other containers you’ve kept out of the recycling bin if you’d like.

how to transplant seedlings

Pansy seedlings in a six pack

You need potting medium. ProMix or something similar, the same material you started the seeds in, will work just fine. I recommend adding worm castings or compost to the mix to give the seedlings enough nutrition to last them a month. Dampen the medium and allow it to set long enough to absorb the water it needs and drain the excess.

You might need fertilizer. If the leaves start to yellow the plants are lacking nitrogen. If they’re slow to grow they need an all-round fertilizer. I prefer to give them a weak solution of compost or worm casting tea all the time rather than a bigger dose of fertilizer occasionally. Plants, like us, need to be fed on a regular basis. They’ll slow down if they aren’t being fed.

Gently separate seedlings from each other and the seed starting medium. Leave as much medium as possible on the roots to help minimize transplant shock. Make a divot in the medium that’s larger than the roots and pop the seedling in. If you are transplanting tomatoes you can bury the stem to the first leaves. New roots will form along the stem. Growth will slow for a week or so while the roots get established but in the end it’s worth that extra week’s wait. Peppers, brassicas (broccoli, cauliflower, cabbage) and other plants that don’t form roots on the stem planting just above the roots is enough. Leave more room in the medium for roots to grow.

Gently fill medium in around the roots and when done, water all seedlings enough to settle medium and soil into their new home. Avoid direct sunlight and wind for a week to allow the plants to recover from being moved. Transplant shock can stress plants to death. If you’ve transplanted seedlings into the garden you can give them shade with floating row cover or by planting them larger plants later in the growing season. Happy gardening!

Joining Homestead Blog Hop #29!

Reasons Why You Should Raise Backyard Chickens

Reasons Why You Should Raise Backyard Chickens

When it comes to animals, Jordan Walker is an expert to that. He tries to help other pet owners through writing useful information in the Coops And Cages blog. And now, he shares with us the several reasons why raising backyard chickens is a great idea.

backyard chickens, 1

People start to realize the myriad of benefits raising chickens can provide; hence, they want to start having a brood in their own backyard. Before, only people in the country are enjoying keeping and reaping benefits that their chickens give. However, with the advancement of technology and the growing health concerns of people, raising backyard chickens has gained popularity.

However, for those who live in the urban area, you need to know about your city’s laws and regulations first when it comes to raising chickens. Most cities in the US do not allow having chickens raised in the backyard because of the noise chickens make. But nowadays, even people living in the city enjoy keeping chickens due to relaxed laws and regulations. That is why it is no longer a wonder if you happen to see a chicken coop in the urban zone.

Is raising chickens right for you?

If you are planning to raise chickens, it would be best to also ask farmer neighbors and people who have been raising chickens in their whole life. This would help you determine if you are best fitted for the endeavor.

Another thing to consider is your feasibility to give your chickens’ basic needs. Will you be able to devote some time to feed and water them, or clean their chicken coop? Yes, chickens also need a home. Of course, you wouldn’t want your neighbors to start complaining about free range chickens going over their fences, right?

Chickens also produce a lot of noise. Their crowing and cackling might get through your nerves. But if you really insist on raising chickens, it would be best to raise more hens than roosters because these crowned chickens are a lot noisier.

Another annoying thing that chickens might do is to destroy your garden–unintentionally. They like to dig and peck at anything they deem tasty. So if you want to keep your garden safe, a chicken coop confines them when you’re not keeping watch.

If you can keep up with all the needs of chickens as well as their behavior, then congratulations! You might be able to survive the responsibilities of chicken farming.

backyard chickens, 2

backyard chickens 34

What’s in store for you if you raise chickens

Aside from laying eggs and their protein rich meat, chickens are great pets, too! Their sweet and mild temper has attracted breeders to keep them as pets. They would eat from your hands, or even respond when called. Chickens offer a lot of benefits apart from being easy to take care of. Here are some rewards breeders reap from raising their backyard flock:

  • Cheaper costs. Starting a brood in the backyard is relatively cheap. Breeders can feed them with kitchen scrap including vegetables, fruits, grains and even meat.
  • Fast meat sources. Depending on their breed, chickens are fast growers that can give breeders a tasty meal. For instance, a Cornish Cross can be processed when they reach seven to nine weeks. This means that breeders need to feed them for about two months and they can already be served in your dinner plate.
  • Healthier eggs and meat. Breeders know what food their chickens eat. Thus, a tastier and healthier eggs can be enjoyed and meat as well. Eating meat and eggs from the chickens you raised is a lot safer compared from those bought in the supermarket because backyard-raised chickens contain less fat.
  • Hefty supply of backyard eggs. Chicken breeders enjoy a large supply of fresher eggs compared to their non-chicken raising neighbors. This is because a brood can lay one to two eggs a day for a number of years after reaching about 6 months old.
  • Good pets. Children will be able to enjoy the company of backyard-raised chickens because of their friendly nature. They are easy to manage and only entail low maintenance costs.
  • Great gardeners. Chickens are also great gardeners as they love to eat grasses. They would weed around your shrubs and trees that would create a meticulously weeded landscape. backyard chickens
  • Pest control. Chickens are also great agents in controlling pests. They eat insects, worms and even mice and snakes. The best thing about them is that they control the pest in your area for free! backyard chickens
  • Excellent sources of fertilizer.  A breeder’s garden will have no problem regarding fertilizer. This is because chicken poop is full of nitrogen needed to make excellent compost. In return, the garden soil becomes rich to be able to grow more plants.

567

Downsides of raising chickens

Aside from the numerous benefits breeders get, there are also some things to watch out for while raising backyard chickens. These are the unforeseen happenings that breeders might meet along the way. Remember that it is not just about getting fresh meat and eggs as farm life is also not just about the roses. Here are some of the major downsides of raising chickens: backyard chickens

  • Chicken waste. Although chicken poop is a good source of fertilizer, chickens can poop a lot than what you need. It is best to have the surroundings of the house cleaned as guests might be having a hard time cleaning their shoes every time they come to visit.
  • Unexpected chicken deaths. Other animals including dogs, raccoons, foxes and the like can hunt down your chickens. They are just some of the most fearsome chicken predators. Some breeders tell of their horror stories after learning the deaths of their chickens. backyard chickens
  • Decline of production. As your chickens age, the production also declines. This happens after two years of laying eggs. However, this is not really a problem as breeders can always keep the chickens as pets or have their meat stacked inside the freezer.

Although raising chickens has some downsides, the benefits you can get are still more than its disadvantages. This may be one reason why more and more people are getting attracted to having a brood in their backyard. backyard chickens

Image Sources: [1] [2] [3] [4] [5] [6] [7]

Author: Jordan Walker
Jordan is the lead content curator for Coops And Cages as well as a couple of other pet related blogs. His passion for animals is only matched by his love for ‘attempting’ to play the guitar. If you would like to catch him, you can via Google+ or Twitter: @CoopsAndCages