Category Archives: Homesteading

Fruit Presses & Apple Cider Season

Fruit Presses & Apple Cider Season

It’s apple cider season! Not the apple cider that’s been stored somewhere for who knows how long before put out on the store shelf. It’s the season of picking, crushing and pressing fruits to make cider. We offer a variety of fruit presses!

Apple & Fruit Crusher - Fruit Presses

Apple & Fruit Crusher

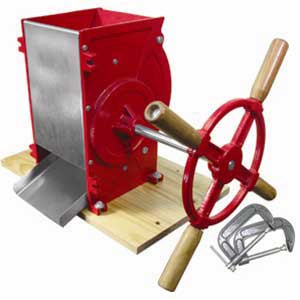
Let’s start with the Apple & Fruit Crusher for hard fruits. Before you press your apples or pears you should break them up. If you have just a few you’ll be fine cutting them into quarters or halves depending on size, before you put them into the press. More than that and you’ll spend a long time cutting.

The Crusher mounts easily on a table top. I’ve seen it mounted between two saw horses. Whatever works for you is great. It’s that simple.

I love the old-timey look of the Crusher with its bright red color and old fashioned handle.

Fruit Presses - Hopper for Fruit Crusher

Apple & Fruit Crusher Hopper

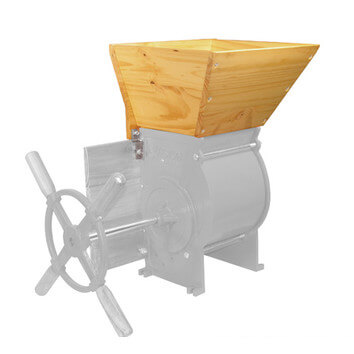
The Apple & Fruit Crusher is easier to load when you add the wooden Hopper. It’s sturdy, easy to put together, and holds a peck of apples at a time. Pouring the apples into the Hopper will save you time and a lot of bending to pick up fallen fruit.

We offer Fruit & Wine Presses from a reputable company called TSM. They’ve combined the old time feel of hand cranking and beautiful presses with modern technology. The baskets are made of oak grown in the USA! Each press comes with a filter bag except for the Deluxe Stainless Steel Press which doesn’t need one.

Fruit Presses

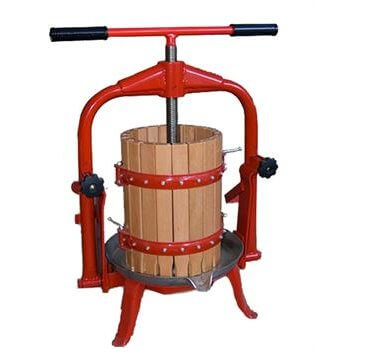
The Harvest Deluxe Fruit & Wine Press is my favorite. It holds 4.7 gallons of fruits. It’s sturdy, mounts to a wooden base for added stability, and has padded hand grips. You’ll be able to press your hard fruits as well as grapes and other soft fruits. The juice drains from its spout into your container.

We also have the Harvest Apple Fruit & Wine Press that holds 4.7 gallons of fruit, and its larger model that holds 8 gallons of fruit. If you prefer a ratchet model you’ll find it here.

You can drink your juice fresh or turn some of it into cider. We love to cook with cider. One of our dishes is pulled pork that has been slow cooked in apple cider.

Apple Cider Pulled Pork Recipe

4 pound pork butt
2 cups apple cider
1/4 cup cider vinegar
1/4 cup brown sugar
1 tablespoon apple pie spice

Add everything together in the slow cooker, set it on low, and let it cook for at least eight hours. It will pull apart with a fork as you take it out of the slow cooker.

Chicken Tractor

Myth Busting for Meat Chickens

Myth Busting for Meat Chickens

I’ve been watching my meat chickens while I work outdoors this afternoon and thinking about how simple they’ve been to keep. Raising chicks for the first time about 15 years ago was nerve wracking. I had to keep them between 95 and 100 degrees for the first week, then decrease the temperature by five degrees weekly. They had to be taught how to eat and drink as soon as they arrived. Never, ever let them run out of food and water. I was a helicopter chicken momma, hovering over them constantly.

There’s so much misinformation out there about raising Cornish cross or similar breeds. There’s no need to hover. Let’s do this the simple way.

Myth #1: You must teach the chicks to eat and drink when they arrive.
You don’t. Instinct, hunger, thirst and curiosity will take care of this. Put them in the brooder with food and water and watch. They’ll have it figured out in a few minutes.

Myth #2: You must keep chicks very warm at all times.
You don’t. Give them a source of warmth in the brooder and the ability to come and go and they’ll make themselves comfortable. I use a heating pad under one end of the brooder. I dislike heat lamps. They’re a fire hazard. If the chicks are cold they’ll move to the warm spot. If they’re hot they’ll move to the cool spot. They’ll move around and generate their own warmth if you let them.

Myth #3. Meat chickens are filthy.
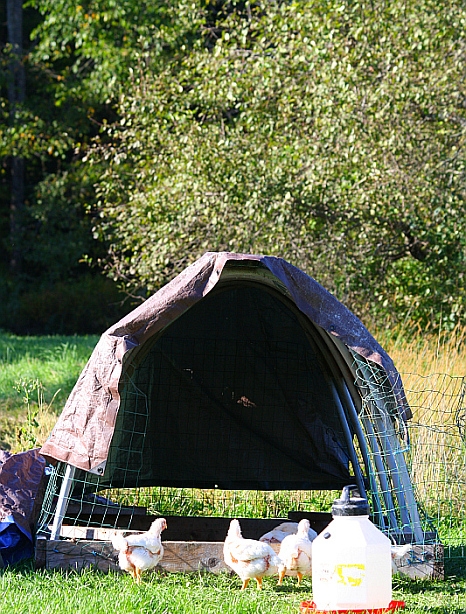
This is true only if you choose to raise them in filthy conditions. I raise mine in chicken tractors.

Chicken Tractor

Chicken Tractor

The tractor is moved to clean grass every day. I feed them in the morning, outside of the tractor. They race out the opening to get to the food, and while they’re busy eating and I know where they are, I move the tractor. I pick up one end and slide it to the side. Repeat on the other side, then back to the first side to straighten it up. Done. The chickens run around either free or inside electronet for the day so manure doesn’t build up.

TIP: I get my chickens in early August. It’s warm enough to keep them from getting chilly at night. By the time they’re big enough to get too hot it’s September and the days are much cooler.

Myth #4
All meat chickens do all day is eat and poop. This is true but it doesn’t have to be.If you put an endless supply of food in front of these birds they will lay down to eat and not get up. I feed my birds in the morning so I can move the tractor and again in the evening. I feed them inside the tractor in the evening so that they go in on their own. They spend the rest of the day finding their own food.

Just like laying hens, meat chickens will spend their days chasing insects. They’ll eat crickets, grasshoppers and other garden pests they find in the grass. Free protein! They’ll eat rodents and frogs (chickens are not vegetarians), worms and small snakes. If you’ve never seen a chicken running with a screaming frog in its beak, well, you’re missing out.

And just like laying hens, meat chickens will take dust baths and scratch for grubs and worms. Keep your birds searching for some of their food and you’ll eliminate growth that’s too fast for their hearts and legs. Just like us, they need to be up and moving.

An old friend said something to me 15 years ago that I still repeat often. “Raising these chickens is only as difficult as you decide to make it.” He was right. You need a feeder and waterer, shelter, and preferably some grass. Add fencing if necessary. That’s it. My meat chickens are five weeks old now. They’re running loose with the laying hens and Khaki Campbell ducks. Our English Shepherd keeps them safe from predators. It’s as simple as I decided it should be.

Time Management Tips for the Homestead

I love reader questions. Did you know that? I love to open a reader’s email and see what they have to say. I’m going to answer a question here.

“You talk about having a lot to do this time of year but you haven’t told us everything you do. What do you do and how do you fit it all in?” ~Rhonda
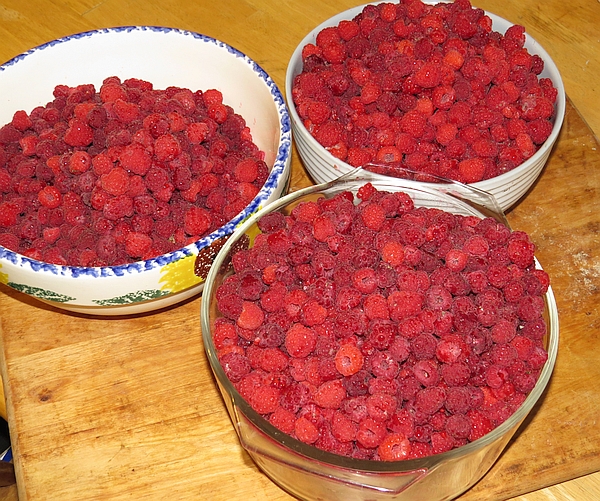
Raspberries freeze well

Raspberries freeze well

This time of year feels like it’s busier than others but in reality, I’m probably feeling more rushed. Homesteading can be a full time job and if you’re already working a job, it can be stressful.

The first killing frost is hanging over our heads any time after the first week of September. It might be early or it might not happen until October. The first frost could come early and then we’ll be frost free for weeks. It’s too late for the tomatoes, squash, cucumbers and other warm season crops once they’ve been frost killed no matter how good the weather is after so there’s the rush to force the plants to produce.

The late raspberries are ripening and the wild blackberries are still going gangbusters. Making jam and jelly is simple but it’s time consuming. I have more time in the winter than right now they’re being frozen in a single layer on cookie sheets. I don’t think these berries make the best jam after they’ve been frozen but freezing them makes it easier to make jelly. They skins burst when they’re frozen so they let go of the juice easily as they thaw.

  • Tip: Freezing strawberries saves time during the summer. You’ll make thicker jam with less pectic and sugar and have juice for jelly when the berries thaw.
Deluxe Stainless Steel Food Mill

Deluxe Stainless Steel Food Mill

Apples don’t have to be sauced, jellied, pied or otherwise put up immediately. You have at least a few weeks, and sometimes months, to get them processed. I picked a bushel of apples one day last week. They were roasted another day and then stored in the fridge. On day three I put them through the food mill (if you don’t have a food mill, you need one). I warmed the apples turned applesauce on the stove, added sugar and spices, and hot water bathed the batched. It took a little time on each of three days but I didn’t have enough time in one day to do it all. Do what you can when you can and it will come together. A little time here and there resulted in 18 pints of sauce.
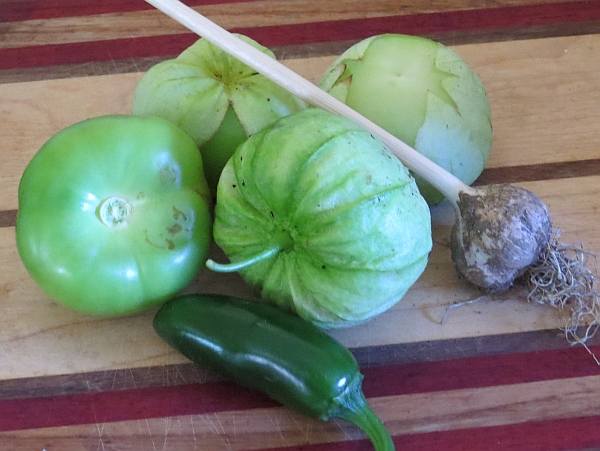
Salsa Verde Ingredients

Salsa Verde Ingredients: tomatillo, Jalepeno pepper, garlic. Missing – onion and cilantro, to be pulled and picked in a few days.

  • Tip: If your tomatoes are not ripening fast enough you can push a spade into the ground around the roots to stress the plants. Cut 12 inches from the base of the plant, severing the roots. A plant’s mission in life is to reproduce. You’ll speed up ripening this way.

The garden is still producing well. Tomatoes, eggplant, tomatillos, squash, pumpkins, cucumbers, kale, cabbage – just about everything is still growing. It all has to be weeded, watered when we don’t have enough rain, picked, preserved or stored – you know how it goes with the garden. This morning I picked close to a half bushel of tomatillos for salsa verde. It’s also hunting season. I can’t put hunting in the freezer so move over berries and vegetables, the tomatillos are coming in. Tomatoes can also be frozen. I like having the warmth from the oven early in the morning on a chilly day as the tomatoes or tomatillos roast. An hour or two with the oven on replaces the small, hot, quick burning fire I usually build on a late fall morning.

  • Tip: When your pumpkins and winter squash start to get soft spots, clean them up and roast them first thing in the morning, then freeze the flesh. This is usually a mid-winter project when I start checking on vegetables stored in the root cellar.

Firewood is weighing heavily on my mind these days. It was delivered late so I’m rushing to get it split and stacked to dry. Best made plans and all, I couldn’t depend on someone when it came to firewood so I was stuck with making the best of a bad situation. It happens. I’m working on eight cords of beach, ash, maple, yellow birch and white birch. The hydraulic splitter makes the work a lot easier but it’s still not an easy job on a hot, late summer day.

  • Tip: Secure next year’s firewood supply now and ask that it be delivered in spring. We burn up to six cords a year. I buy eight cords a year which means we a year “off” now and then without the expense and work, and won’t run out of wood.

Pigs, ducks and chickens are growing out back. They’re turning grass, insects, weeds, food scraps and a few commercial pellets into meat that will feed my family. Portable fences and chicken tractors need to be moved daily. Two people moving fencing takes me a third of the time it takes when I have to do it alone. Ask for help.

When did the paint start peeling off the hen house? I swear it was fine yesterday. Or I was too busy to notice. I’m not sure it’s going to get painted before the snow flies. If there are a few extra dollars I might hire someone to do it for me. It would take someone who likes to paint less than a day to do it. It takes me more than a day to fumble through scraping and painting. We can’t always do it all. Remember when you first started to daydream of homesteading? It was so idyllic. You’d spend days outdoors in the beautiful weather doing your chores? The mosquitoes weren’t part of my daydream. Neither was heat rash. Rainy days would be spent inside, cooking and ready. Painting the hen house was not in my day dream.

  • Tip: Neighborhood kids are often willing to do some work if you pay fairly, and you might be surprised at how well they work. I pay by the job rather than the hour. I don’t want to pay for the time they spend taking selfies and texting.

Plan to use the oven early in the morning or later in the day to warm up the house. It can do its work while you’re doing something else.

  • Tip: The final muck out of stalls and pens doesn’t have to happen when the animals leave for slaughter. Give your attention to the work that must be done at time and get to the stalls, pens and the hen house before the ground freezes and you’ll be all set.

Do you have a time management tip to share? Please leave them in comments!

Autumn Vegetables to Seed Now

Autumn’s coming. The stressed trees are showing a little fall color now. Nights are cooling down and if they haven’t already, day time temps will cool soon. The soil temperature will drop as the amount of sunshine decreases, and that means it’s time to plant the cool loving seeds. Decreasing sunlight and warmth slows growth compared to spring planting. It’s best to plant in full sun at this time of year.

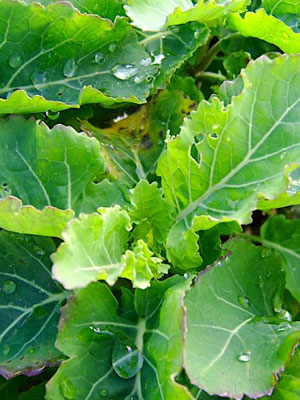
Premier, also known as Early Hanover, is an heirloom kale. It takes approximately 60 days to maturity when planted in late summer or early fall. In spring, as the days are getting longer, it averages 45-50 days. You can cut  some as baby kale for salad and stir fry while leaving part of the plant to over winter under protection of a low tunnel in zones five and up. Not all plants will survive even with protection but those that do will start to grow again in March or April.

May Queen lettuce grows well in rich, moist soil. May Queen is an heirloom butterhead that needs 50+ days to maturity but only 30 for baby greens.

Inter-seeding Cherry Belle radishes will help you spread out your tiny seeds when direct seeding. They sprout quickly and will help mark your rows. Did you know radish leaves are great in salad and stir fry when they are young and tender? Save some of your seeds to plant in pots on the window sill for winter. 21 days to maturity.

Bloomsdale Longstanding Spinach

Bloomsdale Longstanding spinach

Bloomsdale Longstanding spinach is perfect for the autumn garden. It dislikes heat but thrives in cool, moist soil. It requires 55 days to maturity but at this time of year you won’t want to let the plant reach maturity. Enjoy eating the spinach until about a week before the forecast calls for several nights in a row below freezing, then make your last cut and mulch heavily with straw or leaves. You can pull back the mulch when the nights are consistently above freezing in the sprig and have a head start on the growing season.

Turnip thrives in cool, moist soil. Purple Globe White Top needs 45-60 days to reach its mature size of three to four inch roots. Pull all of these turnip before the ground freezes as they don’t over winter well. If they do survive they’ll go to seed early in the spring.

Scarlet Nantes Carrot

Scarlet Nantes Carrot

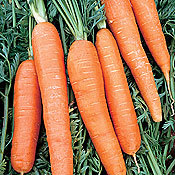
For late season carrots we like Scarlet Nantes and Danvers varieties. Carrots, like other roots, get sweeter as the soil gets colder. Pull what you’ll eat fresh and can store, then mulch the rest of the row heavily with leaves or straw before the ground freezes. As long as you can push the mulch out of the way you’ll be able to pull carrots. Move mulch when nights stay above freezing in the spring and start harvesting again.


Detroit Dark Red Beet

Detroit Dark Red Beet

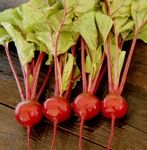
Detroit Dark Red beets are treated in the same manner as carrots. Enjoy the leaves as baby greens in salad or larger leaves for beet greens. Cut only two leaves per root at this time of year to ensure the roots receives enough energy to grow.

Planning Ahead to Plant Garlic

It’s that time of year – garlic. It’s time to check on the garlic you planted last year and to choose and order your garlic varieties (unless you’re growing your own seed stock, that is!) and plan ahead for the day you plant garlic.

Garlic Bulbils

Garlic Bulbils

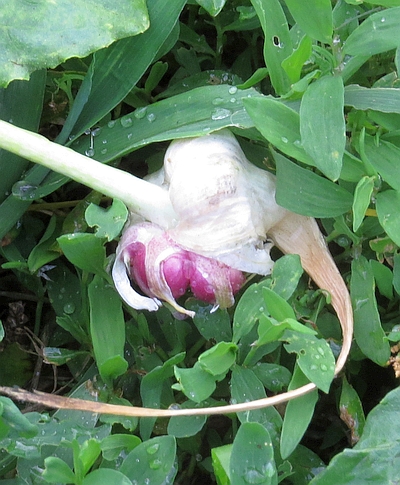
I pushed a garden fork into the damp soil this morning, loosened a head of garlic and gave it a tug. It’s small. I missed this plant when I cut off the scapes and energy went into producing lots of little bulbils in the flower rather than a larger head. We’ve had plenty of rain so the soil has never dried out. There was plenty of compost in the soil when I planted the individual cloves 10 months ago, and I mulched with more than enough hay to control weeds. It’s small but probably very tasty, and there’s still a little more time for the rest of the plants, which still have nice green leaves, to grow.

Look around the garden. What area will be open in late fall that will also be convenient next year? You won’t be able to drive a tractor through the place you choose for this fall’s garlic planting. Is there room to go around? Will the spot be inconvenient when you’re maneuvering the rototiller between rows next year? Does the soil drain well? If there are puddles in that spot each spring it’s not the place for your garlic.

Fresh garlic

Just dug…

Garlic likes soft soil that has been enriched with lots of compost. You’ll need to turn over the top 8 to 12 inches of soil. If the spot you choose has a weed problem now’s the time to get it under control. Garlic doesn’t like competition. If the weed load is light you’ll have an easy time planting and can skim ahead past solarization. If that’s the case, a lot of gardeners are envious!

Solarization will kill tender annuals and some perennials, and kill a large portion of the seed bank. The seed bank is the ungerminated seeds in the soil. Seeds can survive for years before germinating. The Hairy Galinsoga you thought you got rid of five years ago might germinate next year because it’s been sitting dormant the seed bank.

Prepare the soil for solarization by harvesting whatever you have growing, and pull all of the weeds you can possibly get out of the ground. Smooth the surface, leaving no room for gaps between the soil and the plastic you’ll use.

Soak the soil deeply, at least 12 inches. Moist soil will retain heat better than dry soil. You don’t want to have to remove the plastic for the next four to six weeks so be generous with the water.

Cover the area with a single sheet of clear plastic unless you live in an area that doesn’t get very hot. In that case, it’s probably best to use black plastic that will prevent germination in seeds that require light to germinate. Weeds that germinate under clear plastic will “cook” and die. Choose 1.5 to 2 mils (thickness) for larger areas. It will stand up to wind and light foot traffic from wayward pets and wildlife better than 1 mil. Painters plastic will last three to five weeks. Keep an eye on the plastic for signs of breaking down and remove it before it starts to crumble. If your seed bank is extreme you might opt for UV treated plastic (greenhouse plastic) that won’t break down so that you can leave the soil covered from now until planting time.


A Taste of Raspberry Jam

Raspberry Jam

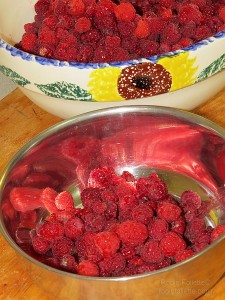
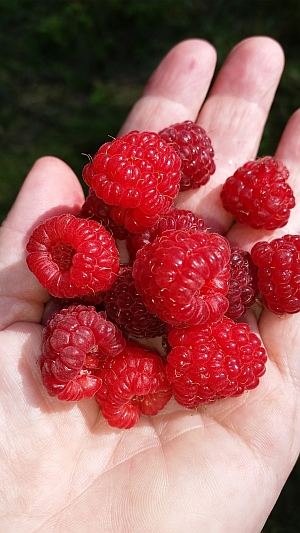
How to Make Raspberry Jam in 30 MinutesMid-July, raspberry time. The canes are loaded, it’s been a good year for raspberries. Picking gallons at a time barely makes a noticeable dent in amount of berries to be picked. It’s time to make raspberry jam.
Raspberries to mash


You’ll need:

  • Two quarts of fresh raspberries
  • 1/3 cup, rounded, bulk pectin
  • 5 to 6 cups of sugar

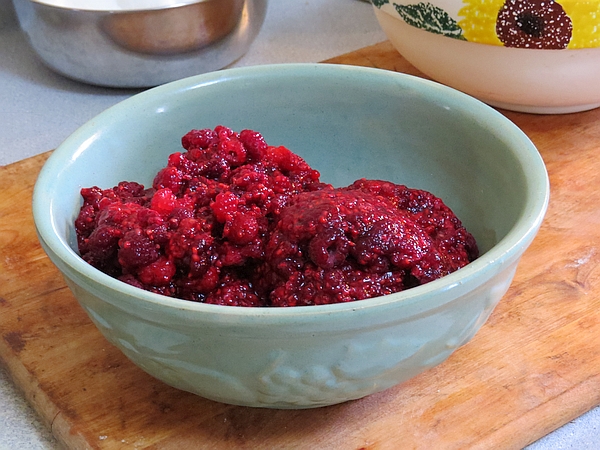
Lightly mash raspberries, one cup at a time. You’ll have five cups of mashed berries when you finish.

Stir in pectin.

Move mixture to an eight quart pan and heat to a simmer over medium heat. When simmering, stir in sugar. Bring to a boil that can’t be stirred down and continue to boil for 60 seconds, stirring constantly.

Ladle into hot, sterile jars. Wipe the rim clean with a damp cloth. Place sterile lids and rings, leaving a 1/8″ air space, and hot water bath as recommended.

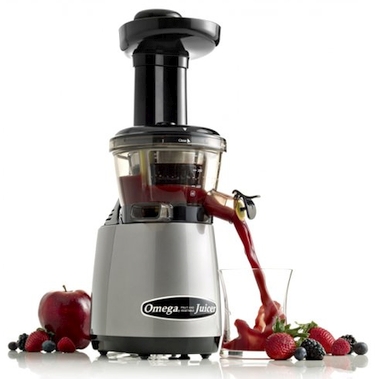
If you’d like to make jelly you can use one of our juicers to speed the process.

Omega VERT Juicer

Omega VERT Juicer

If you’d like to do this by hand, freeze the berries, let them thaw, and strain the seeds out. Frozen berries are much easier to juice than fresh.

There are so many things to do this time of year that being able to freeze the berries and make jelly later is a great convenience.

After thawing the berries you can heat them to around 100*. Don’t cook, just heat. Remove the juice you can pour out easily, then hang the remaining berries in cheese cloth to drip into a pan. When the dripping slows to an unproductive rate, give the cheese cloth a gentle squeeze to get the last of the juice.

Lightly mashed raspberries

Lightly mashed raspberries

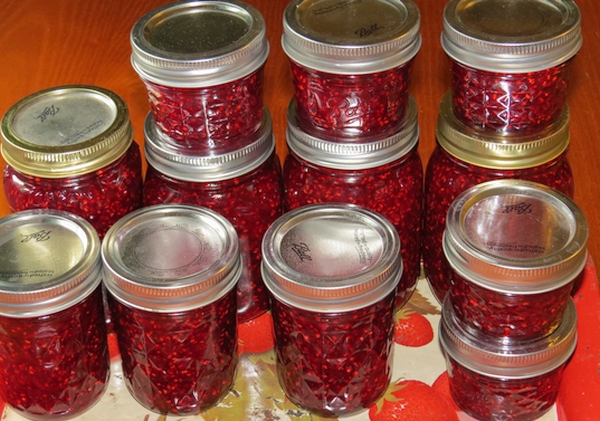
Raspberry Jam. Imagine a warm biscuit and jam this winter.

Raspberry Jam. Imagine a warm biscuit and jam this winter.

Raspberry Jelly Recipe

This recipe is different than the jam recipe in a major way. This recipe doesn’t use pectin. You might need to make it a few times to get it just right. If it’s too thin you can use it as pancake syrup, on ice cream or in smoothies. It won’t be what you were aiming for but it won’t go to waste.

4 cups raspberry juice
1 1/2 pounds sugar

Mix together. Heat to a gentle boil. Skim off any foam that settles at the top. Continue to boil for 20 to 30 minutes. When your spoon is lightly coated the jelly is ready to be jarred. Ladle into hot, sterile jars, leaving a 1/8″ head space. Wipe the rim clean, place lids and rings on, tightening the rings to “finger tight.” You want it tight enough to keep water out but loose enough to let air escape during the hot water bath.

raspberry bowls