
Anyone can learn to make better butter!
There are two options in this article: making your own butter from scratch, or improving on the butter you buy. You may ask, why would I want to improve on the butter I buy? Great question!
REAL butter is a wonderful product! Years ago, they used to tell us it was bad for our health, but research has shown otherwise. Today, we know that REAL butter is actually a healthier fat than those manufactured products with chemicals and dyes and hydrogenated molecules that can potentially lead to cancer and heart disease.
Now that we know that REAL Butter is good for us, we can teach you how to make it better. This is a project that you can even enjoy with your kids. Basically, it involves creating a variety of flavored butters by adding ingredients like fruits, nuts, spices and herbs. The options are endless and entirely up to your imagination.
So here we go…
How to Improve on Store-bought Butter
Decide ahead of time what flavor of butter you would enjoy having on bagels, or toast, or crackers—or even to spread onto bread you will toast in the oven to go with your meal. Here are some suggestions we have used: chopped green onion, garlic and chopped chives, fresh chopped dill, chopped pimentos and olives, chopped sun-dried tomatoes, blueberries and honey, strawberries and honey, rosemary and thyme, softened or crushed caraway seeds… It truly is only limited by your imagination!
Garlic and Herb Butter
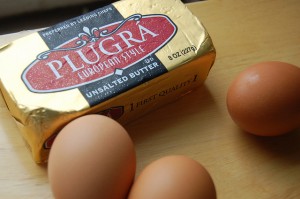
Start with a pound of butter from the store. We always prefer organic; but, if you can’t get it, that’s okay.
- Unwrap the butter, place it in a bowl, and let it sit at room temperature to soften.
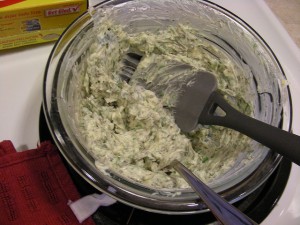
Once it is soft enough to mash with a spoon, mash it into one large mass. - Then whip your butter until it is smooth and creamy.
- You can do this step either with the whole pound, or you can divide it into several pieces and place each one in a separate bowl.
- Add your chosen ingredients to flavor each bowl as desired. Then, gently stir until the flavoring has been distributed throughout.
- Transfer your butter to one ore more appropriately sized containers and store it in the refrigerator until you’re ready to use it.
How to Make Your Own Butter
Method #1
First, you’ll need some heavy cream. You can skim the cream off the top of a jar of raw milk from your cow, or you can buy it in the store. Once you have your cream, you’re ready to get started.
IMPORTANT NOTE
This method works best with raw milk. The cream will start to ferment as the lacto-bacteria naturally found in raw milk consumes the natural sugar (lactose) in the milk. Store-bought milk has typically been pasteurized (or ultra-pasteurized). Pasteurization kills all the bacteria in the milk, including beneficial lacto-bacteria. But because pasteurized milk cannot be kept sterile after processing, it eventually picks up random bacteria from the environment. So, although any type of bacteria will cause milk to ferment, there’s no way to know whether the bacteria in store-bought milk is beneficial.
Preparing the Cream
- Pour the cream into a glass jar, such as a canning jar.
- Place a lid on top, and leave it on your counter to ferment at room temperature for 12 to 24 hours.
- The next day, you will see that this bottle of cream, which was once a liquid like thickened milk, is now even thicker. Tip the jar back and forth. The contents should move more slowly than before.
- When the cream has thickened, place the jar in the refrigerator to cool. The cream will thicken even more.
- Then, follow the directions for “Churning Your Butter,” under Method #2, below.
Method #2
You can make butter that tastes even better than plain butter by adding some starter culture at the beginning. You can use the same type of culture we use for making cheese. It’s called a mesophilic culture. We carry several kinds, and each will give your butter a different flavor.
We suggest you start with Biena Meso II. Then, when you have mastered making butter, try another culture to see if you like that flavor better. You can always get a Meso Sampler Set consisting of the three cultures that work well for butter. But if you make cheese already, you are set! Just use one of the meso cultures you already have on hand.
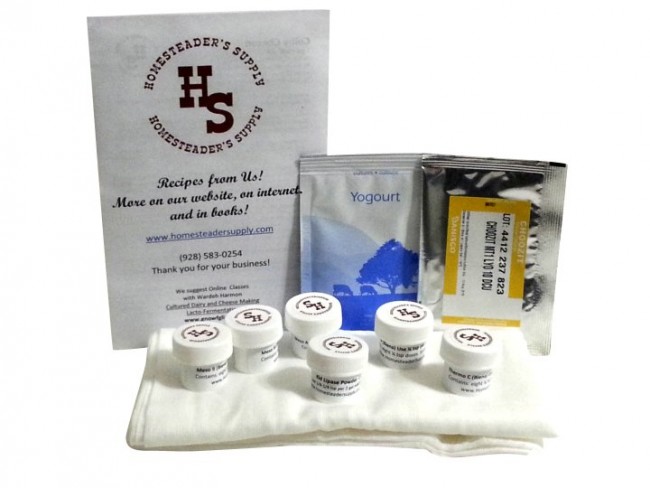
Cheesemaking Culture Sampling Set
You can use a manual or an electric butter churn, or you can use an electric blender. If you use a blender, make sure it’s not one that will heat the liquid as you are mixing it. You can also give the jar to your kids or grandkids and have them shake it; some prefer to roll it on the carpet, instead. This will work too; it just takes more time. But some folks don’t mind that it takes longer because they enjoy getting the whole family involved in the project.
Culturing the Cream
- Take just a pinch of dry culture and place it on top of the cream right after you pour it into the jar. Wait about 30 seconds or so, until the culture has dissolved. Then mix thoroughly with a spoon, in bottom to top motions. You want to make sure the culture mixes through the cream completely.
- Place a lid on top, and leave it on your counter at room temperature for 12 to 24 hours. During this time, the lacto-bacteria naturally found in milk will consume the natural sugars, and the cream will start to ferment.
- The next day, you will see that this bottle of cream, which was once a liquid like thickened milk, is now even thicker. Tip the jar back and forth. The contents should move more slowly than before.
- When the cream has thickened, place the jar in the refrigerator to cool. The cream will thicken even more.
Churning Your Butter
When your cultured cream is good and cold, it’s ready to be churned. This is how you do it:
- If using a blender or churn, pour some of the thickened cream into the churn. Remember, never fill your butter maker more than two-thirds full of cream. You can start churning right away, although it will be harder to churn this way because of the thickness. Or, you can add some very cold water to the thickened cream. That will make it easier to churn; and, actually, we have found cold water makes the process faster.
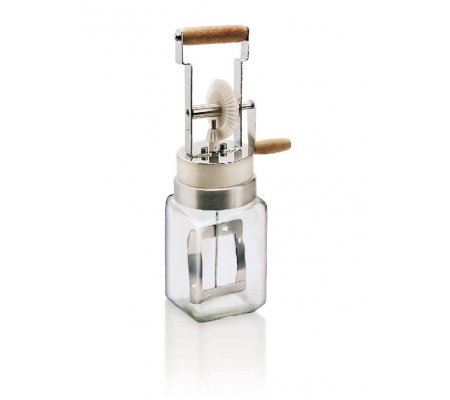
1.7 Quart Butter Churn
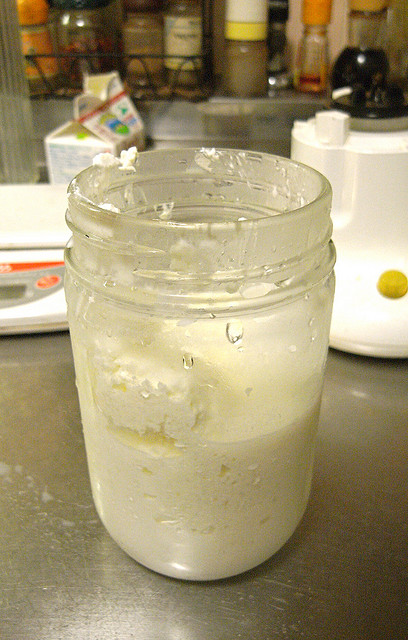
- During the process of spinning/churning the butter, the molecules begin to separate. It’s called “breaking.” You will begin to see the cream turn into a bumpy mush. Just keep going, it’s not ready yet…but, almost.
- Keep spinning until you see that the butter fat has completely separated into blobs of yellow butter hanging in a cloudy thin liquid. The liquid is buttermilk, which you can drink or use in baking. Some folks don’t want to add water at the beginning because they want just the resultant “buttermilk.” We have found it’s easier to churn with the addition of water–and, you still get buttermilk! It’s really a personal choice!
- Pour the liquid into another jar, leaving the butter in your churn.
- Now add cold water, and churn some more. This process is called “washing the butter.” This step ensures you get all the buttermilk out of the butter, as it’s the buttermilk that will spoil faster and ruin your butter.
- Wash the butter several times until you see that the water is mostly clear.
- Remove the butter from your churn, placing it into a stainless steel or ceramic bowl. Using something like a fork or spoon, mash the butter to the bottom of the bowl. We have found that our Prepper Pro—the multi-use kitchen tool we designed and manufacture here in the USA—makes the mashing process so easy!
- As you mash the butter, you will see water being released. Just pour this water out and continue mashing the butter until no more water is released. Voilà! You have now made your own butter!
- At this point, you can add some salt to taste, or not, if you prefer sweet butter. If you like, you can whip your butter and flavor it as described above in the section “How to Improve on Store-Bought Butter.”
- Then, either pack the butter into little containers, or wrap it in wax paper to freeze and store for later use.
We designed our Sweet Mary’s Wooden Butter Mold as a way to mold freshly made butter. It allows for a full pound, or smaller amounts, depending on how you hold it when packing the butter. And there is no need to wet it or freeze it in between batches. You can mold one butter block right after the other.
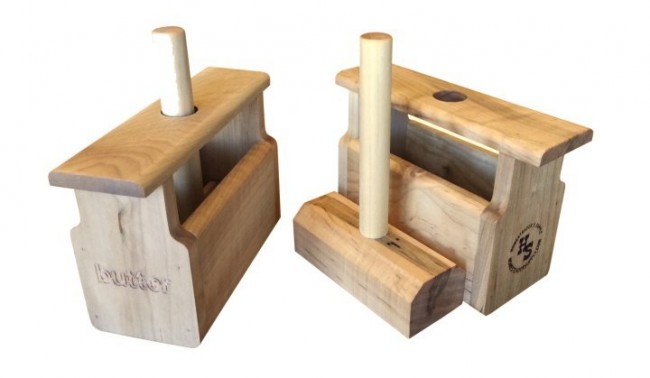
Sweet Mary’s Wooden Butter Mold
We also carry various molds for making large amounts of butter. One makes little pats of butter shaped like farm animals, another molds one-pound blocks, and yet another molds half-pound blocks. Once filled, you place the mold the freezer for a couple of minutes. Then the butter pops out easily and you can wrap it in tidy blocks with wax paper and stack it in the freezer.
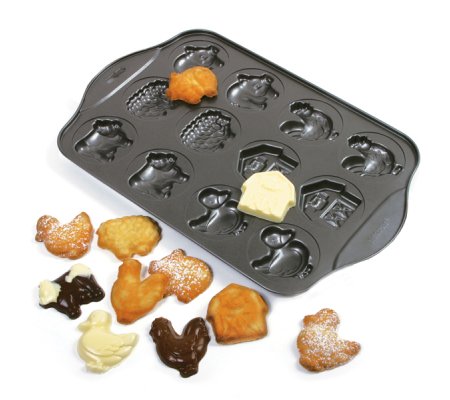
Farm Animals Butter Mold
We hope you enjoyed our article on making butter. We’d love to get some feedback from you and want to hear any suggestions you might have. Have you tried a technique that works better? Please share!